DIY winter greenhouse
Content:
Every gardener dreams of installing a winter greenhouse in his garden. After all, then the cultivation of vegetable, fruit and berry crops becomes possible for all 12 months. It is very expensive to build a winter greenhouse, since it is necessary to provide the necessary microclimate, which will require not only the construction of the building itself, but also it will be necessary to install thermal insulation. It is necessary to install systems that maintain the desired microclimate, provide electricity and water. Below we will share information to help you set up a sturdy winter greenhouse that will do its job even in areas with the harshest winters. So, what is a winter greenhouse and how to build it yourself.
What are the differences between winter and summer greenhouses? What is the reason for their so high cost? The answer to this can only be considered by considering all the processes occurring in the greenhouse during the cold season.
Winter greenhouse with heating: why is it needed and what heating methods exist
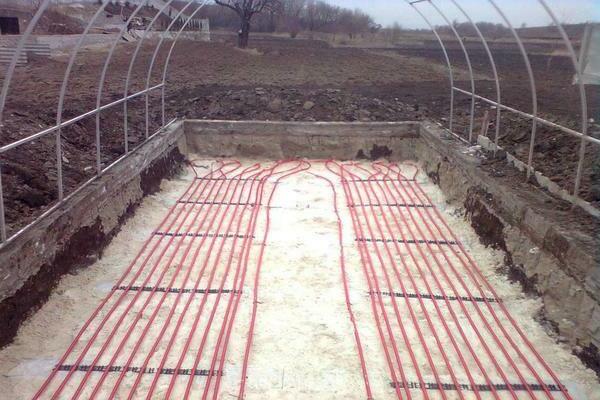
In the summer the greenhouse is heated by the sun's rays. During the day, the earth and the structure itself are warmed up by the sun, while at night it gives off the accumulated heat. This helps to stabilize the temperature, which creates a comfortable environment for horticultural crops. Cloudy weather will also not negatively affect crops, because in summer the daylight hours are long, which allows the greenhouse to warm up well enough.
In winter, especially if these are northern latitudes, the daylight hours are very short and the sun only rises high for a short time. The sun's rays only have time to lightly touch the soil and do not heat it up. At night, the ground cools down and freezes when frosts begin. This is related to the reasons for the need to warm up winter buildings using heating systems.
The winter greenhouse can be heated in various ways. Stoves, water heaters, gas or electricity heaters are suitable. Everything comes from desires, financial capabilities and the size of the building. When choosing, the main thing is to pay attention to the power of the device, it is important that it is enough to heat the greenhouse during the cold months.
Winter greenhouse: insulation
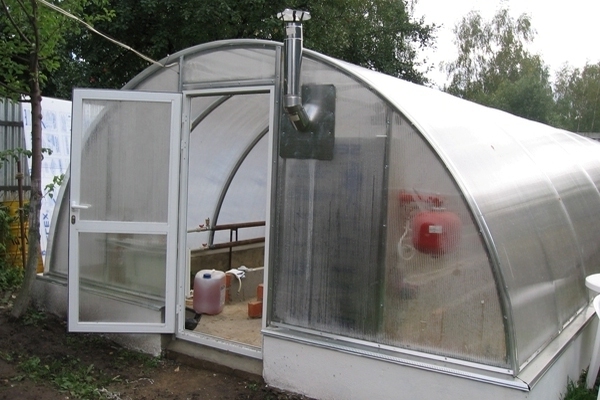
Choosing the right heating device is important, but it will not be effective if the insulation is poor. To reduce heat loss, it is necessary to bury the greenhouse in the ground, erect blank insulated walls, use double glazing or polycarbonate 10 mm or more thick.
It is also very important to properly seal the joints and cracks. Recessed greenhouses have excellent thermal insulation characteristics, however, they have some of the disadvantages listed below.
Recessed winter greenhouse: how to make a frame
In order to create good thermal insulation, it is necessary to deepen the greenhouse into the ground so that it goes below the level of freezing of the ground. In temperate latitudes, the greenhouse should be lowered to a depth of one and a half meters. In more northern latitudes, two meters.To prepare such a pit, more financial investments will be needed.
For this kind of greenhouses, places where groundwater is located close to the soil surface will be unsuitable. If there is no other site, then you will need to install a special system that will collect and remove groundwater.
The walls of such a structure should be made of high-quality concrete that does not allow water to pass through. Thus, all the work becomes not only expensive enough, but also difficult in order to carry it out on your own.
Winter greenhouse - DIY installation
Materials such as foam concrete, heat blocks and wood can be used to build blank insulated walls.
Styrofoam will serve as an excellent insulation here. This material is easy to install, moisture resistant and does not rot.
To isolate cold air from the ground, an insulated blind area is suitable, the width of which should not be less than 50 centimeters.
It is important to know that the walls of the greenhouse are insulated only from the outside.
How to insulate a greenhouse basement
What the greenhouse is covered with is also very significant. The coating should not interfere with good light transmission and good thermal insulation. If glass is used for the structure, then it should be double or triple, and the gaps between them are from 1 to 3 centimeters.
If polycarbonate is used, then special profiles will be required. This will create insulation for the honeycomb inside. It will also help to create an airtight air gap with excellent thermal insulation qualities.
One layer is laid with polycarbonate, whose thickness is 1-2.5 centimeters. If the thickness is not more than 0.6 centimeters, then it is laid in two layers.
It is important to know that the film is used for winter greenhouses only in areas where snowfall is very rare. If there is a lot of snow, the film will stretch and break.
How to water plants and what to install for this
For plants to grow well, develop and bear fruit, they need a sufficient amount of water. If the greenhouse has a large area, then you will need to use a lot of water. Therefore, when laying the foundation, you need to think about a source that supplies plants with liquid.
If you plan to connect pipes to a water supply system or a well, then they must go deep enough underground. If the laying takes place in the south of the country, then they should go underground to a depth of 100 centimeters, if in the north, then at least 1.8 meters. If the greenhouse occupies a large area and serves for the production of crops on an industrial scale, it would be much more expedient to cut a well near the greenhouse.
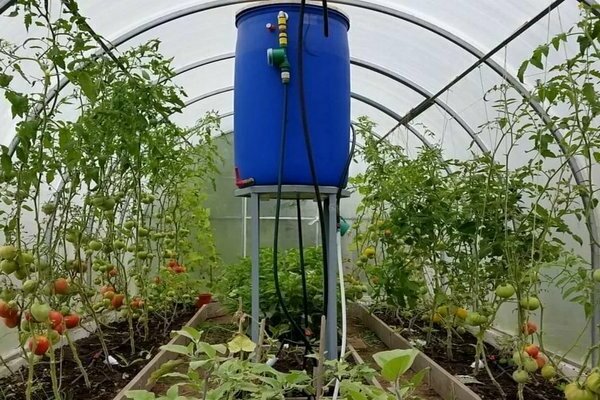
In order for the water to be heated, tanks are suitable, whose volume is from 0.2 to 1 cubic meter. They must be installed on a small hill in order to create the necessary pressure for the irrigation systems. In order not to create a shadow for the cultures, it is necessary to place them on the north side. The water is heated by the sun. You can also make artificial heating using heating elements.
It is important to know that the container where the water is located serves as a good heat accumulator. Heated during the day, it shares its warmth, gradually cooling down at night. And this reduces temperature jumps.
Winter greenhouse and ventilation
For plants to grow successfully, they need ventilation. Thanks to him, plants can receive the required amount of oxygen, and excess heat and moisture will go away. To create these conditions, it is necessary to install systems that are responsible for natural and forced ventilation.
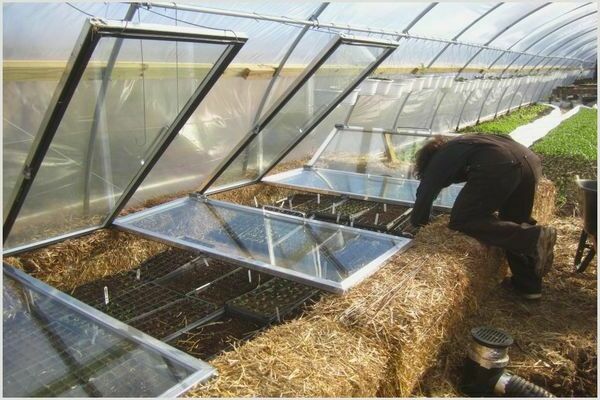
Basically, so that the room can be ventilated, vents are made. Their installation should be at the top of the walls or on the roof. By installing the window at the top, it will be possible to provide the best ventilation. Warm air rising up will change places with fresh fresh air coming in. They can be made both automatically and manually.
How to make a winter greenhouse: lighting
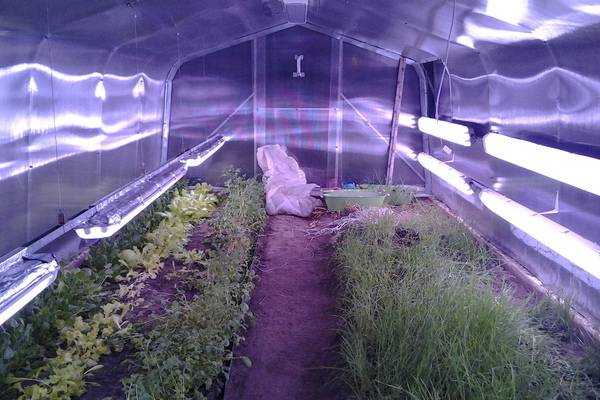
In the summer, most plants have enough light that is supplied to them naturally. In winter, there is not enough natural light and additional lighting must be connected. To do this, it is possible to use DNAT and DNAZ gas-charging lamps.
The amount of light that will be supplied with artificial light depends on the varieties grown in the greenhouse. With this in mind, the required number of lamps is installed. Basically, the calculation of the total power of the lamps is done taking into account the area.
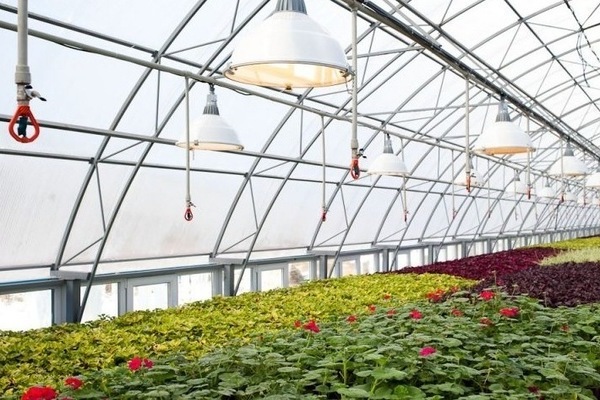
To illuminate one square meter, a power of 100 watts will be sufficient. If the area is twenty square meters, then at least 2000 W is needed, i.e. 5 HPS lamps with a power of 400 watts. In addition, it will be necessary to use the starting equipment.
It is important to know that the DNAT and DNAZ lamps are very hot. Therefore, to use them, you will need to use special lamps that reflect light, installing them on the ceiling.
How to build a winter greenhouse and save money
If you plan to grow horticultural crops on an industrial scale in a greenhouse, the area of which is about 100 square meters, then it would be much better to place an order for it with a company.
At manufacturing plants, you will be able to build fully equipped agricultural or block-type winter greenhouses in which automatic heating, irrigation and ventilation are already installed.
Such a choice will require less financial costs and at the same time they are quite suitable for mechanized devices performing maintenance.
Choosing a place where the winter greenhouse will be located
A small winter greenhouse, in which it is planned to grow vegetables or other crops for home consumption, can be built on its own.
To do this, you must in advance choose a suitable place for, decide on the shape and size. And draw a diagram in which it will be seen where the beds, heating, irrigation and ventilation systems will be located. It will also be necessary to calculate the cost of all the materials that will be needed.
The winter greenhouse should be installed in an area with good lighting and protection from cold winds. It can be attached to the garage, outbuildings and to the house, most importantly on the sunny side.
If you install the greenhouse separately, then this should be done in the direction from north to south, sealing the wall from the north with insulated materials or creating a kind of dressing room there.
Greenhouse construction
A simpler and more reliable, with good thermal insulation, will be a straight-walled structure, where foam concrete with insulation serves as a material for establishing the main walls. At the end on the south side of the wall, it should be sewn up with a double layer of polycarbonate. The dressing room, made on the north side, will serve as protection during a blizzard. And also there you can install a boiler room and a warehouse for tools and other equipment.
With the help of reinforced polycarbonate, greenhouse slopes must be sewn up. By creating a supporting part of wood, you can completely exclude the penetration of cold.
Preparing an action plan
For a seven-meter greenhouse in length and three meters in width, you will need to install the foundation:
- concrete 3.6 cubic meters,
- 100 meters of 10 mm reinforcement,
- 130 meters 0.6 centimeters of reinforcement,
- 1 cubic meter of cut 25 mm formwork board,
- 179 pcs. foam concrete blocks with dimensions of 200 mm x 300 mm x 600 mm,
- 9 twenty-five kilogram bags of masonry glue,
- 3.3 meters cubic 10 mm polystyrene S,
- 0.5 cubic meters of board sizes 40 x 150 mm for rafters,
- 5 sheets of polycarbonate, the thickness of which is 10 or 16 mm,
- 15 pcs. end profile L = 210 cm,
- 2 pcs. ridge profile L = 6 m,
- 12 pcs. connecting profile L = 6 m,
- 200 pcs. self-tapping screws with a thermal washer.
It is important to know that it will take about a month and a half to build a greenhouse. At the same time, drying of the foundation takes about 4 weeks at an outside temperature of at least + 15 degrees.
Laying the foundation
If cellular concrete is used in the work, then the base must be strong. A good option would be to use reinforced concrete for a shallow strip foundation.
The foundation will be needed both to indicate the boundaries of the greenhouse, and to indicate the location of the capital partitions between the vestibule and the room for growing plants.
Procedure
It is necessary to mark and clear the ground. Remove all debris and weeds from the area and make it level. Make a marking for the size of the greenhouse, using stakes and twine for this. Then the markings are made for the foundation.
To do this, you need to install bars or boards where the corners of the structure will be. A string is attached to them and stretched around the entire perimeter. All corners should be perpendicular to each other, and the diagonals should be equal. The contours of the foundation outside and inside are marked with twine.
A trench is dug to a depth of 50 centimeters in accordance with the markings. A mixture made of crushed stone and sand is laid out at the bottom, which is well compacted. Next, you need to install the formwork.
To make them, you need to take a 25 mm edged board. In the case of a heavy soil with a high density, the formwork is placed exclusively above the ground. If the soil is light, then it is installed at the bottom of the trench.
Further, mandatory reinforcement of the foundation is carried out so that the foam concrete masonry does not crack due to seasonal movements of the earth. Rebar brand 10-A-III (A 400) GOST 5781-82 is suitable for making the longitudinal reinforcement of the tape. Reinforcement grade 6-A-I (A240) GOST 5781-82 will help to make transverse screeds. Annealed wire is used for tying reinforcement at intersections. Corner reinforcement requires special attention.
Next, the foundation is poured with concrete. The above dimensions will require 3.6 cubic meters of concrete. Some people mix the concrete themselves. But not only is it very long and difficult enough, it can lead to a decrease in the strength of the foundation during layer-by-layer pouring.
Construction professionals advise to order ready-made material. Concrete is poured into the prepared formwork, pushed through with a rod or vibroshlag, after which the surface is leveled.
Next, you need to wait for the concrete to mature. This period occurs depending on the temperature regime. The most optimal conditions are considered to be temperatures from +18 to +20 degrees. Under these conditions, after two or three weeks, the concrete will be strong enough to continue construction. If the temperature is different, then you should wait about a month before proceeding with further work.
To maintain constant humidity, cover the concrete with polyethylene during the drying period. When the top layer of concrete dries up, it must be moistened with water. The time during which concrete gains strength depends on the temperature.
It is important to know that the formwork is removed after a week, and the boards from it can be used more than once.
Foam concrete walls
When aerated concrete blocks are laid, the use of special glue is recommended. This will allow for the minimum thickness of the joints, which will significantly reduce heat loss. If you lay the blocks on a cement mortar, it will be necessary to additionally insulate and plaster the walls.
The first thing to do is waterproofing. To do this, you will need roll materials in the form of roofing material, bicrystal or their analogues.
After complete drying of the foundation, it is necessary to put a mortar of sand and cement on it in proportions of 4 to 1. It should be spread in a thin layer. Next, the roll waterproofing is laid out so that the overlap is at the joints. After that, the surface is leveled with a rail or level.
The second thing to do is laying the first row. For this, foam blocks are laid on a solution of sand and cement on top of the waterproofing. When applying the solution, it is necessary to leave a margin, the excess can be removed after the blocks are installed.
For laying out the next rows, special glue is used. It is applied with a notched trowel wherever surfaces meet, both horizontal and vertical.
For a tight fit, a rubber hammer is used, lightly tapping with which, this work is carried out. The rows are laid with a bandage on half of the block.
Next, you need to reinforce the masonry. For this, a welded masonry mesh is used, the process takes place on every second or third row. If the wall is one and a half meters, and the blocks are 30 centimeters in height, then the masonry should turn out to be five rows. Thus, the reinforcing mesh can lie between the third and fourth rows.
The glue is applied on top of the mesh, and then the block is installed. The masonry can be reinforced using reinforcement rods that are laid in block grooves.
For doorways, blocks are cut to size. They are very easy to cut with a hacksaw; they must be done according to the template.
The next stage includes wall insulation. This is done from the outside using polystyrene sheets. Insulation can be of different thicknesses, it all depends on the region in which the greenhouse is installed. It can be from 3 centimeters to 15.
For the southern regions of the country, polystyrene with a thickness of 3 or 4 centimeters is used. On the territory of the Volga region, if it is Volgograd or Saratov -4 or 5 centimeters. And if Ulyanovsk, Nizhny Novgorod, Kazan or Izhevsk, then the polystyrene should be 5 or 6 centimeters thick. In Central Russia - 6-7 centimeters, in the North-West - 7-7 centimeters. On the territory of Vladivostok and Khabarovsk - 7-8 centimeters, in the Urals - 7-9 centimeters. In Siberia, the thickness of polystyrene should be about 10 centimeters.
After the walls are insulated, they must be finished. For this, moisture resistant materials are suitable. It can be brick, siding, or plaster can be used. Finishing will improve the look of the greenhouse and provide additional wind protection and thermal insulation.
It is important to know that foam and polyurethane can be used instead of polystyrene. It is not worth using mineral wool, as there will be a lot of humidity in the room.
Decking on rafters
For the manufacture of the racks of the timber connecting the racks and the supporting roof systems, wooden boards with dimensions of 4 by 10 centimeters are used. The rafters are installed at a distance of 50 centimeters from each other.
To do this, on the wall from the south side, the first layer of the board is laid on top of the waterproofing and fastened with fasteners, such as an anchor, to the foundation. Using anchors, side posts made of boards are attached to the foam concrete masonry. The upper harness and intermediate supports are attached to steel corners or self-tapping screws.
After that, the top layer of the board is fixed with anchors, which is laid on the block walls along the entire perimeter. They are attached at a distance of 60 centimeters. This is necessary to distribute the weight over the entire wall. If you put it directly on the blocks, then the load will be pointwise and this will cause the destruction of foam concrete.
To attach the rafters, the top bar must be secured. To do this, the racks need to be centered on the top layer of the planks on the walls that run across the building. They are fixed with corners and self-tapping screws, after which diagonal sticks (braces) are installed.
In order to assemble the ridge beam, you need to fasten two boards measuring 40 by 100 mm on both sides of the racks.
In order to make the rafters, you need a 40 x 10 mm board. It is applied to the top bar and the top layer of the board on the longitudinal wall. There, with the help of a pencil, the place where the gash will be made is marked. Next, a gash is performed, a beam is tried on, on which the entire crate will be attached (also called a rafter leg) and all unnecessary is pushed aside. Each pair of such beams is connected by metal plates in the upper crossbar.And also corners and screws are attached to the upper crossbar and the upper layer of the boards.
To sheathe the walls with polycarbonate, it is enough to attach it in one layer. If its thickness is from 1 to 2.5 centimeters, you can create a good protection against heat loss. The cladding begins at the end of the wall to the south. Cutting out polycarbonate is done in size with the wall, so that the ribs are in a vertical position.
The insulating material for the upper cuts on the polycarbonate is aluminum adhesive tape. The lower sections are insulated with perforated tape. The cuts are closed using the end profile. To fix the polycarbonate, self-tapping screws and thermal washers are used. The wall from the north and the one that separates the vestibule from the greenhouse is hung in a similar way.
With the help of connecting profiles, sheets are connected at the slope of the greenhouse. A one-piece profile will be enough for 10 mm polycarbonate, and for a thicker one, you will need to use a split aluminum with a seal. In order for polycarbonate to retain its integrity, it must be fastened through the profile.
Perforated strips and end profiles are used for processing the lower ends of the sheet. The ridge profile connects the upper slopes.
It is important to remember that after the installation is completed, all gaps are sealed using polyurethane foam or a frost-resistant sealant is used.
Winter greenhouse: door installation
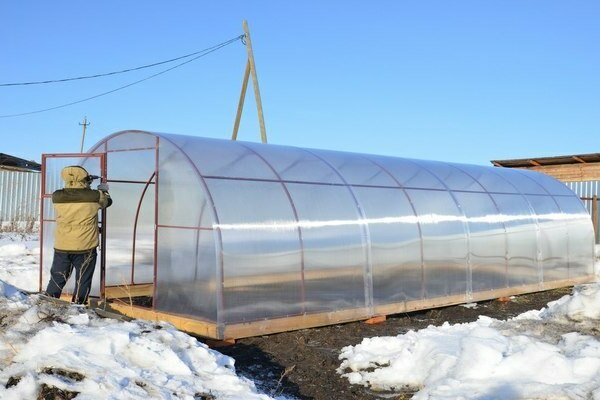
The design described here provides for two doors in the structure. One separates the vestibule from the greenhouse, the other separates the street from the vestibule. The one that leads to the street is insulated with thermoplastic polymer or other materials.
For the door between the dressing room and the main room, you can use polycarbonate and install it in a wooden frame. The door frame is secured with 10 cm anchors. It is inserted into the hinges and locking devices in the form of locks are installed on it.
Winter version of the greenhouse. We make a heating system
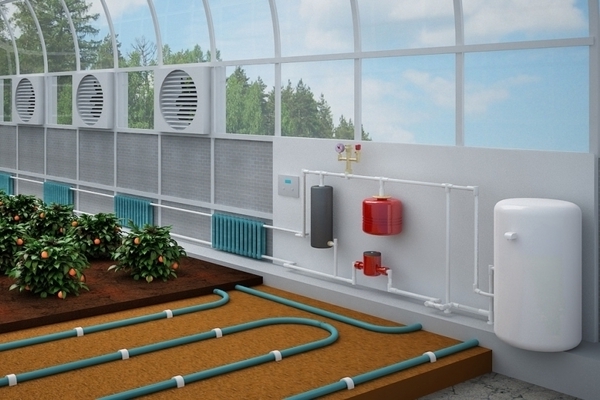
The greenhouse is equipped with the heating system of your choice. This could be a boiler and a radiator system.
If this is a boiler, then a vestibule is perfect for its installation, and its chimney is brought out into the street.
If a system of radiators is chosen, then for a greenhouse of the size we have considered, it will be sufficient to arrange them along the walls.
Drip irrigation for greenhouse
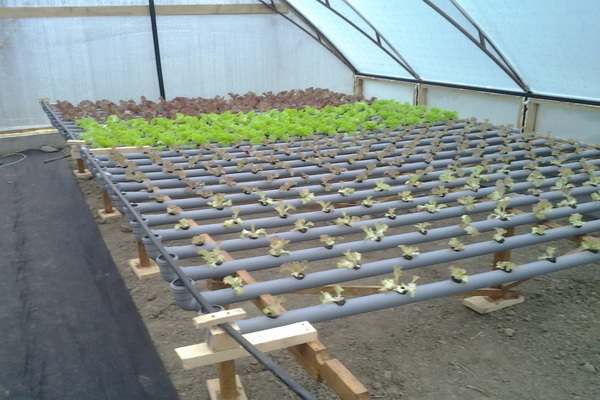
Drip irrigation devices are perfect for watering plants in a winter greenhouse. The tank can be placed in the vestibule and equipped with a system that is responsible for heating the water. Perforated hoses are supplied to the plants in the beds. If the plants are on racks, then droppers are suitable for them.
How to conduct lighting
Lighting is done by placing lamps on the ceiling, given that some of them can get very hot and this can damage the polycarbonate.
In order to increase the illumination of the room, it is necessary to use reflective luminaires.
All electrical wires are routed through corrugated plastic or metal pipes and attached to the greenhouse.
In the greenhouse, you can make beds, as well as equip it with racks.
In regions where it is especially cold, the beds are laid using the technology of biological, electric or water heating. In the south of the country, the soil can be effectively warmed up by the sun. It will be sufficient to sew up the main walls of the structure with reflective materials. In addition to heat, plants will receive twice as much light.
Outcome
Having installed a winter greenhouse on your site, you can grow vegetables or other crops there all year round. It can also make a beautiful greenhouse that will delight the eye throughout the year or only in winter. You can grow strawberries, mushrooms or flowers in it and sell them. There are many options for what to use the greenhouse, you just need your imagination and desire.

