Apple tree air layers: breeding instructions
Content:
The article describes the apple tree air layers: complete instructions for breeding.
Air layering of an apple tree: briefly about this breeding method
Apple tree air layers
To cultivate an apple tree with the characteristics of a species, which has the same properties as the parent fruit-bearing tree, but without grafting, it is possible to use the old method of the fruit-bearing tree with the help of air layers. Air layers are used for reproduction. Reproduction by air layering consists in the ability of a fruiting tree to cultivate a root system from cambial tissue in the presence of defects.
The air layering method is wonderful in that if a fruiting tree planted from an aerial shoot does not take root and leaves root shoots, then, compared with other planting methods, the shoots do not need to be grafted, because it will have all the characteristics of the parent fruiting tree.
Air layering of an apple tree: what time is it worth to act with this method
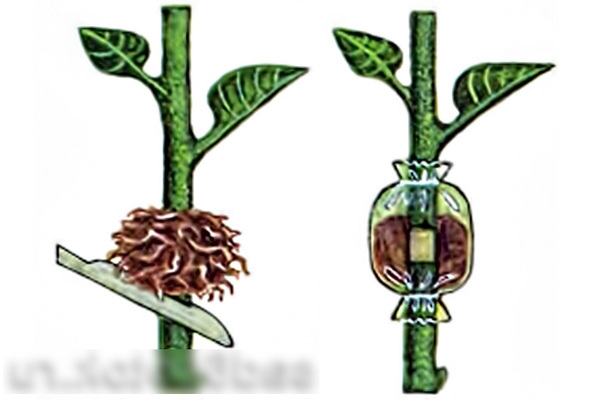
So when should you do air layering? This action is carried out at the beginning of the spring season, immediately after the snow melts, but the foliage has not yet grown, which means before the onset of the growing season. In the middle zone of our country, this is the second decade of the first spring month.
Reproduction of apple trees by air layers in summer: varieties of moisture-consuming devices
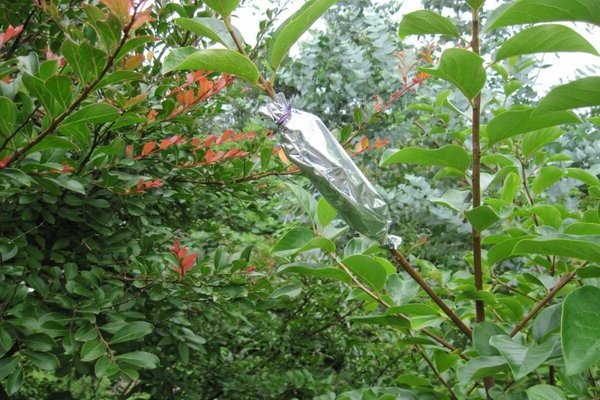
If there is a question about how to propagate plants by air layers (fruit trees), it is worth considering the following:
- Purchase a plastic container, a one and a half liter bottle made of plastic is recommended.
- Sleeves made of polyethylene.
- A special substrate purchased from nurseries or shops with a garden and vegetable theme.
You can make a special substrate yourself:
- From moss, soil from your territory, ready-made compost, sawdust, which has already been perepil.
- A special substrate from one part of manure, which has already been peeled and one part of humus.
- A special substrate made of soil and vermiculite, because vermiculite retains its liquid amazingly. In addition, the constituents of vermiculite are all important for the herbaceous nutrient: silicon, magnesium, iron, calcium, potassium and others. However, do not add mineral fertilizers to the special substrate.
- It is possible to use sphagnum moss, regularly watering it.
- It is possible to purchase special mineral wool for hydroponics as squares.
She has a couple of merits. It does not carry bacteria, which means it is disinfected. It has a long application time, it can be used more than once. It has flexible fibers, this gives the root system the usual growth rate, to extract air. However, regular watering is needed, not allowing the formation of a dry crust.
How to make air layers on an apple tree correctly?
The air cut is the fruitful part of the shoot and is deliberately reinforced for roots to emerge by separating it with moist soil.In three months, a root system is formed at the shoot and it is possible to plant it as a varietal herbaceous one. Apples appear on this planted planting material, upon reaching the age of three to four years.
If there is a desire to breed a fruiting tree with a column shape by this method, then the method does not differ from the cultivation of an ordinary fruiting tree with the help of aerial shoots:
- On a fruiting tree with a columnar shape, select one shoot that grows strictly vertically, they are greatly reduced when compared with an ordinary fruiting tree.
- Cut the bark in a ring on a fruiting tree.
- Place a package on the shoot, wrap it with tape from one end of the shoot.
- Place the soil in the bag, water it regularly.
- During the spring and autumn seasons, roots should form on the shoot of the fruiting tree.
- Then cut off the shoot and plant the grassy one.
How to make fruit tree aerial layers. Selection and preparation of the escape
Note! In the second decade of the first spring month, select a whole shoot on which fruits grow and the sun's rays fall on it. There should be no branches on the shoot. It is recommended to select shoots that have reached the age of two to three years, they are partially stiff and have a new growth, it is greener.
The shoot width should be exactly the same as that of the pencil.
Place a transparent sleeve thirty-five to forty centimeters long on this shoot. Place the entire shoot in the sleeve and wrap the duct tape around both ends. This is made to make the bark softer, because at the end of the spring season and at the beginning of the summer season, the temperature in the air becomes suitable for creating a greenhouse effect.
At the end of the first summer month, remove the plastic sleeve from the shoot, find the area where the shoot grew in last year (a solid shoot of green and brownish color, and the growth is slightly greener), count about ten centimeters towards the trunk and make an incision in a circle, which means remove one centimeter of bark.
Then, from the circular part to the upper side of the shoot, make two more cuts, and then two cuts from the circular part towards the trunk.
However, it is possible to act differently. Without removing the bark around the ring, it is possible to make small oblique cuts around the shoot.
This method has another advantage, it lies in the fact that the part of the shoots on which you want to have roots without stopping its feeding:
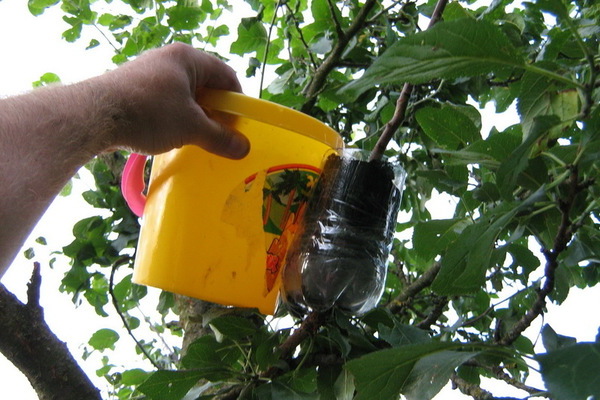
- Purchase a container made of plastic, preferably one and a half liters in volume, cut out its bottom.
This is done on warm days at a temperature of plus nineteen degrees. - Place a sleeve made of film on the shoot and wrap the area closest to the trunk with tape.
- Then place a container made of plastic on the shoots, but only with the bottom up.
- The circular cut should be one-third of the bottom of the bottle and the stem of the scion should be in the middle of the bottle.
- Try to tie this shoot to the trunk to guide it vertically.
- Attach the top of the film to the container and press down with tape.
- Make according to the rules a special preparation "root" (one whole teaspoon per one liter of liquid) or "heteroauxin" (two capsules of one tenth of a gram, placed in ten liters of liquid), pour into a container, do not touch for two or three days.
- Then pour out the "root" or "heteroauxin", making a hole with a needle in the sleeve, place two glasses of a special substrate in the container.
- Cover the entire area of the container with plastic wrap and paper. It is recommended to wear protective gloves.
- On especially hot days, a special substrate is moistened once every two days, and when it rains, it is moistened once every seven days.Apply a settled liquid for humidification, preferably after precipitation.
However, by the end of the third summer month, the air cut of a fruiting tree may not grow a root system, but exclusively grow bulges on the trunk. Do not panic, when planting in the soil, these bulges will grow in the roots.
Note! The special substrate is kept moist all the time, but do not bring it to the swamp, but do not let it dry out.
Strengthening of planting material and cuttings with air layers
- In the first month of fall, cut the cut at the top, but only halfway. This is done to give the cuttings a normal size.
- Otherwise, it will absorb a huge amount of nutrients (which means that the smaller the size of the cutting, the easier it will take root after cutting off the cutting from a fruiting tree).
- Seven days later, use a sharp pruning shears to cut the scion off the bottom of the sleeve.
- Make a landing hole thirty days before. Moisten it before planting.
- Remove the film and container from the cutting with roots, it is important that the soil does not fall. Plant a stalk with an earthen ball, so rooting by air layers will happen faster.
Cultivation of planting material from air layers
The resulting adapted planting material can be planted in the first autumn month, or it can be done before the first spring month. It depends on where you live. When you are in the southern regions, then it is recommended to plant the planting material in the autumn season, if you live in the northern regions, then it is recommended to plant the planting material in the spring season.
You can plant the planting material in a large container, fill it with a special substrate containing sand, peat and garden soil, all in the same proportions. Place it in the basement for the winter season. Remember to moisturize the planting material.
Note! When planting planting material, then do not forget that it must be planted at an angle. The cuttings do not have a root collar, and a lot of space is needed for the growth of the root system. Having planted the planting material at an angle, you accelerate the cultivation of the apple tree.
How to propagate an apple tree with air layers: video


