DIY greenhouse from a profile pipe
Content:
When you want to build a greenhouse or greenhouse on your summer cottage, of course, the question arises: what material should be used? In this article, we will consider what a do-it-yourself greenhouse from a profile pipe is. With its help, it is possible to make a strong frame that will serve you for more than a decade.
Do-it-yourself greenhouse from a profile pipe: briefly about this structure
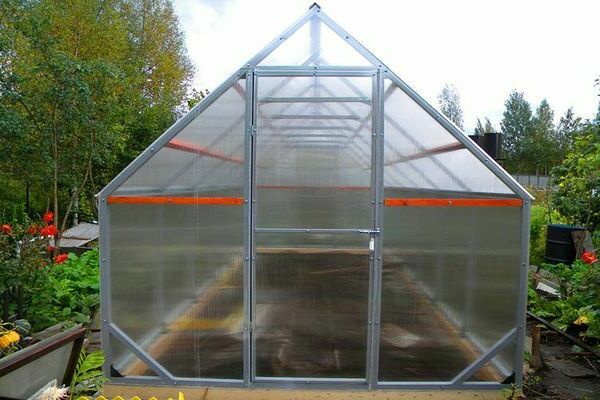
On social networks, it is possible to find a large number of recommendations for assembling this structure, however, most of the craftsmen characterize the process of building from pipes, but not profile.
You need to know that the profile pipe, unlike the usual specimen, has the shape of a rectangle or square.
Despite the light weight, this material is quite sturdy. If you expect to make an arched greenhouse, then we recommend using a 40x20 profile. For lintels, it is recommended to use a pipe with dimensions of 20x20.
Advantages of a profile pipe:
- serves not a single dozen years.
- a wide variety of surface selection.
- installation is not difficult.
- fastening is not difficult.
- the ability to make the construction of various figures.
The only inconvenience is the bending of the material. With this option, it is necessary to correctly bend the only pipe, then apply it as a template. It must be filled with sand in advance.
Making a greenhouse from a profile pipe by hand
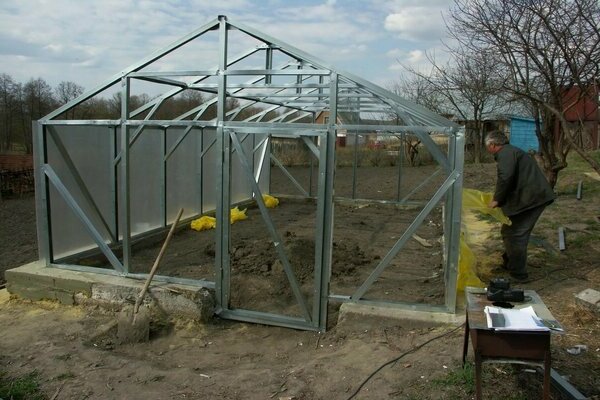
Construction of a greenhouse frame from a shaped pipe
A couple of options for curly greenhouses are known, but we thought to survey the establishment of an arched greenhouse. If there are little skills for such work, then there should be no difficulties with the installation.
In the process of choosing a site for placing a greenhouse, the required amount of light must be taken into account, so the greenhouse should be located to the south side. Surface drops should not be more than ten centimeters.
To build arches, you need to purchase a profile with a section of 20x40, take ten copies of a profile pipe at once. The approximate length of the profile pipe should be up to 5.8 tenths of a meter. You can cut it off immediately upon purchase, or purchase six-meter profile pipes. For the design of arches, it is advised to use a tool called "pipe bender". If you make it yourself, then it will be problematic to get a strong material.
For the frame jumpers, it is necessary to prepare a profile with a section of 20x20 millimeters, purchase 40 copies at once. The length of the material should be up to 67 centimeters.
Use stakes and sturdy twine to mark the greenhouse under construction. To get a level greenhouse, you need to check the diagonal markings.
Dig a pit eighty centimeters deep, then place a cement mortar in it, approximately to the elongated bottom. The height of the excavated pit should be up to 15 centimeters.
At a new level, the transverse bases are welded to the longitudinal bases. To give strength and strength, it is advised to use corners made of metal.
Put bricks under the base, if there is a desire for masonry, it is possible to make a small ditch.
Immediately before making the frame, it is necessary to lay out the polycarbonate sheets, place the arcs on top and outline them with a felt-tip pen.Cutting off the material is possible with a construction sharp knife. In this case, do not touch the additional 2 cm space.
When the solution completely hardens, it is worth starting the installation work from the frame of the profile pipe. It is necessary to weld the arch number one to the elongated bases.
It is worth mentioning that the installation of the arch under the first and last numbers is considered the most important process, therefore it is advised to use a plumb line.
With the help of jumpers, the remaining parts are welded in turn. Masters advise to start welding the arcs to the top of the jumpers. Then install the last arch. Then it is necessary to weld end jumpers made of shaped material with a section of 20x20, because they do not have a significant weight.
Polycarbonate is attached to the structure using specialized self-tapping screws with washers. Immediately before sheathing, the protective coating must be removed from the sheets. The first copy should go beyond the boundaries of the structure, by about 15 cm.
After fixing the polycarbonate, it is necessary to cut off the holes for the windows and doors. All joints must be covered with silicone.
The duration of this self-made structure reaches more than ten years. At the same time, the greenhouse does not need any agricultural technology.
DIY greenhouse from a profile pipe - drawings
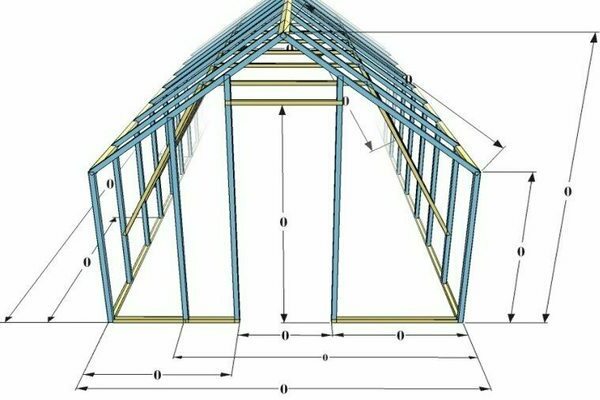
When preparing a greenhouse structure scheme, it is necessary to take into account that the pipe has ordinary dimensions from three to twelve meters. Therefore, you need to ask the seller for this small nuance. This will allow you to get away from unnecessary costs and operate without unnecessary trimming.
Note! The cross-section of a pipe from a profile for basic elements should be 20x40 in size, and another 20x20 for connecting parts.
It is possible to apply the following information on the drawing:
- foundation.
- vertical racks.
- roof structures.
- about the strapping of the top.
- doors.
- about the windows.
- spacers.
First, you need to choose the space between the vertical posts. Masters advise dimensions of 100 cm. In the case where the greenhouse needs to be covered with dense fabric, then the space can be reduced to 60 cm. This is required to reduce the load on the pipe. If it is necessary to increase the space, then it is necessary to purchase auxiliary parts.
Features of making an arched greenhouse
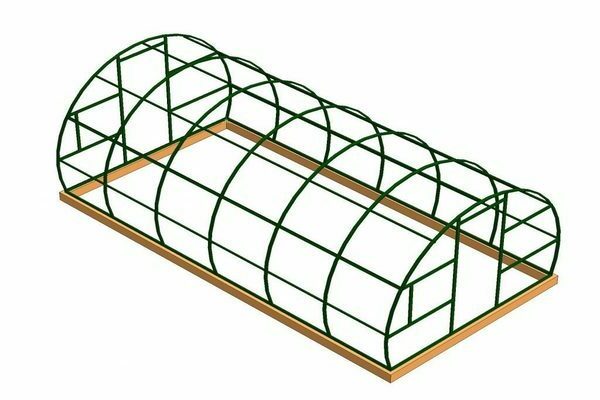
Diagram of an arched greenhouse from a profile pipe
To the manufacture of a greenhouse in arch shape a different method must be used. Because here it is necessary to correctly bend the pipe from the profile material at the correct angle. If it is assumed that the height of the greenhouse will reach two meters, then it is necessary to buy a twelve-meter pipe. The space between the arcs is advised to be made no more than 1 meter.
All arcs are fixed to each other. To secure the building from all sides, it will be necessary to use profile materials. In the topic, mention the auxiliary struts on the parts.
Do not forget that, if desired, it is possible to make various parts from the pipe, therefore it is known about such an opportunity as creating a lean-to, in the form of a triangle or a ball for a greenhouse.
You most likely realize that the construction will be quite heavy, which means that it is necessary to make a base. The foundation is prepared at the request of the owner of the summer cottage. It is advised to immediately place the anchor in the cement solution, to which the frame for the fortress is welded.
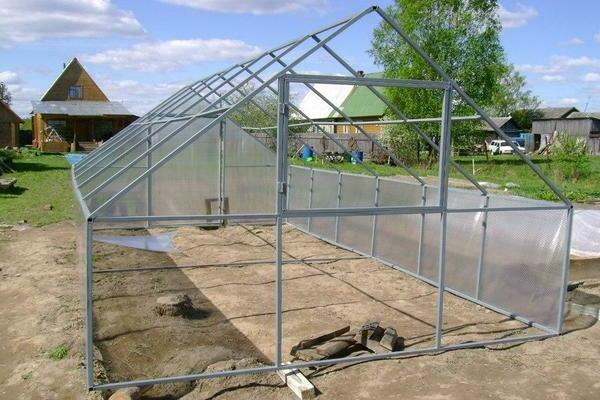
The assembly steps are quite simple and are described below:
- for vertical struts, it is necessary to cut a pipe from a profile material of the required dimensions.
- weld vertical posts to the base, while using a tool called "building level".
- on top of the racks, you need to fix the stroke.
- take measurements and cut out details for vertical pillars.
- cross beams to combine and strengthen all the racks.
- make a door and install it in the planned location.
One part of summer residents and farmers prefer making a frame on the ground, after which it is strengthened on the foundation. To avoid irregularities, these processes must be done exclusively on a flat area.
For the hand-made production of a greenhouse in the form of an arch of their pipe from a profile pipe, it is necessary to use a tool called a "pipe bender". In its absence, the following steps must be taken to fold:
- cut a part of the required size.
- to make saws.
- bend the pipe.
With this option, the masters are advised to start assembling from both sides. This allows you to increase the fortress of the structure.
Immediately after installing the frame, it is necessary to strengthen the polycarbonate. However, a couple of pitfalls are known here, which are listed below:
- the top side is that on which there is a protective layer.
- it is necessary to attach the sheets using self-tapping screws with rubber caps.
- the sheets are fastened to each other with metal plates.
- a sealant is applied to the joints.
- after the material has been strengthened, remove the protective cover.

