Greenhouse by Meathlider
Content:
It has long been noted that the crop grown in the greenhouse is much superior in quality and quantity to the crop grown in the open field. There is no risk of freezing of seedlings from unexpected temperature changes. And also the plants are protected from strong winds and bad weather. Therefore, the installation of greenhouses on plots has recently become more and more popular. The Meathlider greenhouse is one such option.
Greenhouse according to Meathlider: description
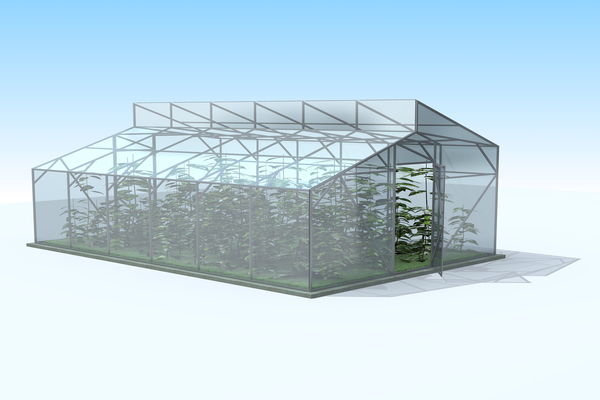
This is the name of an experienced technician. A professional in agricultural science. It was he who became the creator of the greenhouse, which differs significantly from the previously used structures. In our country, this greenhouse is also called "American". It looks like a small structure. Its characteristic feature is the presence of a multi-level double roof.
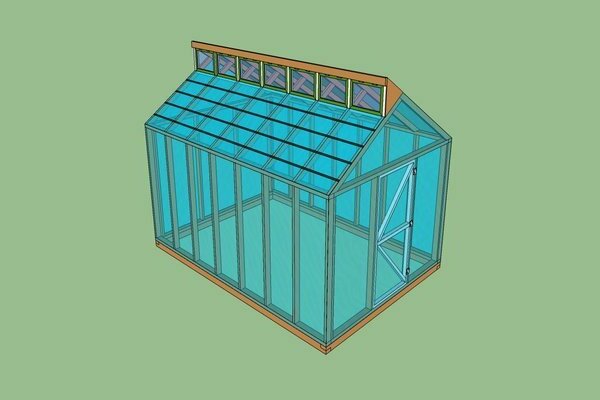
The room resembles the same greenhouse. However, one side of the roof is set to the north and the other to the south. The north side of the roof is above the level of the south side. Transoms are installed between them. These transoms perform the function of free air conduction in order to provide the necessary ventilation to the plants. Thus, through the open windows, air enters the greenhouse from the south side, while warm air comes out in the meantime.
Greenhouse benefits
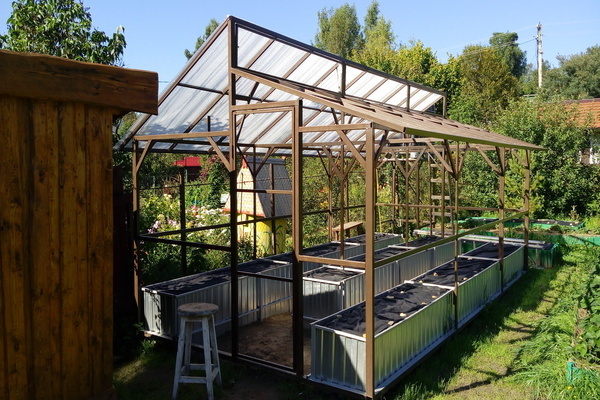
- This design provides very good warm and cold air movement. Thanks to this, there is no risk that the plants will overheat or suffocate.
- No need to waste time, money and effort to install additional ventilation.
- The design is designed in such a way that there is no need to buy various cylinders and dispensers containing carbon dioxide.
- The American greenhouse is very durable and reliable. Because it contains a large number of crossbars, beams. As well as other supports. Therefore, do not worry that severe bad weather will damage it. And also the abundance of precipitation in winter.
- The whole structure consists of crossbars, which are interconnected with the most common tools. Namely: self-tapping screws, bolts. All this simplifies the process of assembling and disassembling the structure.
- It will not be difficult to move it to another location if required. In addition, the roof is the last to connect to the walls. This also simplifies the assembly process itself. As well as replacement of broken parts.
- Due to the low height of the walls, it is more comfortable to do gardening in such a greenhouse.
- The design is carefully thought out in such a way that its dimensions and interior space create an optimal climate for plants. And also the usable space accommodates a sufficient number of crops.
- "American" has a two-layer skin, between which there is a fairly large gap. Approximately 5-7 cm. This air cushion provides optimal thermal insulation.
Of the shortcomings, only a large number of design details. This complicates the assembly somewhat. And also the cost of this greenhouse will be higher than others. However, the costs are overlapped. Because there is no need to install additional ventilation. And also special cylinders with carbon dioxide. In addition, the quality and quantity of the crop grown in this greenhouse compensates for the disadvantages.
Place for installation
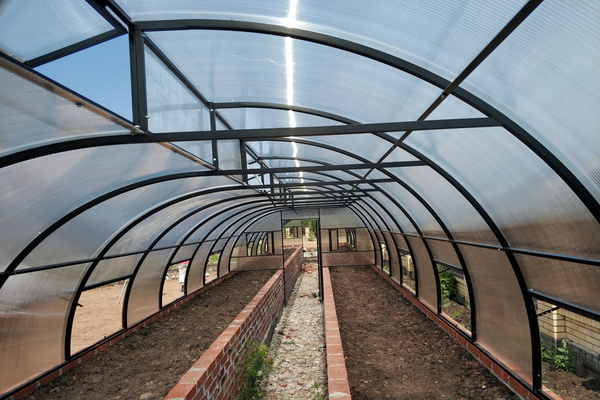
If you decide to put an American greenhouse on your site, then you must first choose a place.It is important to pay attention to several factors:
- It is desirable that the site is level. If there is no flat place on your site, then it will be necessary to organize or build it.
- You also need to pay attention to the cardinal points. This is very important to get the desired effect. The upper level of the roof should face the north side. And the lower slope should face strictly south. As a result, the end sides of the structure will face west and east.
- In addition, it will be good if the greenhouse is located in an open, sunny place. It is important that there are no structures nearby. As well as trees that will create shadow. Ideally, if the sun stays on this area all day. But if this is not possible, it is permissible to choose an area where the sun stays all afternoon.
- Also, the effect of the greenhouse will be worse if it is installed in low-lying areas. Or on peat soils.
Greenhouse according to Meathlider: foundation
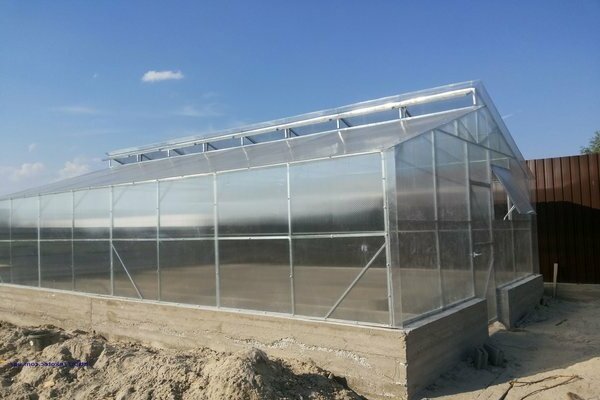
Despite the fact that the greenhouse is a simple structure, the foundation is still needed here. A point foundation can be installed. It will be the cheapest and easiest to manufacture. In second place is the timber foundation. And the last option is a strip foundation. At this stage, you will have to spend a lot and work hard.
To organize a point foundation, you will need to arm yourself with wooden beams or stakes, the length of which will be about half a meter. The place for the greenhouse must be cleared of weeds, stones and other debris. If necessary, the site must be leveled. Next, it is important to measure carefully and carefully. And also mark the dimensions of the future structure. For these purposes, small pegs with a rope are most often used. Then you should thoroughly hammer the beams in different corners of the future greenhouse. The bars are driven in to ground level. All other pegs must be driven in a short distance from each other. It is important that these gaps are equal.
Timber foundation
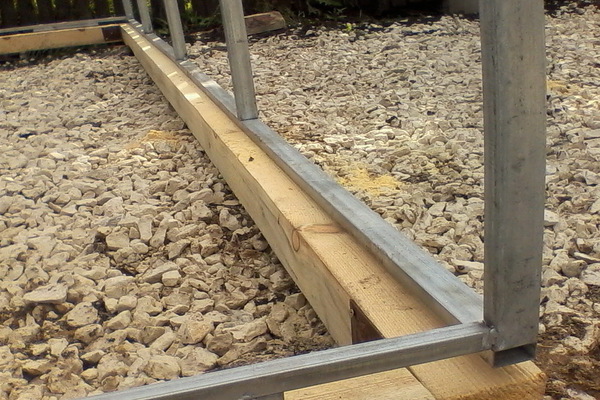
To build a squared foundation, you will need large squared beams. Approximately 15 by 15 cm. After the site is sufficiently cleared of debris and all markings are completed, it is necessary to make a deep trench along these markings. It should be equal to the thickness of the beams and slightly larger in width. The resulting ditches should be tamped and leveled. Further, sand is poured into the dug trenches. And it is carefully compacted. You can also water it.
Then some kind of waterproofing material is placed in the trench. It can be polyethylene or roofing material. The bars from which the greenhouse will be made must be disinfected. And then prepared beams are laid in these trenches. They are fastened together with nails or self-tapping screws. The resulting foundation should rise no more than 5 cm above the ground. Another layer of waterproofing material should be laid on top of the beams.
Strip foundation
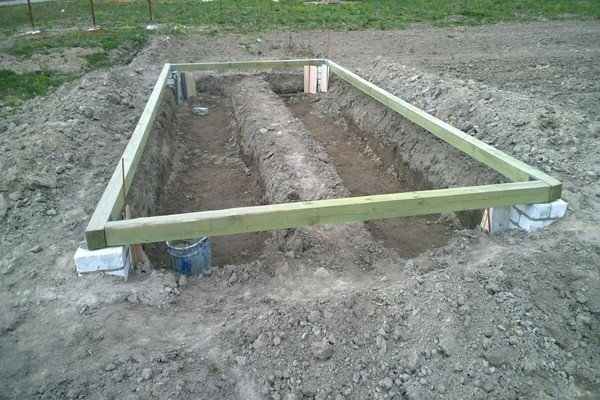
The tape foundation will serve for a long amount of time. But this will be a costly method. And also the effort from the gardener. Tape foundations can support very heavy structures. To establish it, the site is also properly cleaned. And markings are performed. Next, you should dig a trench. A width of about 25 cm and a depth of at least half a meter. The soil in the trench is compacted. Then you need sand. But the best option is a mixture of sand and gravel. This mixture must be laid out in a layer of about 10 cm. And also compacted.
Then formwork is made from the boards. If you want the foundation to be super strong, you can also add a steel bar grate. Although for an American greenhouse, this is not necessary. The next step will be the preparation of the concrete mix. For this, cement is taken - 1 part, sand and crushed stone. A solution is prepared from this mixture.It should be diluted with water per kilogram of cement - half a liter of water. The prepared trench is poured with the resulting concrete mixture. After which it should dry for about a week. Then the formwork should be dismantled. And leave the structure for about a month for the final hardening of the concrete. After that, you can start building the greenhouse.
Greenhouse according to Meatlider: frame
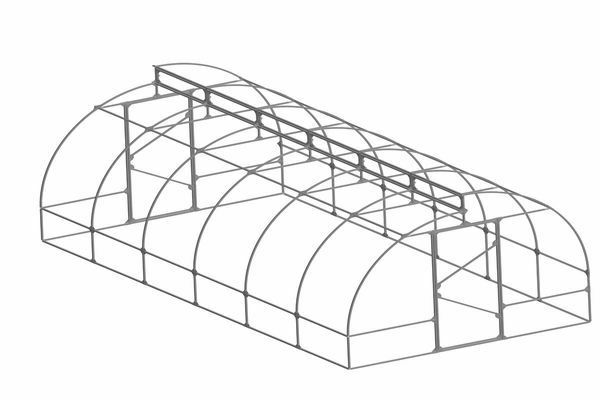
To build a future greenhouse, the most optimal material is a wooden beam. It is the most readily available material that is comfortable to work with. In addition, the advantage is the absence of condensation. The entire frame of our greenhouse will consist of a base, walls. And also the roof, doors and windows will be made. To connect wooden beams of various sizes, you will need self-tapping screws and metal corners. And also the plates.
The largest beams will be used for the base of the greenhouse. To install the walls, windows and doors, you will need 50 mm by 70 mm beams. And for mounting the roof, it is better to take a beam of 40 mm by 150 mm.
Frame fabrication
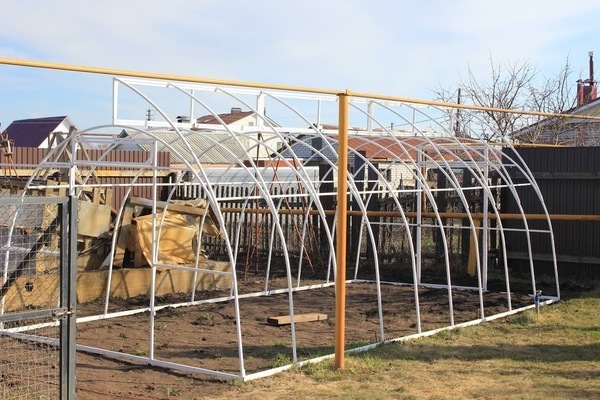
To build a wooden frame, you will also need tools such as a screwdriver, screwdriver, tape measure, saw, stepladder. As well as other inventory, since the resulting frame will still need to be coated with linseed oil or antiseptic. If you are a creative person, you can paint the frame with paint.
If we take Mitlider's greenhouse as a basis, then the dimensions will be as follows: width 6 meters, length 12 meters, height 2.7 meters. And the height of the walls is 2 meters. The lower roof level will be at a 20 degree angle. And the angle of the north side of the roof is at an angle of 35 degrees. Changes to these values are permissible, if necessary. However, do not deviate too much from the standard. Because the roof could collapse. Or the structure will not function properly.
To make the construction more accurate and error-free, it is best to make a drawing on paper in advance. Or using a computer. First of all, the base is being prepared. The largest bars should be treated with either an antiseptic or drying oil. This base will be practically on the ground. Therefore, you should not skimp here. To exclude rotting of the material. Next, you need to cut off the excess elements with a jigsaw. After that, you should design the box. And also to fasten the bars together with the help of iron plates and self-tapping screws. The end sides of the box will be attached with corners.
Greenhouse according to Meathlider: installation of the frame
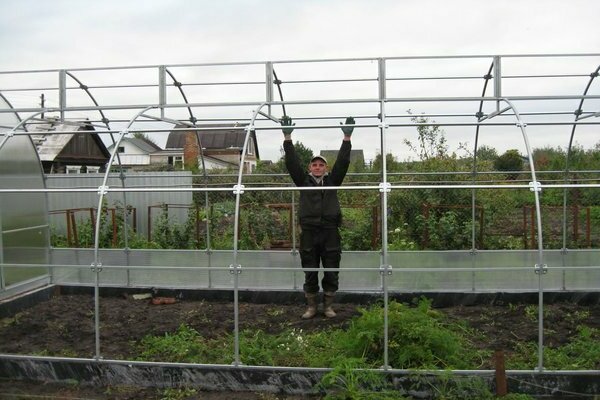
After building a wooden box for the base of the future greenhouse, it is necessary to recheck all the dimensions of the box using a tape measure. The method of measuring the diagonals will be more accurate. Using a level, the base is leveled if necessary. Next, our base should be placed on the prepared foundation. After that, you can proceed to the design of the walls. They will be made of 50mm x 75mm beams. The wooden material should also be disinfected beforehand. And if you wish, you can paint it in any color.
Then beams are prepared for vertical supports, the height of which will be 2 meters. And also bars for setting the horizontal top. All parts are also interconnected. And they are held together by metal plates. As well as corners with self-tapping screws. At a distance of approximately 2 m, vertical supports should be installed. Through the same metal connectors and screws. It is important to position the timber in such a way that the narrow sides are directed towards the inside of the structure.
Additional horizontal ceilings are installed on the southern wall. At a distance of half a meter from the upper border of the wall. This is where the windows will be installed. For a better and more durable structure, you can put slopes from the south and north wall. The last step will be to connect the constructed walls to our base.
Making greenhouse walls
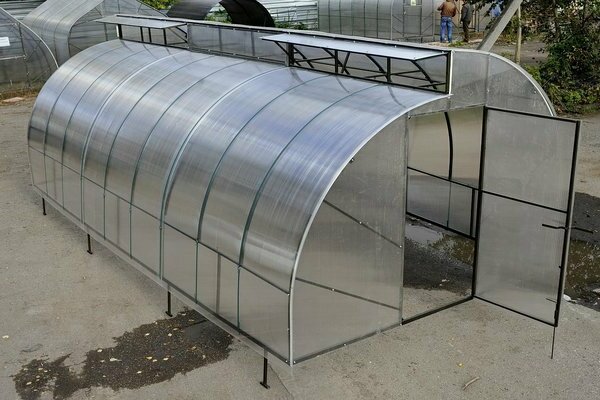
Next, you can start making end walls and installing doors. All beams are carefully processed. And they are also being prepared for the future construction. It is necessary to design and assemble a door that will be 70 mm by 180 mm in size. And also do not forget about the horizontal bar in the middle. Joints can be connected with metal corners. Or plywood triangles. After the door has been constructed, the handles, hinges and lock should be attached.
The resulting rectangle is sheathed with polycarbonate. You can also use polyethylene. This must be done on both sides to ensure better thermal insulation. Next, the end walls of the greenhouse are constructed. And they are attached to the support using self-tapping screws and corners. After attaching the horizontal supports, the vertical beams should be installed. With an interval of about 2 meters. This will be the frame into which the doors will be installed. For better strength, slopes can be made. The designed walls should be bonded to the south and north sides of the structure.
Greenhouse according to Mietlider: the final stage
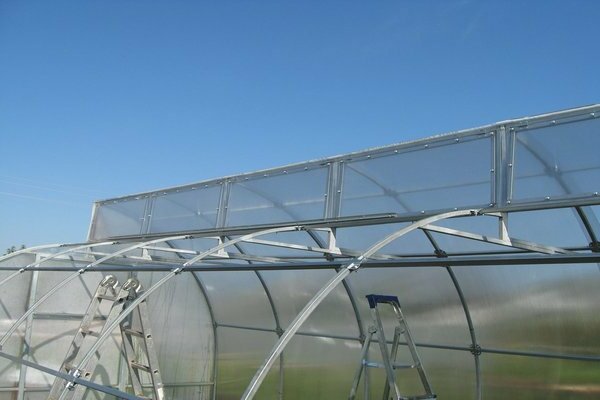
Now you can proceed to the last stage - the construction of the roof. Here you need to show maximum effort and diligence. To accurately complete the design. Because ventilation will depend on it. It is necessary to install crossbars between the walls with a gap that matches the uprights of the long walls. Beams should be attached to the supports located in the center to form the base of the wall. Which will be located between the two roof slopes. In addition, the beam will serve as a window frame. The beams should be positioned within an interval of approximately 40-50 cm.
Further along the edges it is necessary to mount the rafters. They are connected to the beams by means of cuts. Alternatively, you can use an additional support bar. Then, from the remaining beams, you need to prepare transoms measuring 1.5 by 2 meters. The number of transoms here will depend on the length of the greenhouse. Transoms must be equipped with hinges, various holders. And also sheathe with any material. For example, polycarbonate or polyethylene.
Sheathing material
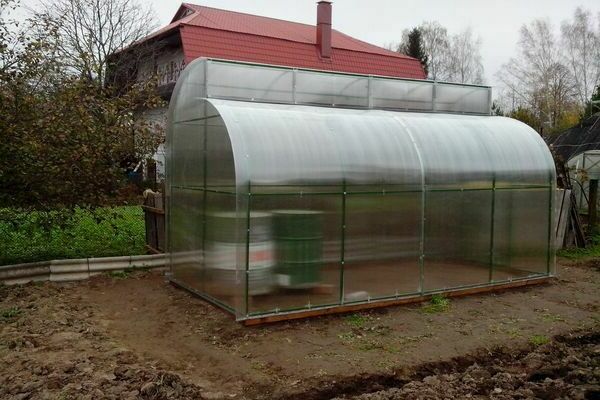
Last of all, the entire frame of the structure is sheathed. The material is still the same. Either film or polycarbonate. Here everything will depend on the service time of the material. That is, if you decide to choose a material that will last only 1 season, then ordinary plastic wrap will do. If you want to use the coating for a longer period, then you will need not an ordinary film, but a special one. Which will not lose its appearance and function when exposed to the sun. It must be reinforced. This means more durable, so as not to break from strong winds and under the pressure of snow. And also serve for several years.
The antistatic coated film will not accumulate dust and dirt. Because it affects the carrying capacity of the sun's rays, which are essential for good growth. And also the development of culture. A good film with a hydrophilic coating prevents moisture from condensation from entering the seedlings. One of the advantages of polyethylene is its light weight. That will make it possible to get by with the construction of a lighter foundation. For example, point or bar. In addition, the film will warm up faster. However, one of the shortcomings is the presence of a too abrupt change in temperature in the structure.
Greenhouse according to Mitlider: how to sheathe the frame
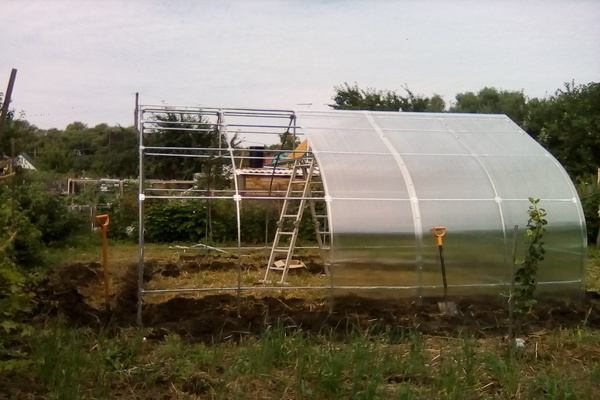
To sheathe the frame with foil, measure out the required amount of foil. Cut off and pull it on any part of the roof or walls. The film is fixed with wooden laths on self-tapping screws. Further, the same must be done from the inside of the greenhouse. The described algorithm should be applied further for the remaining sections of the structure. In this way, doors and windows are sheathed.
It is necessary to sheathe the greenhouse on both sides.Because the air cushion that forms between the two layers of film will act as thermal insulation. And the temperature change will not occur so abruptly. Which will have a positive effect on the plant. Polycarbonate sheets outperform polyethylene material in terms of strength and heat retention in their properties. But it should be borne in mind that it is quite heavy. And this will require the manufacture of a solid foundation.
If you are using polycarbonate as cladding, only cladding is required outside the greenhouse. No cladding is needed inside. It is important to pay attention to the properties of the purchased material, as there are also several factors that contribute to the durability of the cladding. Polycarbonate sheets are attached to the greenhouse using self-tapping screws. To simplify the process, it is recommended to measure and make holes in the sheets in advance. And then attach them to the frame. This will also help to further simplify the process of replacing failed materials and sheets.
In addition, when attaching polycarbonate, it is necessary to ensure that condensation drops can flow down.
Conclusion
Greenhouse according to Meathlider is an excellent choice for gardeners and summer residents. This design performs all the functions necessary for growing plants. In addition, you can make it yourself.

