Planting pumpkins in the ground: instructions
Content:
The article provides detailed instructions on how to properly plant a pumpkin in the ground: selection of a place, planting on compost, preparation of seeds and growing seedlings.
Sooner or later, every gardener will want to plant a pumpkin, the excitement and desire to grow as large fruits as possible wakes up. This orange beauty can rightfully be considered the queen of the garden, not only because of its beauty, but also because of the incredibly high content of nutrients. A wide variety of dishes can be prepared from pumpkin, it is well stored all winter, providing you with vitamins. So even if your summer cottage is very small, if you find a place for a pumpkin, then I assure you that you will not regret it.
Planting pumpkins in the ground: choosing and preparing a site
Planting pumpkins in the ground: choosing and preparing a place
When choosing a place for a pumpkin, first of all, we recall the rules of crop rotation: you cannot plant a pumpkin where representatives of the pumpkin family grew in the previous year (cucumbers, zucchini, squash and, in fact, the pumpkins themselves), in such a garden you will definitely not wait for any harvest. The culture of the pumpkin family can be returned to the same place not earlier than in 4-5 years. The best precursors for pumpkin will be onions, various types of cabbage, carrots, tomatoes, corn.
The bed should be located in a sunny place, but light partial shade is acceptable. The main thing is that the soil has the opportunity to warm up well. Pumpkin prefers sandy or sandy loam soils, as they are rather loose and quickly warm up.
The preparation of the beds should be started in the autumn. To do this, completely remove all weeds and plant residues of the culture that grew here this season, dig deep into the soil, carefully choosing all the roots and insects that you probably come across. The better you do the preparatory work, the easier it will be for you to deal with weeds and pests in the next year.
In the spring, start by digging in the ground again while applying fertilizer. At the initial stage, the pumpkin needs nitrogen the most for growth. Then proceed with the construction of the garden. The denser and heavier the soil in your area, the higher you need to make the bed - this is necessary so that the water does not stagnate and the roots of the plants do not suffer. The height of the beds is usually about 25-30 cm, the width is about one and a half meters, and the distance between the beds should be at least half a meter. Pumpkin is a powerful climbing plant, it needs a lot of space for full development, so do not try to place many plants on a small piece of land - in this case, there will most likely be no fruits, or they will be very small.
As a fertilizer during digging, you can apply both organic and mineral fertilizers - this is your choice. The main thing is to satisfy the pumpkin's need for nitrogen so that it can grow green mass as quickly as possible. If we talk about organic matter, then you can use manure, humus, well-rotted compost. If you fertilize with manure, then when planting plants, add superphosphate and potassium to each well (20 and 10 g, respectively). If it is not possible to use organic matter, then purchase a complex fertilizer and use it according to the instructions. Do not forget that an excess of fertilizer can be no less detrimental to plants than a lack of it.
Planting a pumpkin in the ground on a compost heap
Planting a pumpkin in the ground on a compost heap
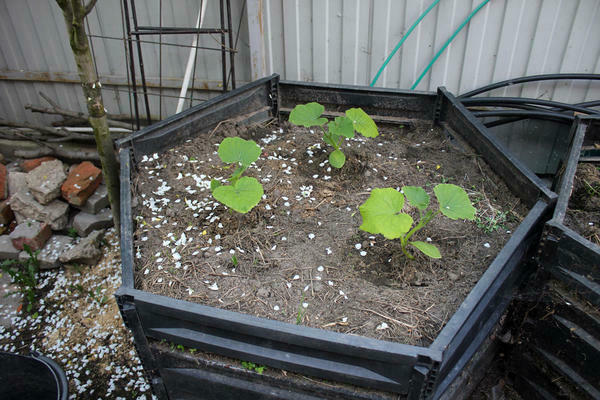
Quite often, the pumpkin is placed on the compost heap, thus creating a mutually beneficial symbiosis: the compost provides the plant with the necessary nutrition, and the plant, in turn, improves the quality of the compost. If we list the main advantages of this symbiosis, then
1. Pumpkin prevents weeds from growing on the compost, its huge leaves shade it from the sun, limiting the growth of weeds.
2. The presence of pumpkin accelerates the decomposition of large plant residues. It usually takes about three years for the thick stems to completely decompose; growing pumpkin on compost makes this process quicker.
3. The compost heap does not dry out, therefore, the processes inside do not slow down.
4. From the point of view of aesthetic perception, compost disguised with a beautiful plant looks much more attractive than without it.
Planting pumpkin outdoors: proper seed preparation
Planting pumpkin outdoors: proper seed preparation
I must say right away that it is worth planting seeds only for early-ripening pumpkin varieties, or decorative ones, which are distinguished by bizarre shapes, small sizes and are grown not for food, but for interior decoration. Basically, pumpkin is grown by the seedling method, but more on that later, first we'll talk about preparing and planting seeds.
Pumpkin seeds can be stored for up to four years, but without pre-sowing preparation, you can never be sure of the quality of the planting material. Prepare a saline solution and immerse the seeds in it, after a while some of them will rise to the surface - they can be thrown away, they are not suitable for planting. The seeds that remain at the bottom of the container must be washed in running water and dried for further preparation: heating, hardening, "grafting" against diseases and germination.
Heating must be carried out so that the seeds germinate at the same time, for this they are heated to 60 degrees and kept in this state for about three hours.
Hardening develops in plants resistance to lower temperatures, which in our unpredictable climate is possible at any time. For this, the seeds are kept for two days at a temperature of + 1 ... + 2 degrees.
In order to prevent further plant diseases, the treatment is carried out at the seed stage. You can use any fungicides, or prepare a light pink solution of potassium permanganate and keep the seeds in it for at least four hours. An ash solution is also suitable, which must first be infused for 24 hours, then strain and immerse the seeds in it.
When all the preparatory work is completed, we proceed to germination. To do this, you need a cotton cloth or cotton swabs, in which you need to wrap the seeds, wet and keep them moist. After a few days, the seeds will open and sprouts will appear - you can start planting.
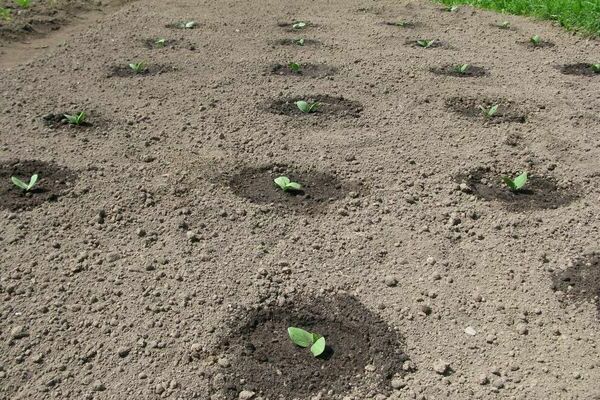
Despite the fact that we hardened the seeds, it is necessary to plant the pumpkin when the soil warms up enough, that is, towards the end of spring. Seeds can rot if planted too early.
Each plant requires a large area, when purchasing seeds, study the information about this variety so that there is not too little space in the garden in the end. Plant several seeds in the hole at the same time at a short distance from each other (some may not sprout, in case of collective planting you will have a supply).
Growing pumpkin seedlings.
The late varieties of pumpkin take 4-5 months to ripen, so in our climate they can only be grown through seedlings. The age of the seedlings at the time of planting should be at least a month - starting from this, determine the time when to plant the seeds.
Growing seedlings
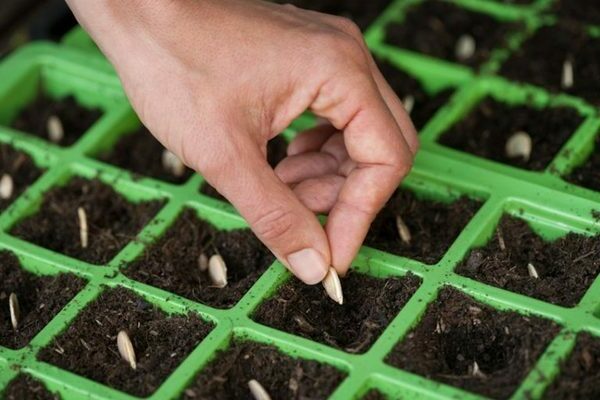
For growing seedlings, you can buy plastic, but it is better to still peat pots with a diameter of at least 10 cm. You can mix the soil yourself (humus and turf soil 4: 1) or buy it in a store.I strongly recommend that you pre-treat the soil from pests (steam it or freeze it in the freezer), this will help avoid problems in the future. Add the first top dressing to the soil, 4-5 g each of nitrogen and potassium fertilizers and superphosphate, mix well, water and plant the seeds to a depth of about 3 cm (pre-sowing seed preparation, which we talked about earlier).
Seedlings will appear in about five days, after which the temperature in the room must be lowered by 5-8 degrees (this can be achieved by frequent ventilation), otherwise in a very warm room the seedlings will grow rapidly and stretch too much, the stem will be thin and fragile. Watering should be done as the soil dries up. After a couple of weeks, and then before planting in the ground, it is necessary to carry out more top dressing so that the seedlings get stronger.
It is possible to plant plants in the beds only when the threat of frost has passed. If your pumpkins grew in peat pots, you can plant with them. If the containers were plastic, then on the eve of planting, water the seedlings well, so that then carefully remove it from the pot along with a lump of earth. Prepare holes of sufficient size, pour at least one and a half liters of water into each and plant pumpkin bushes, sprinkling with soil to the level of the cotyledon leaves. Everything is ready, now it remains to take care of the plant and wait for the harvest.
Planting pumpkins in the ground