Planting scheme for peppers in a polycarbonate greenhouse
Content:
Pepper is very popular in our country and is grown in all regions. However, it is not always possible to grow them outdoors due to the cold conditions. Therefore, it is recommended to use polycarbonate greenhouses for their cultivation. In addition to creating good conditions for your plant, you can also speed up the harvest. However, in order to get a good harvest of tasty and juicy pepper, it is also important to devote time to it and properly care for it. Which pepper planting suits you best - read more in this article.
Planting peppers in a polycarbonate greenhouse - placement rules
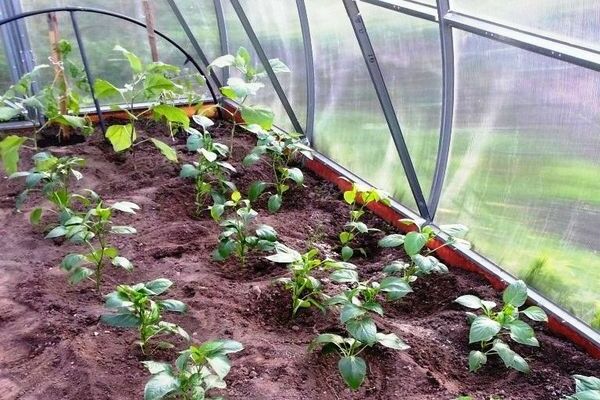
planting pepper
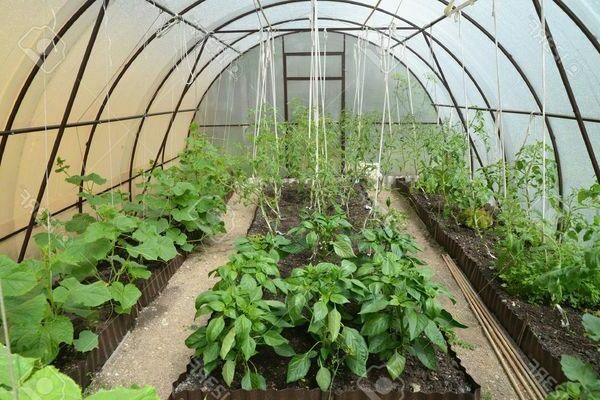
When planting peppers in the beds, it is very important to pay attention to the placement and distance between the seedlings. Observing all the rules, you can get not only a large harvest of good quality, but also speed up the ripening of the pepper, and hence its collection.
There are many rules for planting, but it makes no sense to compare which one is better, since they depend on the varieties and climatic conditions in which they will grow.
If pepper is planted in a polycarbonate greenhouse, then the width of the beds will depend on the structures that are installed in it. Width is of great importance when growing this crop, influencing the yield.
For example, in a three-meter greenhouse, you can place two or three beds from 70 centimeters to one meter.
So let's look at the rules for planting bell peppers. There are several planting rules, but most often, especially novice gardeners, adhere to the classic planting method.
For this, holes are prepared in advance, where the distances from each other will be at least 20 centimeters, and the distance between the rows is about 50 centimeters.
However, those gardeners who have been growing this vegetable for a long time have more efficient planting schemes in their arsenal.
One way is wide-row... Using this method for planting, it is necessary to make holes at a distance of 60 centimeters between rows and from each other from 15 to 30 centimeters.
The second of the ways that is used in order to get a good harvest is two-line or three-line tape.
The distances between such tapes are 60 centimeters, in the tape between rows from 20 to 40 centimeters and from 15 to 30 centimeters there should be distances between plants in a row.
The third way is square-nested... In this case, the roots of the plant are planted in 2 pieces in one nest and a distance of 60 centimeters is observed.
The fourth way is chess... In this case, nests for seedlings are made as on a chessboard, while it is important to follow the placement rules 20x20, 30x30 can also be used.
Using this method, you can significantly save the area for planting and at the same time not deprive your plants of comfort.
There is also such a method where 3 plant roots are planted in one hole. However, this method is only suitable for the southern regions of our country.
Since, due to the thickening that is created with such a planting, the pepper begins to need more sun during the entire growing period.
Choosing this method of planting, you need to know that with it it becomes much more difficult to care for the crop and the risk of getting fungal infections increases.
Remember that when choosing planting methods in which several plants are placed in one hole, you will need to use twice as much fertilizer.
Allowable number of plants when planting in one hole
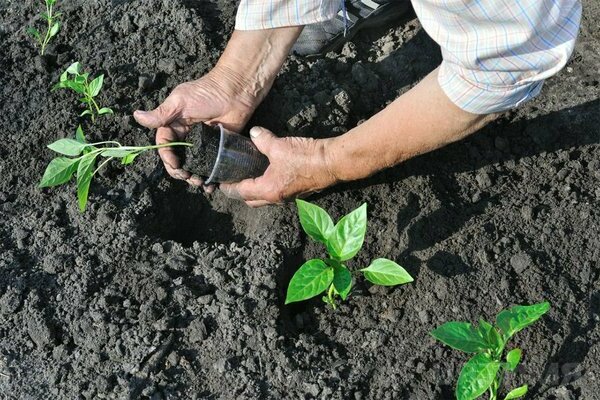
planting pepper
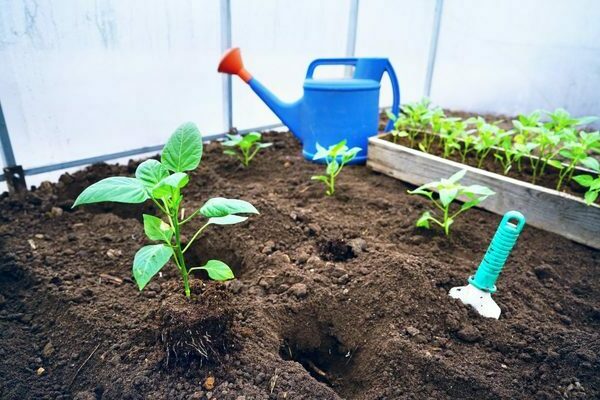
By planting plants tightly, you can get larger fruits than those between which a greater distance was maintained. This is due to the fact that temperature changes occur more evenly.
But due to the fact that with this method the plant receives less sun and carbon dioxide, the ripening period is greatly increased. Therefore, this method is best used by those who live in the south of Russia.
Organic fertilizers can be used to compensate for the loss of carbon. With this method of feeding, you can safely plant 1 sq. meter 14 plants.
If you do not plan to fertilize the soil in the greenhouse with the help of organic matter, plant it on 1 sq. more than 8 bushes should not be.
Planting pepper seedlings in a greenhouse
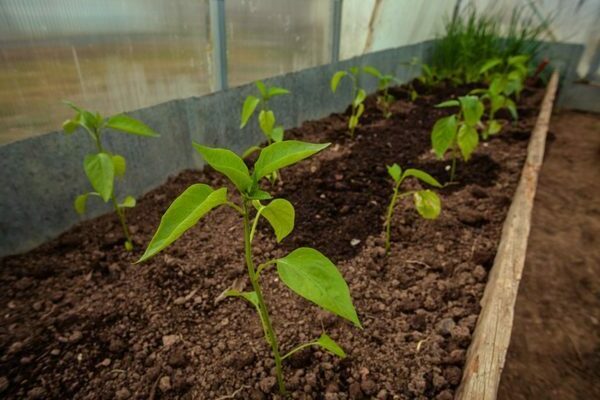
When transplanting peppers, it is important to follow some rules for the good development and growth of the plant. How you will act depends on how quickly your seedlings will take root.
Preparing nests for planting and planting seedlings should be carried out as follows:
Mark the area to create rows and nests using a marker or any tape. Nests are made to a depth of no more than 15 centimeters, pepper does not like to be placed too deep. The distance between them in a row should be from 15 to 30 centimeters.
After the holes are ready, they must be fertilized. For this, a mixture made from 200 grams of humus, 1 tablespoon of phosphate and a spoon of wood ash is introduced. Next, each nest must be watered with one liter of warm water.
By adding Fitosporin solution to the water, you will prevent many bacterial and fungal infections. Immediately after you've fertilized and watered the wells, you need to plant your plants. The roots must be tightly, but gently, so as not to damage, press down with soil.
This will allow each root to receive the necessary amount of nutrients and moisture, which will help them function well and adapt faster. Nests with plants planted in them must be covered with a mixture of dry soil and compost.
Such a mound will allow the plant to receive more oxygen and help to take root faster. Seedlings that have an open root system and are grown in large containers should be planted when the sun has already set.
Since pepper seedlings take root very hard, they should be helped. This can be done during repeated watering by adding growth stimulants with a complex of trace elements, phosphorus, potassium and nitrogen to the water.
They have a positive effect on plants, helping to cope with stress faster and easier and stimulating root development. You can buy such fertilizers at a specialized store.
It must be used in accordance with the information specified in the instructions.
Planting pepper in the greenhouse - caring for the plant after transplanting
After two weeks, when the plant takes root, you can do feeding. At this stage, it is best to apply mineral fertilizers based on nitrogen, which is responsible for metabolism.
It is one of the most important macronutrients, without which the development of plant growth and mass is impossible. In the event that you prefer organic matter, then infusions from cow dung, chicken dung or herbal infusions are well suited here.
If you do everything right, then soon you will see that the plant grows well and young ones appear on it. If the plant does not develop, then it is necessary to figure out why this is happening and why, there is no result from the applied fertilizers.
During the entire period of growth, the plant must be fed. This will help it develop correctly, as a result of which, you will get high yields.
The next dressing is done when the pepper begins to bloom and buds form.As a rule, this happens 14 days after the first fertilization.
This time, the composition should include the entire list of trace elements, so it would be best to purchase this complex in a nursery or in a specialized store, after consulting with a specialist.
Many brands are popular with gardeners, because it is difficult to recommend either in this article. During the ripening of the pepper and the first harvest, you can do the third top dressing. It is no different from the previous one.
However, at this stage, wood ash can completely replace mineral fertilizers. It is very simple to add ash, just sprinkle it on the soil near the roots and pour water over it. But the best option would be to pour a solution of 200 grams of ash diluted in one bucket of water.
One bush is watered with 1 liter of water. It is considered useful for pepper to alternate dressings from root to extra-root. You can even create a schedule so you don't get confused.
For example, in the first week, root feeding can be done using yeast infusion. In the second week, the same type of feeding is made from the infusion of ash.
In the third week, yeast infusion is also used, but already for foliar feeding. On the fourth week, foliar feeding is carried out again with the help of infusion from ash. The scheme is repeated every subsequent week.
Formation of a bush in a greenhouse
Pruning this type of culture is a controversial issue. Some claim that there is no need for this and the formation of a bush only takes time without giving results. Others believe that this method will help significantly increase the yield of bell peppers.
Since it is extremely difficult to find out the truth in this case, it is better to find your own way through your own experience. You can divide the area into two parts, on one to trim, and on the other not.
Seedling formation: If you have decided to form a bush, then you should start with seedlings. When the sprout reaches 20 centimeters and the trunk begins to delaminate in two.
A bud is formed between the trunks, which takes up a large amount of nutrients, which interferes with the development of the plant.
In order for the bush to continue to develop well and more branches appear on which fruits will form in the future, the bud must be removed.
Crown buds are only left if they want seeds. Since it is from them that you can get strong, high-quality seeds, planting which you can get an excellent harvest.
Pruning at different growth periods
When the pepper has taken root well after transplanting into greenhouse conditions, the period of development and growth of the bush begins.
At the base of the leaves, lateral shoots begin to appear, which take up a significant part of the nutrients, which interferes with the good development of the fruit.
By removing these shoots, you will help your plant receive the required amount of trace elements, and he will thank you with a large harvest.
In order to form our bush, we will need to cut off the shoots, which are most often formed on skeletal or main branches.
The first pruning is done on the main stem. All lateral processes are removed along with the leaves. This will open the access of oxygen and light to the plant, which not only contributes to good development, but also is a good prevention against various diseases.
Further, the bushes are formed as follows: The main shoots, formed from the embryonic shoot at the first fork of the main stem, begin their branching, form buds and new shoots.
This greatly inhibits the development of the bush and deprives it of the necessary substances. Therefore, if the crown flower is removed in time, without allowing the shoots to form, the plant will branch better, which means the harvest will be better.
The next pruning is carried out in the same way, but this time only those buds in which the growth goes inward are removed.Such buds form an irregular plant shape, provide a lot of shade and deprive the bushes of the ability to get good access to air.
The last pruning takes place in August. During this period, flowers are removed, leaves near the fruits, all ovaries that have just formed and the shoots are pinched.
After completing these simple steps. You will once again give strength to your plant, which it will spend on ripening pepper.
With proper care of this crop, in September you can get a large harvest of quality peppers.

