Juniper Dream Joy
Content:
It is not for nothing that juniper bushes enjoy the sympathy of landscape designers around the world. The unpretentious nature of these evergreen conifers makes them suitable for growing even in regions with harsh winters or dry summers. The variety of species allows you to choose a suitable variety for decorating the site, which will meet all the requirements of the designer and owner of the garden. These hardy and undemanding representatives of the Cypress family are divided into 70 species, which differ from each other in growth, spreading branches, and color of needles. There are tall and dwarf varieties, painted in light green, emerald, silver-green shades. With the help of various types and varieties of juniper, you can create a green coniferous carpet on the site, form green hedges and mark vertical accents. The solid green effect is achieved by planting low-growing juniper varieties with their creeping shoots almost parallel to the ground. These include Dream Joy juniper, as well as varieties such as "Blue Star", "Andorra Compact".
For the formation of the middle tier of the landscape composition, rounded varieties of juniper bushes are suitable: "Hetz", "Pfitzeriana". It is recommended to create coniferous hedges and single vertical accents by planting tall varieties of virgin or rock juniper on the site. This article will focus on the Dream Joy dwarf juniper (Juniperus squamata Dream Joy). How to plant it in the ground and how to properly care for it in order to preserve the attractiveness of these evergreen coniferous bushes for many years.
Scaly juniper Dream Joy: variety description
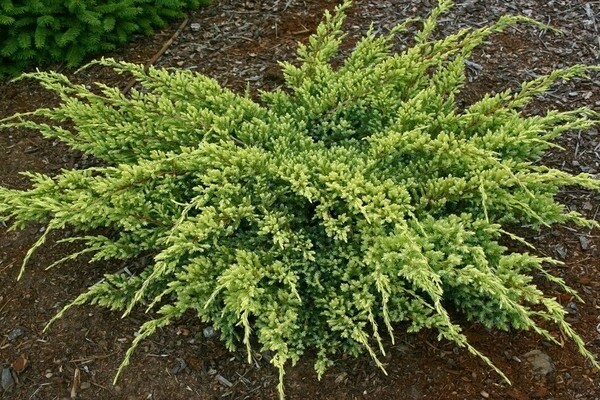
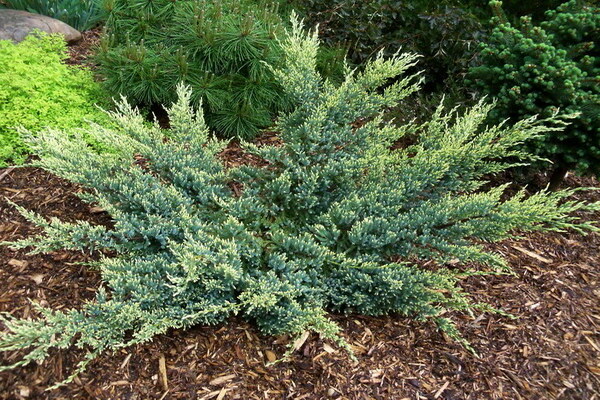
Juniper Dream Joy: photo of the variety
Dream Joy variety belongs to scaly varieties juniper. These dwarf conifers cannot boast impressive growth rates. During the year, their shoots lengthen by no more than 15 cm.
In an adult state, the flattened crown of the Dream Joy juniper bush reaches a maximum height of 0.5 m. Its sprawling, asymmetrically located branches grow 0.9-1 m wide. The shoots are placed almost parallel to the surface of the earth, at the ends sticking slightly to it.
The needles of the Dream Joy juniper are rather short and prickly, like needles, painted green with a grayish tint. In young juniper bushes, the needles are lighter, yellow-green in color, darken over time. Due to the color difference between young and adult shoots, juniper bushes of the Dream Joy variety acquire an unusual variegation and brightness.
Due to the slow growth rates and general compactness, the bushes of this variety can be safely planted even in small areas, without fear of their excessive growth and violation of the compositional design.
Juniper Dream Joy is resistant to severe frosts and can successfully winter when the temperature drops to -34 degrees without any protection. This species is also not sensitive to drought and can do with occasional watering for quite a long time.
The unpretentious nature of Dream Joy extends to the composition of the soil. Juniper of this variety successfully takes root both on rocky and sandy soils. However, it will feel best on well-aerated and drained loam, or on sandy loam.
The soil acidity level suitable for juniper ranges from neutral to slightly acidic. It should be borne in mind that moisture stagnation is absolutely unacceptable for juniper. For this reason, it is recommended to avoid placing juniper plantings in areas with close to the ground water.
It is best to place Dream Joy Juniper in a well-lit area. And the point here is not only in the preferences of the light-loving coniferous shrub. Just in the sun, the unusual spotted coloring of juniper bushes will look most advantageous.
Juniper scaly Dream Joy: planting and care
An important stage in preparing for planting a juniper is the selection of planting material. For planting in open ground, only healthy and strong seedlings that do not have damage and signs of disease are suitable. It is optimal to purchase juniper bushes in containers with a nutritious soil mixture. This prevents the root system of the seedlings from drying out.
Shortly before transplanting in open ground, it is recommended to place the roots of young juniper bushes in a solution that stimulates their growth and development. For these purposes, a tool such as "Kornevin" is suitable. The roots of the seedling should be kept in the solution for 2-3 hours, after which you can start planting.
Step-by-step instructions for planting seedlings soil
- A landing recess 0.5 m wide and the same depth is dug.
- The bottom of the planting pit should be lined with a drainage layer with a thickness of 10 cm (for sandstone and sandy loam soil) to 20 cm (for loam). Broken brick, expanded clay, sand are suitable as drainage.
- The soil extracted from the planting pit must be mixed with sand and humus at the rate of 50% / 25% / 25%.
- Part of the resulting soil mixture is poured over the drainage layer. A seedling is placed on it so that the root collar is at the same depth as in the container.
- The planting pit is filled up with the remnants of the soil mixture, which is compacted tightly and spilled with water.
- To prevent evaporation of water from the soil, it is necessary to cover the topsoil.
- If the weather is hot and dry at the time of planting, it is necessary to provide the seedlings with shelter from direct sunlight and abundant watering. Otherwise, young plants are at risk of sunburn.
Juniper care
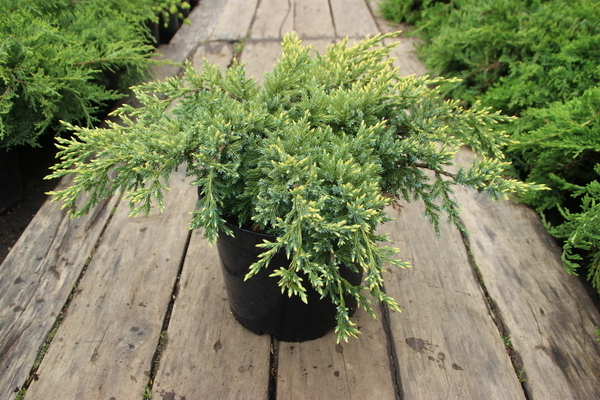
Caring for the Dream Joy juniper assumes the following procedures: watering, fertilizing, pruning, preventive treatment. In general, this juniper variety does not cause much trouble to its owners.
Subject to the recommendations regarding its placement on the site and the process of planting in the ground, the juniper successfully takes root and takes root in a new place. The further development and preservation of decorative qualities will be helped by the care procedures.
In the spring, when the snow melts, it is necessary to spend sanitary pruning and remove shoots with traces of damage and disease. Thus, healthy parts of the juniper bush will receive the full amount of nutrients.
During this period, plants weakened after winter need additional nutrition, which will supply them with useful elements necessary for growth and development. Therefore, in April it is recommended feed juniper bushes with complex fertilizers.
To water Juniper Dream Joy is only available a few times per season. If the summer is dry, it will not be superfluous to spray the crown of the bush with warm water.
To keep the root system from overheating and to protect it from weeds, it is recommended mulch near-stem radius around juniper bushes.
Junipers don't get sick too often. The greatest danger for them is represented by fungal infections, which can greatly damage the decorative qualities of "Dream Joy".When the first symptoms of the disease appear, the affected bush should be treated immediately with fungicidal solutions.
How to propagate Dream Joy scaly juniper
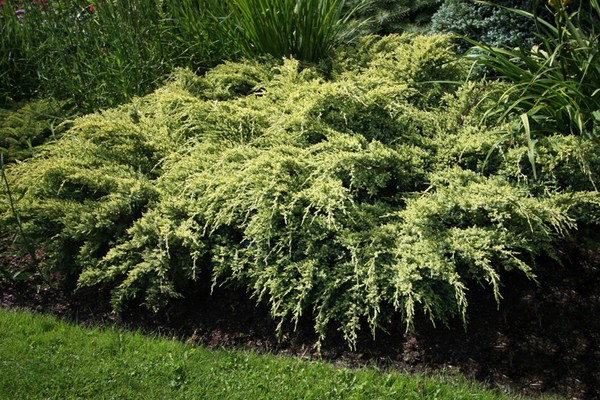
Juniper Dream Joy in garden design: photo
There are 2 ways to propagate Dream Joy juniper - seed and vegetative.
Reproduction of juniper seeds not very popular among gardeners. Since it requires a lot of effort and special knowledge and skills. It is used, as a rule, by breeders who create new varieties of plants.
For successful germination, juniper seeds are subjected to prolonged stratification, which takes about 3 months. Only after preparation can the seeds be sown. But this event is not very often crowned with success.
Seedlings, hatched from a few viable seeds, are grown in greenhouse conditions, and after a certain time are transplanted into seedling containers. They can be planted in the ground no earlier than in 3-4 years, when all parts of the young juniper bushes are sufficiently formed and strengthened.
Vegetative breeding method juniper is much simpler and not time consuming and expensive. Each gardener can choose from two vegetative propagation options.
The first option involves reproduction cuttings... For these purposes, in the spring (in April), cuttings are cut from the strong shoots of an adult juniper bush. For this role, fresh green shoots about 15 cm long are suitable, having retained some old wood on one side. The cuttings are placed in a solution that stimulates the formation of roots, and are there for 1-2 days.
After that, the cuttings can be transplanted into containers with a nutrient substrate and placed in open ground or in a greenhouse, depending on environmental conditions. Shoots need regular watering and moisture. Drying out of the soil in pots with seedlings should be avoided, as well as systematically spray the cuttings.
By autumn, the cuttings will form an independent root system. For the winter, it is better to place them in a closed, cool room. During the next season, they will grow intensively, and by autumn they will become full-fledged seedlings.
The second variant of vegetative propagation of juniper involves use of layering... To do this, you need to select a branch close to the ground and clear it of needles 20-30 cm from the top. An incision is made in its lower part (you can remove a little bark), which is then covered with a root-stimulating agent.
The shoot must be placed in a small depression in the soil, secured in it and covered with earth. Next, it is necessary to ensure that the layers are regularly moistened. Do not allow it to dry out. Within 6-12 months, the cuttings will take root and form a full-fledged root system. After that, it can be separated from the parent bush and transplanted to a new location.
Juniper scaly varieties Dream Joy invariably enjoys the sympathy of amateur gardeners and landscape designers. This is explained not only by its compact size and contrasting colors. But also an unpretentious nature, allowing it to be cultivated even in regions with severe winters and dry summers.
Caring for this variety of juniper does not require special skills and even a novice gardener can do it, provided that the necessary recommendations are followed.


