Juniper Arcadia
Content:
Junipers have long and firmly won the sympathy of landscape designers. These coniferous shrubs are distinguished by their unpretentious nature and undemanding to the conditions of their cultivation. Taking care of their appearance is quite simple, the formation of a juniper crown does not require much effort. With an attractive appearance and aroma, these evergreen shrubs help to purify the air in the territory they occupy. There are quite a few varieties of junipers, for example, the Arcadia juniper, which many gardeners dream of buying. He will be discussed in this article.
Cossack juniper Arcadia: description of the plant
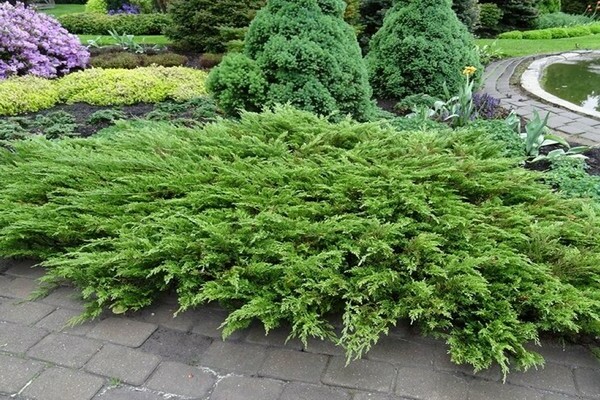
Arcadia is a type of Cossack juniper, like other representatives of the Juniper genus, belonging to the Cypress family. Botanical name - Juniperus Sabina "Arcadia".
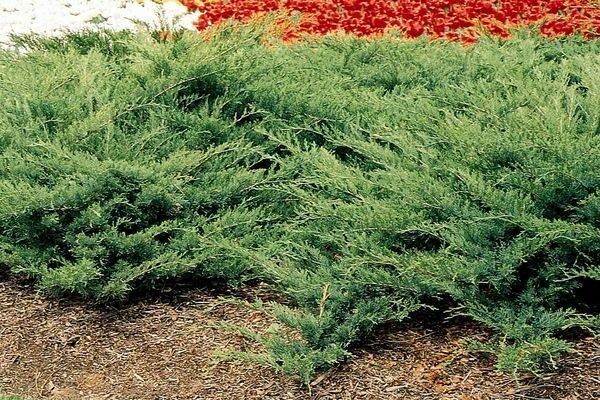
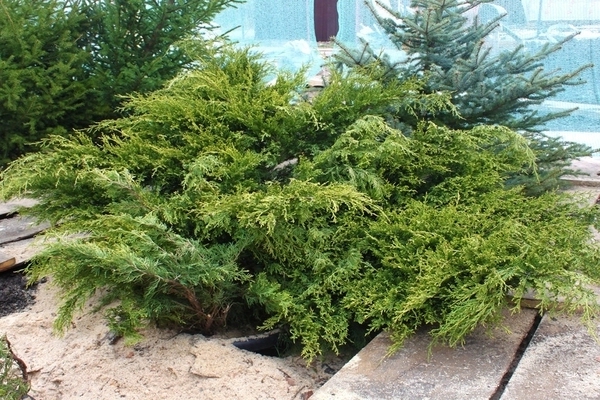
Representatives of this variety cannot boast of high growth rates. During the year, their shoots grow only 20 cm. The creeping branches form a dense crown, shaped like a large and lush pillow.
Due to the horizontal placement on the trunk, the shoots are located almost parallel to the ground. Upward, the Arcadia juniper does not particularly strive, growing only up to 0.4 m in height. But the crown formed by horizontal branches and thin shoots often reaches 2 m in diameter.
The needles of Arcadia are soft, long, fine-scaled, colored in a light green shade. The juniper of this variety bears fruit in tiny, rounded cones no larger than 7 mm. Green in color, they are covered with a bluish bloom.
The ripening period of the fruit is in autumn. You cannot eat them, because the cones of the Arcadia juniper are poisonous. The shoots of this plant also contain toxic essential oils.
Juniper Cossack "Arcadia" is able to withstand severe drought and significant drops in temperature. Feels good in adverse conditions of urban areas with its high content of gases, dust and smoke in the air. Harmful emissions do not harm it, so the juniper is often planted near highways.
Juniper plantings help to cleanse the air from dangerous impurities, and also have soil-protecting qualities. "Arcadia" is resistant to various diseases, and also successfully resists the attack of pests.
Most often, the Cossack juniper Arcadia is affected by the following diseases:
- Fungal disease brown shutealso called brown snow mildew. It can develop at rather low temperatures, under snow cover. Leads to the death and shedding of needles and juniper shoots.
- Biorellus or resin cancer manifests itself in the formation of deep sores pressed into the surface of the tree trunk with tarred edges.
- Bark necrosis has a fungal origin and leads to the death of the affected areas of the bark and shoots.
- Gray mold or rot, it is also an alternaria, is also caused by a pathogenic fungus. Signs of the disease are a general weakening of the juniper bush and a change in the color of its needles, which is covered with a grayish-brown bloom.
- A wide range of reasons can be caused by such a problem as drying out of juniper branches. This can happen both as a result of mechanical damage and under the influence of fungal infections.
- Appearing on needles rust can also have a variety of reasons. From a fungal disease to non-compliance with agrotechnical requirements for the care of juniper.
- A dangerous disease that most often affects the root system of young juniper bushes is fusarium or root rot. As a result of infection, the roots of the plant begin to die off, which leads to the weakening of the entire bush and may even cause its death.
How the Cossack juniper Arcadia is grown
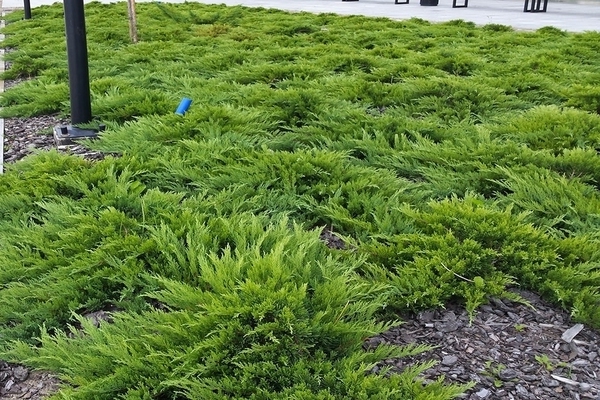
Cossack juniper Arcadia: photo
Junipers prefer sunny areas, but they thrive and thrive in slightly shaded corners. As for the composition and quality of the soil, the best option for growing Cossack juniper "Arcadia" will be a light soil of moderate dryness.
The preferred acidity level is neutral to slightly acidic. When choosing a site for planting juniper bushes, you should avoid areas with groundwater close to the surface of the earth.
Planting young juniper bushes
If juniper seedlings were purchased in containers with soil, then you can start transplanting them into open ground at any time during the growing season. If a young plant has bare roots, this can be done both in spring and in autumn. However, experienced gardeners prefer the spring period.
Step-by-step instructions for planting juniper seedlings in open ground include the following steps:
- A planting recess should be prepared in advance, the dimensions of which should be 2-3 times larger than the diameter of the earthen coma formed around the roots of the juniper bush. When planting several seedlings at the same time, the interval between them should be from 50 to 200 cm, depending on the expected size of the bush. The diameter of the planting pit for an adult plant must be at least 70 cm.
- A drainage layer should be placed at the bottom of the landing recess, the thickness of which should be at least 0.2 m. For these purposes, brick fragments, expanded clay, sand are suitable.
- Attention should be paid to the composition of the nutrient soil mixture. Since, in many respects, the speed with which a young plant takes root and takes root in a new place depends on it. You can prepare it yourself by mixing peat, sand and turf in a 2: 1: 1 ratio. Also, it will not be superfluous to add slaked lime, lime and dolomite flour to the resulting mixture. For each landing groove 50 cm wide and deep, there should be about 0.1 kg of the substance.
- The planting pit is filled with nutritious soil, then a juniper seedling is placed on it. It should be placed so that the root collar of the seedling rises above the ground by no more than 10 cm.
- After planting, the soil around the juniper bush should be well tamped and shed with water. Throughout the first week after planting the seedlings, they must be watered regularly and abundantly.
- It is recommended to cover the near-stem radius with a layer of mulch after the water is completely absorbed into the ground. Mulching will relieve you of the regular loosening of the soil in the area with juniper. Otherwise, it is necessary to loosen the ground from time to time.
Arkadia juniper care procedures
Caring for an adult juniper bush consists of balanced watering, top dressing and periodic pruning of shoots.
In the summer, 2 or 3 times are enough to water juniper Cossack "Arcadia". The amount of water for irrigation depends on the size of the bush, a compact plant takes about 1 bucket of water, for a larger one - from 2 to 3 buckets.
During prolonged droughts, it is recommended to irrigate juniper bushes using the sprinkler method. This should be done in the evenings, using warm, settled water for irrigation.
The first top dressing can be applied in April when plants need nutrients to help them spring awaken and grow vigorously. Suitable preparations containing nitrogen, for example, nitroammofosk or "Kemira Lux".
In the first case, it is enough to add 30 to 40 g of the substance to the soil. In the second, dissolve 20 g of the mixture in a bucket of water. After making the fertilization, it is necessary to shed the soil abundantly around the juniper bushes.
Mulching the trunk circle will allow you to keep moisture in the soil for a long time and prevent its evaporation. Wood bark, wood chips, peat, grass cuttings are used as mulch. The mulch layer should be about 5 cm thick.
Sanitary pruning juniper bushes are traditionally held in spring and autumn. In the spring, it is necessary to rid the weakened plant of dry shoots and needles so that the remaining parts receive nutrients from the soil in full.
Autumn pruning aims to remove non-viable shoots in order to ensure the flow of nutrients to the stronger parts of the juniper bush that can survive the winter.
Since the Cossack juniper "Arcadia" has creeping branches and shoots, they often sprout independent roots. From such rooted branches, cuttings can be cut and then transplanted separately.
Transplanting adult juniper bushes
A transplant for adult juniper bushes is not only not required, but also poses a certain danger. If this procedure cannot be avoided, it is necessary to prepare the bush in advance for transplanting to a new place.
Preparation starts in 6 months: it is necessary to shorten too long root shoots. Since for transplantation and subsequent adaptation to a new place, the juniper bush must form a smaller root system.
It should be noted in advance on which side the bush was oriented, for this you can tie marking tapes or fabric scraps to the branches located on the north side.
Dig the juniper bush carefully, as deep as possible in order to extract the maximum number of intact roots from the ground. As in the case of planting seedlings, the planting hole should already be prepared in advance and filled with a drainage layer and nutrient mixture.
After transplanting, it is necessary to shed water around the juniper bush, and when it is absorbed, cover it with a layer of mulch.


