Carrots on a tape: how to plant correctly
Content:
In the process of growing carrots, usually there are no problems, since this culture is quite unpretentious. But nevertheless, in order to get a rich harvest of tasty and beautiful root crops, it is necessary to follow a number of rules when caring for the crop, watering and weeding it, not forgetting to loosen the soil and spud the root crops a little at the right time. And above all, you need to properly plant carrot seeds, most of the success depends on this. Therefore, further we will talk about: carrots on a tape, correct planting.
Carrots on a tape: rules for planting seeds

To get large root crops of the correct shape, it is imperative to observe the required distance between plants, which is usually equal to 4-5 centimeters. Carrot seeds are very small, so when planting them by hand, it is extremely difficult to adhere to the desired distance, almost impossible. In addition, carrot seeds are quite light and, after planting and watering, can float to the surface or move sideways. And if a heavy downpour passes, then you can forget about the verified landing pattern, everything will mix. And if the seeds are planted too often, it means that in the future it will be necessary to thin out the seedlings, and when thinning there is always a chance to damage the delicate and fragile carrot sprouts.
Therefore, an agricultural technique was invented - carrots on a tape, which greatly facilitates the process of planting and further care of carrots. This is a planting method that allows you to fix the seeds in one place, and not be afraid of watering and rain. And also the method of carrot seeds on the tape allows, when planting, to observe the distance between the plants, which is necessary for comfortable growth and correct formation. The essence of the method is that the seeds are attached to a special tape at a certain distance, and together with this tape they go deeper into the soil. You can prepare the seeds for planting carrots on the tape yourself or buy a ready-made tape with seeds at the agricultural store in the seed department.
Carrots on a tape: preparing planting material with your own hands
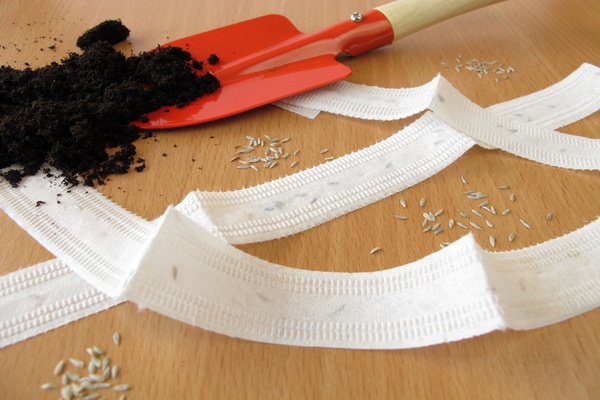
Carrot seeds on the tape: photo
If you decide to try planting carrots on a tape, then there are several ways to prepare planting material. The simplest of them is to buy ready-made seeds already glued to the tape, which do not require any additional processing and are completely ready for planting. If you want to prepare the seeds yourself, then as a basis, you can use special adhesive tapes, paper napkins or towels, as well as toilet paper - the most common and suitable material for this. The glue used on purchased tapes does not harm the plant; some useful substances are even added there. And if you stick it yourself, you will have to prepare a paste from flour or starch, which is also completely harmless to seeds. By purchasing a ready-made ribbon, you greatly simplify the entire planting process. In this case, you are also not limited in the choice of a variety, since modern producers produce seeds in various forms: the same variety can be purchased in the form of ordinary seeds, pills, on tape. The carrot seeds on the tape are attached at the same distance from each other, you just have to make grooves in the prepared soil, water them and lower the tape with seeds, sprinkling with earth. The seeds will germinate, and the tape will gradually disintegrate from exposure to moisture, and will in no way prevent the sprouts from moving to the surface and fully developing.
As we said earlier, the seeds on the belt have already passed the necessary pre-sowing treatment, which includes disinfection and processing with compounds that accelerate seed germination. Some believe that the disadvantage of this approach can be considered the higher cost of such seeds, as opposed to conventional or those sold in the form of pills. But you can argue about the price here only if you plan to plant a whole field with carrot ribbons. And if we are talking about one or two beds, then, in my opinion, the price is not very high. Another thing is when it comes to the quality of the material. More and more gardeners every year complain about the poor germination of store seeds. Therefore, if you have good and proven planting material, then you can prepare such planting belts yourself, especially since it is not at all difficult. If you have a good eye and a steady hand, then feel free to start preparing the seeds. This method is especially appropriate if you have become the proud owner of a small amount of seeds of an elite variety of carrots, and you need to plant in such a way that not a single seed is lost.
Before you start gluing the seeds, you need to carry out a number of preparatory work. First, make sure your seeds are suitable for planting and test their germination. To do this, place a dozen seeds on a cotton cloth or cotton ball and wet. Then wrap everything in a bag or plastic wrap and make sure that the fabric does not dry out. After about 10 days, see how many seeds have started to germinate by estimating the percentage. Considering that you have to do a rather painstaking work, you only need to use high-quality planting material, the germination of which is close to or equal to 100%. Secondly, prepare the base by cutting the toilet paper into strips approximately 2.5 cm wide. Thirdly, prepare a paste from flour or starch according to a well-known recipe. To prepare the paste, boil 200 ml of water, and while it is boiling, slowly pour into it and mix thoroughly two tablespoons of flour. After the substance becomes thick, wait until it has completely cooled down and you can start the gluing process. You will need a toothpick or match with which you will apply small drops of paste to the prepared paper strip at a distance of about 4-4.5 cm from each other. And then, using a damp needle or a thin knitting needle, you need to place the seeds in these drops. When doing the work, you do not need to first apply all the paste, then proceed to the seeds, since by that time the first drops can already dry out. Alternate between the two for best results. After the end of the process, leave the strips with seeds unfolded to dry, this will take at least a day. Then carefully roll them up and store in a dry and cool place until you start gardening.
Planting carrots on a tape with your own hands
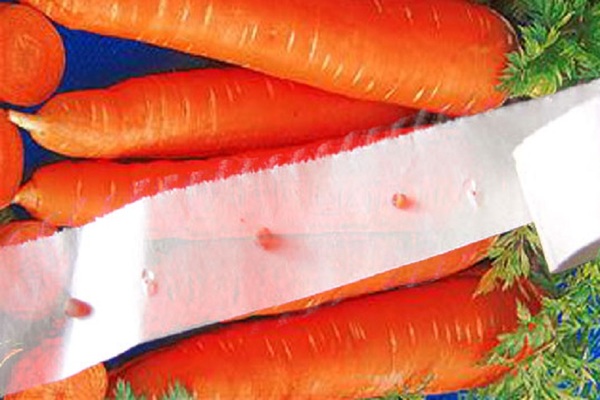
Carrot seeds on the tape: photo
Before you start the process of planting carrots on the tape, you need to carefully prepare the soil, and it is recommended to start this preparation in the fall. Determine exactly where the carrots will grow, since it is not recommended to plant them for two years in a row in the same place (and also after celery, dill, parsley). It is believed that the best precursors to carrots are nightshades (tomatoes, potatoes) or legumes (beans, peas, beans). Once you've chosen a spot, dig deep into the garden and remove all weed roots, this will make your weeding process much easier for the next season. In the spring, this procedure must be repeated and immediately before planting, loosen and then level the soil with a rake. Make the target number of furrows and water them abundantly with warm water, the distance between the furrows should be at least 10-12 cm.Finally, carefully lay out your paper strips along the grooves, placing them with the glued seed side down. Carrot seeds germinate for a very long time, so to create additional comfort after planting, you can cover the bed with an opaque film or non-woven covering material. This technique will help to retain heat and moisture, as well as slow down the growth of weeds, which usually appear in the garden much earlier than carrot shoots. The edges of the covering material must be well secured by pressing them to the ground with stones or boards so that it is not blown off by the wind. After 14-17 days, the shelter can be removed, provide access to sunlight, and expect a friendly emergence of seedlings in the near future.
Conclusion
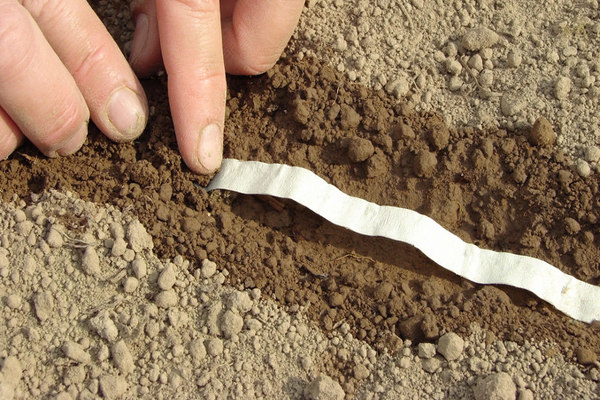
Carrot seeds on the tape: photo
Of course, carrot care on the tape does not end there. You will need to regularly weed the beds until mid-summer (by this time the tops will grow and block the access of sunlight to the weeds), carefully loosen the soil so that a crust does not form on its surface. After the roots, as they grow, begin to crawl out of the ground a little, they will need to be huddled so that they do not turn green near the base. All this is necessary for a good harvest. But by planting carrots with tape, you save yourself the need to thin out the plantings at a time when the plants are still fragile and delicate, and they are easily damaged. Preparing the ribbon for planting is a painstaking and responsible process. But with proper seed preparation and planting space, further plant care will be much easier. And the result, that is, the harvest, will become much more impressive.


