When to plant clematis
Content:
Many gardeners rightfully believe that the rose is the real queen of the garden, which has no equal. However, if this is so, then clematis is worthy of the title of king, because he, like a rose, is incredibly beautiful and gentle. This king has many names: besides Clematis, he is called Clematis or even the Prince. Clematis, like roses, are fairly easy to propagate. There are ways even beginners can handle it. You can propagate it by layering, dividing and, in the usual way, by cuttings. However, after breeding, newly-made seedlings need to live somewhere. Doesn't the king of flowers deserve the best possible spot in the garden? In this article, we will figure out where it is worth planting clematis, planting at what time is most suitable so that they are effective and beautiful.
Hopefully, these tips will really help you, and after reading, your clematis will only grow in the best areas of your garden.
Clematis planting: how to care for a seedling before transplanting
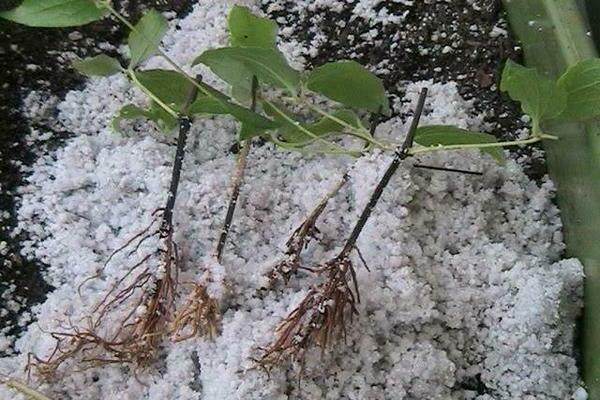
Before you move a clematis seedling to its new home, you need to save it. After all, you cannot plant it immediately after cutting it. Therefore, for some time he will have to live with you (in a house or in an apartment), and care for him should be as careful as possible.It is important to note that the seedlings are different, and it is very important to figure out which one you want to plant you, and what kind of care should be taken.
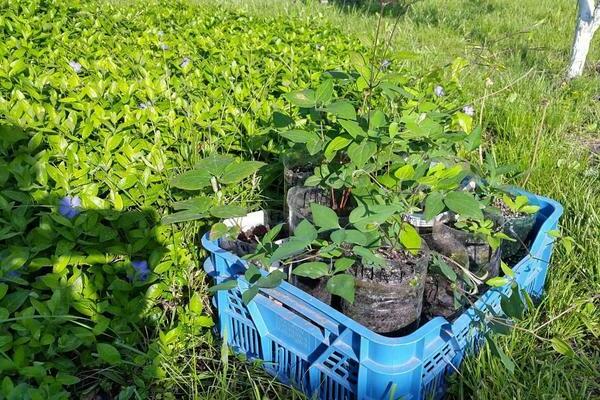
(Z.K.S.) - This abbreviation stands for Closed Root System. It is these saplings that you will most often find in the market or in stores. Often they are sold in boxes, but some sellers will immediately plant these seedlings in pots.
(O.K.S.) - As you probably already guessed, this clematis seedlings have an open root system. They are sold exclusively in plastic bags, in which, in addition to seedlings, there is a little peat fertilizer.
However, we strongly do not recommend buying the second type of seedlings, because they take root much worse, have much less efficiency, and simply grow more slowly.
How to keep an open cutting
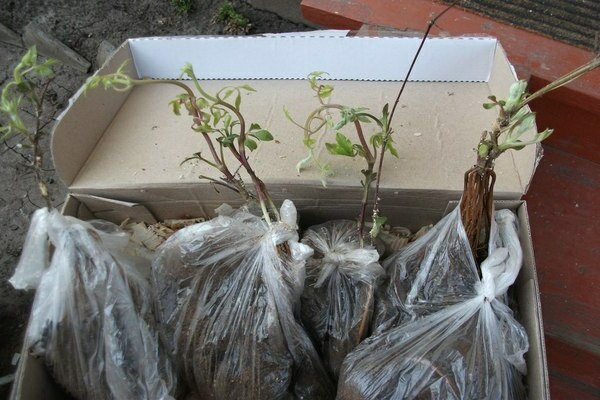
When it comes to storing a seedling before spring planting (if, of course, you decide to choose a seedling with an open root system), even a beginner can handle this, because the rules are incredibly simple.
First you need to remove the seedling from the packaging and clean it from the peat contained inside. If you find physical damage at the root, it is necessary to trim the damaged areas until there are none at all. However, open cuts are a great way for fungi to get inside the plant. In order to prevent this, it is necessary to soak the root in a solution of some fungicide before planting.
Important! Follow the directions when using fungicides. Otherwise, you can seriously harm the plant!
Clematis - planting an open cut before the final transplant
Now that the seedling is ready, you can plant it in the ground. We will use an ordinary plastic bottle as a container. We cut it off in the place where the bottle begins to narrow and turn into a neck. After that, it is imperative to make holes.They will serve as drainage. Now you need to pick up the soil. Neutral, fertile soil is best.
It remains only to carefully look after clematis and wait for the onset of a suitable date. Most often this period is spring. So, it's time to plant clematis. How best to do these. In fact, a technique is very often practiced in which clematis is planted directly in the bottle, without removing it from there.
This greatly simplifies the process of caring for the seedling, but after a year you will have to dig it up and plant it again. This time will be enough for the flower to develop and grow enough to grow on its own in the open field. For some time, clematis will feel very uncomfortable in unfamiliar conditions, and therefore in the first two to three weeks, care for the seedling should be especially careful.
Important! The seedling can be planted in the ground without a bottle, but in this case you will have to take very good care of it in order to prevent all kinds of infections, infestations and diseases. And in principle, watering and weeding will have to be more frequent procedures.
How to keep a rooted stalk?
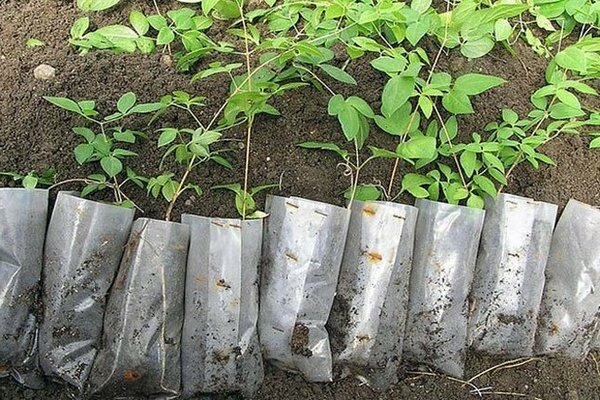
The first and most important rule of caring for a rooted cuttings is the time of purchase. Unlike a seedling sold in a plastic bag, a cutting served in pots and boxes should not be purchased earlier than three to four weeks before planting. However, this rule, like all subsequent ones, is very simple.
Below is everything you need to know to successfully preserve a seedling:
- The most destructive thing that can affect the seedling immediately after purchase is direct burning sunlight. The plant at this time will be very weakened, and the scorching sun may well cause very serious damage to it. Therefore, the best option would be to find some place for the seedling where only diffused light will fall. This, however, does not mean that you need to put it in the shade. A room with a window to the west is much better suited for these purposes. But after three weeks, when the seedling gets stronger, it will be possible to put it in the sun.
- If there were buds on the seedling when buying, you should get rid of them, no matter how beautiful they are. The buds are a very serious load for the flower, and if it spends extra energy and nutrients on them, then, quite possibly, the sprout will die after some time, simply not being able to withstand it. Therefore, when you get home, you will need to cut the buds with a sterile garden knife. This will make life much easier for the future king of your garden.
- Regular watering of clematis is equally important. However, remember that this plant is very picky about the moisture in which it has to grow. Therefore, the most important thing is not to overdo it with the amount of water with which you water your clematis.
Clematis planting - care for rooted cuttings
However, it is not recommended to use ordinary water as an irrigation liquid. During this period of life, the seedling is not very adapted to protection from all kinds of fungi and infections, and therefore, it is necessary to mix water with some kind of fungicide. This will significantly reduce the chances that something will happen to your seedling even before you have time to plant it.
Watering should be frequent - at least once a week. Also, exactly the same solution that you use for watering, you can spray the root zone of clematis, because it is through it that fungi most often enter the plant.
Often, the containers in which such seedlings are sold are not very voluminous, and therefore, if for some reason you could not take the first advice and bought a cutting too early, you can transplant it.
A bottle with drainage holes (the same one that we made for seedlings with an open root system) or a fairly tall pot is suitable as a new container.Such a transplant will help the plant to survive more comfortably for several weeks before planting.
Important! Fertile soil must be poured into the container. Otherwise, it will be more difficult for the seedling to hold out until the appointed time.
Also, during your cohabitation with the seedling, you can feed it a couple of times. However, this should not be an ordinary procedure, which will be carried out with and without reason. You should resort to feeding only if the seedling does not feel well: it wilted or looks lethargic. In this case, even a mixture of several complex preparations can be used.
Important! When buying a seedling, it is very important to read the instructions on the package, because it is vital for us to find out which pruning group it belongs to. This will become especially important when we start further caring for the plant, namely, pruning.
When clematis is planted: in autumn or spring
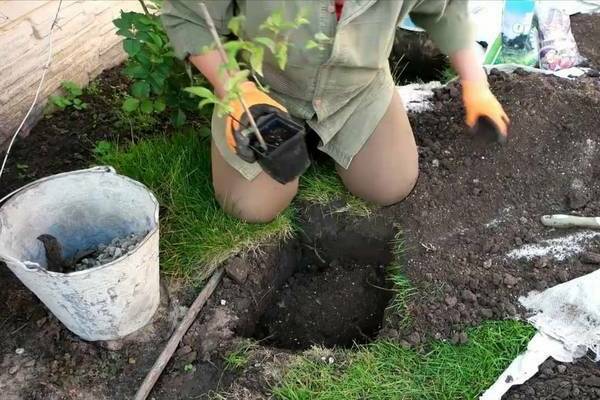
If you want to hear a short answer - of course, spring is a more suitable season for planting clematis, at least simply because planting seedlings in spring is more convenient and practical.
However, there are several nuances here. For example, seedlings with an open root system should be planted exclusively in spring, but cuttings with a closed root system can be planted even in summer. However, it will be easier to do this in the spring anyway.
Planting clematis in the spring - the best timing
The most suitable time of the year for planting clematis is, of course, spring. However, which months to choose. If you have standard weather conditions, then, of course, the end of April or the beginning of May is best. However, our country is incredibly huge, and advice suitable for the southern strip can easily ruin the planting of clematis in the northern strip.
So there is simply no universally perfect date. However, you can list the dates that fit a particular band.
For example, in the south, clematis can be planted in early April. In the middle lane, the dates indicated above will be the most suitable - the end of April, the beginning of May. In the north, clematis planted at the beginning, maximum in mid-May, will show themselves best.
Clematis: landing and lunar calendar
If you want to adhere to the lunar calendar, then we offer you the dates that will be the most or least favorable for planting seedlings. However, we want to draw your attention to the fact that relying on the lunar calendar can be a dangerous undertaking.
The boost in growth that the moon gives is so disproportionately small compared to the effects that timely watering and proper feeding have on the plant, that, hoping that the moon will do everything for you, you can lose clematis.
So if you feel like it, you can stick to the calendar. Only here it is not worth considering that a suitable landing day is already half the battle. Always rely only on your knowledge and strength.
Dates for 2019:
Clematis landing, Auspicious days: In March, all numbers from the fourteenth to the thirtieth will be suitable for planting clematis. Exceptions are numbers from twenty-first to twenty-fourth. In April, you will be pleased with all numbers from the seventh to the seventeenth and from the twenty-fourth to the end of the month. In May, all numbers from the sixth can be considered more than favorable.
Clematis landing, Unfavorable days: In March it is the sixth, seventh and twenty-first numbers. In April - the fifth and nineteenth. In May - all the same as in April.
Planting clematis in open ground in spring
Now that you know how to save clematis before planting and how to prepare it for it, you can proceed directly to the planting itself. To do this, you, as well as to perform any procedure, will have to follow the rules.
Fortunately for you, as you probably already noticed, clematis is not the most demanding plant in the world.
How to choose a suitable location and soil?
In order for your clematis to grow exclusively in the most suitable place for it, you should adhere to these simple rules:
- The place should be sunny, because clematis is a plant that loves to bask in the light. However, the planting area should not be exposed to direct sunlight throughout the day. On the other hand, it can kill clematis, so it is best to choose some semi-shaded area. It is especially important to adhere to this rule if your clematis flowers are brightly colored.
- The most dangerous external factors that can significantly weaken your clematis are drafts. Clematis does not like them very much and it is important to provide tolerable protection from them.
- An equally important tip - never plant clematis close to buildings, fences and walls. Not only does this significantly limit the space for the roots of the plant, but you also allow waterlogging, since water after rains will drip from the roofs and over-water the clematis. So it is advisable to keep a distance of at least one and a half meter-meter between the nearest building and the bush.
- Also, an important factor that will significantly affect the future location of clematis is its future support. In the end, clematis is a climbing plant, and it needs support like water. And if you plant a seedling thoughtlessly, in the future the support may not only hinder you in the planting site, but also simply cannot fit there. Therefore, always plan ahead.
- There is also an element of the landscape, planting clematis in which is not only undesirable, but can also cost you a plant. We are talking about the lowlands. They are dangerous in that they collect a large amount of moisture, which, as we have already found out, can be detrimental to clematis. Therefore, the best thing you can do is create a small moat around the planting site, or plant a seedling on an artificially created hummock. Along with it, a high bed is also suitable.
- An even poorer planting spot than the area next to a regular fence is the area next to a metal fence. The fact is that on hot summer days, such a fence heats up critically and can greatly harm the plant, which has decided to circle around it.
As we noted a few paragraphs above, the soil in which you are going to plant clematis should be neutral, sufficiently loosened and very fertile. The worst soil in which you can plant a sprout is sour, since it is precisely such an environment that clematis does not tolerate at all.
Advice! If you want your clematis not only to look beautiful on its own, but also in harmony with the environment, you can plant it next to a wooden gazebo or fence. This vine will look very stylish and cozy.
Clematis planting a seedling: how to prepare the soil and planting hole
As with any plant, the clematis pit and soil must be prepared in advance. This is done so that the soil has time to settle before planting. The most suitable time is one and a half months before planting. Although, in principle, you can do this later. However, not a week before landing.
How exactly to do this is below.
Naturally, like any other work, this must be done clean. Therefore, before you start digging a hole and filling it with nutrients, it is necessary to clear the place of work of stones and weeds.
If acidic soil prevails on your site, then you definitely need to do something about this, because clematis in no case wants to grow in it. And if he wants, he will do it very sluggishly and reluctantly. Therefore, you just need to somehow deoxidize the soil. There are a huge number of preparations for this, but wood ash can also be used.
To add the drug to the soil, you must first dig it up. After the "medicine" is added, it is necessary to loosen the soil so that the active substance spreads evenly over it.
However, the neutrality of the soil is not enough for clematis to take root well in it. You also need to take care that the soil is not too heavy. To do this, you need to dilute it with peat and sand. For one square meter of soil, you will have to spend about one bucket of each of these two substances.
It may, however, turn out to be the other way around, and the soil on your site will be too light for clematis. In this case, it is necessary to make it heavier. With this task, for example, sod land, laid directly on the bottom of the pit, copes well.
Clematis landing, digging a hole
Now that your soil is ideal for clematis to settle in, you can start digging a hole.
Its dimensions have long been established by experienced gardeners and should be about 70 centimeters in height, width and depth. Although, if you make the pit a little smaller, it will not be critical
The first thing you add to the hole should be a drainage layer. It is necessary, because, as already mentioned, clematis absolutely does not tolerate excessive waterlogging. In addition, it cannot be ruled out that underground waters lie under the pit. A layer of drainage that is about 15 centimeters thick will help protect the sprout from them.
As a material, you can use pebbles or even finely battered brick. Although, the latter is not recommended to be used, because it collapses over time under the influence of moisture.
Now the hole needs to be filled with nutrient soil. To do this, we need several ingredients, which include: ordinary fine sand, peat for planting plants, prepared humus in advance, as well as fertile sod land. All of these ingredients must be well mixed together before you pour them into the pit as a homogeneous mixture.
After all the ingredients are in the hole, all that remains is to add a little mineral fertilizer. One hundred and fifty grams should be enough. You can also add a glass of wood ash. Now that the procedure is completely completed, it is necessary to water the resulting mineral mixture abundantly so that you do not have to plant clematis in dry, lifeless soil.
Important! If you want to plant several clematis bushes at once, you need to keep a distance between them. The most optimal distance is one meter. This is done so that the shrubs do not fight among themselves for water, nutrients and minerals. However, if you want to see several clematis in a tight space (for example, in a flower bed), you can maintain a distance of only thirty centimeters.
Clematis planting - how to prepare a seedling
Before planting a seedling in a completely new and unfamiliar environment for him, in which he still has to get used to, it is necessary to thoroughly prepare it. However, this procedure applies specifically to the cutting itself. It is not necessary to renew the soil in the storage container.
In order to correctly and competently carry out the preparation, you must perform the following steps:
- The day before direct planting, it is necessary to soak all the roots of the plant in a solution that stimulates growth and development. How to properly dilute it will be written on the packaging with the active ingredient, so follow the instructions carefully.
- If, suddenly, mold or rot appears on the spine, then the damaged areas must be removed until only healthy tissue remains.
- After that, you need to resort to some kind of fungicide that will help the plant not to get infected through the exposed tissue. If the roots have grown too long, they should be cut off. Usually a third of this length is enough.
- Above the root collar, while the plant was gaining strength before planting, small leaves could appear. We will definitely need to get rid of them, since we will have to deepen the petiole, and the leaves will greatly interfere with this.
Clematis planting a seedling
Now that the planting hole is completely ready, you can start planting the seedling directly. In order for your clematis to be the most effective and produce the most flowers, you must follow the instructions below:
- First of all, the pit, before planting a sprout in it, must be compacted.
- Now, if you bought a clematis seedling with an open root system, you need to form a slide from the fertilizer in the pit. It is on this hill that we will plant the roots of the future clematis.
- To do this, you need to take a prepared seedling, spread its roots and plant them on an earthen slide in such a way that they are all evenly distributed in different directions. In addition, it is very important to ensure that the roots do not bend or break.
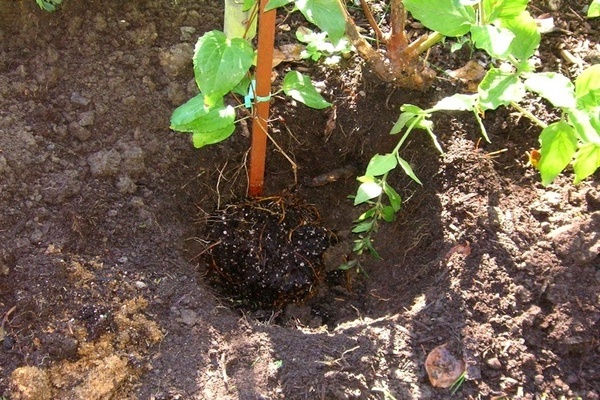
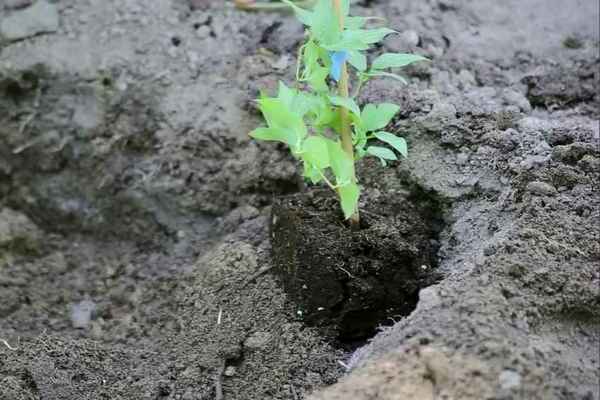
- If you bought a seedling with a closed root system, you need to act with precision, and vice versa. In the center of the hole, another shallow hole is pulled out, into which you insert an earthen lump formed around the roots of the seedling.
Now let's talk about deepening. This is a very important procedure. It is carried out in order to strengthen the immunity of the plant and contributes to its safety during frosts. In order to correctly carry out this procedure, it is necessary to sprinkle a little earth on the root collar. In our case, eight to twelve centimeters will be more than enough. In addition to the root collar, our deepening should also affect several buds of the future clematis. This will help them grow and develop faster.
Now you need to cover the entire resulting structure with earth. It is taken from the outer layer of the pit. As it falls asleep, the ground needs to be gradually compacted so that the seedling is held firmly and firmly in the ground. A small hole is made around the trunk, which will make it much easier to water the plant in the future. In addition, if the edges of the hole are slightly raised up, this will also serve as a primitive protection against waterlogging during rain.
Clematis planting a plant - what actions do we perform immediately after planting
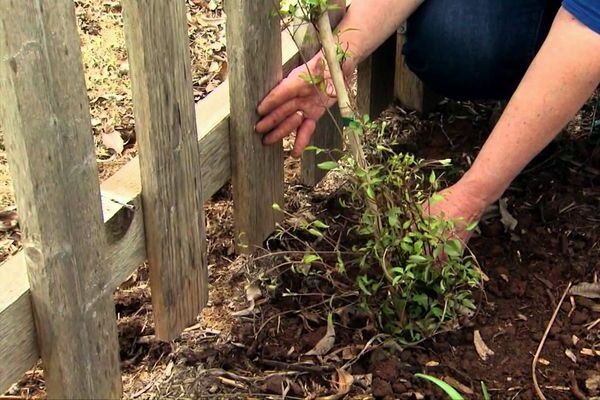
Immediately need to water clematis, in order to instantly provide him with a boost in growth. You will need to pour about three to four buckets into one hole.
For the first time, while there is still no support next to the clematis, an additional reinforce it with the help of a wooden peg placed next to it. A plant tied to it will grow more confidently and quickly adapt to a new habitat.
It is advisable to carry out a procedure called mulching... It consists in the fact that you cover the soil around the trunk of the plant with sawdust, needles or fallen leaves. This procedure is not necessary at all, but it is incredibly useful, since it allows not only to retain moisture and prevent its evaporation, but also protects clematis from weeds that constantly strive to steal food from him.
Also, after planting, it is highly recommended to cover the plant with a special film material for a while. It is not difficult to do this, however, in the event that return frosts begin or, suddenly, a strong wind rises, your clematis will be completely safe.
Important! At first, the soil around the root collar will not be dense enough and during irrigation it will be greatly eroded by water. To prevent this, it is necessary to add some soil back after the first few waterings.
Clematis: planting and care after planting
As you have probably already noticed, caring for clematis is a fairly simple task that any amateur gardener can easily handle. Nevertheless, the first year of caring for clematis should be the most difficult, because at this time you need to be as sensitive and attentive to the plant as possible. So you can provide him with a good future and the present title of king of your site.
As already mentioned, at first clematis will feel very uncomfortable in a new place.Therefore, the first few weeks will have to shadeso that against the background of general stress, the plant does not receive several sunburns.
This should be done until clematis loses all signs of lethargy. The best way to shade is with arcs through which you can stretch a special agrofiber, which will perfectly protect clematis from the sun. It will also help the plant not to fall prey to strong winds.
However, the most delicate topic for clematis is watering... In the first year after planting, they need to be monitored especially closely so that there are not too many of them, but at the same time, not too few. This means that, along with the drying out of the soil, its excessive waterlogging should not be allowed. As they say, you need to stick to the golden mean.
On average, the plant is watered only once a week, however, if the weather is hot outside and, moreover, if you have not mulched, the number of waterings must be increased to two or three times a week. On the contrary, when autumn comes, you need to reduce watering.
As we have already mentioned more than once, no less important than watering, the procedure is mulching... This easy process performs many useful functions, and therefore it is highly recommended to carry out it.
The benefit of mulching is that on hot days it prevents moisture from leaving the soil around the plant too quickly. Also, let’s repeat, mulching is the best weed control currently available, so if you’re not mulching yet, it’s not clear what are you waiting for?
Also in gardening, you need to pay great attention the neighborhood different plants, because the neighbors can not only look very beautiful together with your plant, but also, perhaps, help him cope with some difficulties.
For example, flowers such as marigolds and marigolds are among the best neighbors for clematis, as they provide amazing protection against many insects. Along with watering and mulching, it is necessary to regularly carry out loosening soil.
It is especially important to do this after watering or after heavy rain has passed. With this procedure, oxygen will flow much better to the roots and will accelerate the growth of your clematis.
Even if you have a layer of mulch, you shouldn't assume that the weeds will just pick up and disappear. Unfortunately, they will still appear, and your direct task is to exterminate them at the earliest opportunity.
And, of course, it is necessary to mention pruning, because this is, in principle, one of the most important procedures. It is she who directly decides how your clematis will grow in the future.
In the very first year after planting, pruning takes place according to a very simple scheme: you simply cut off the shoots at the level of twenty to thirty centimeters above the ground. In all subsequent years, pruning is carried out according to a more complex scheme, which is determined by the pruning group of your clematis.
There are three of these groups, and it is incredibly important to know which of them your clematis belongs to.
The last procedure - sheltering clematis for the winter. Clematis is not a plant that tolerates cold very well, and therefore it is simply necessary to take care of protection. This procedure is especially important in the northern regions. By the way, it is also much better for them to buy clematis of the third pruning group, because covering them for the winter is so simple that it’s just a pleasure.
Clematis planting by seeds
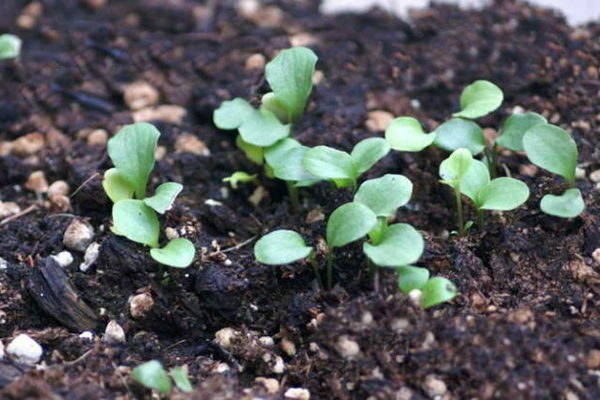
Yes, that's right, clematis can be grown from seeds as well. All that is needed for this is to plant seeds for seedlings. However, this breeding method has one catch: it does not allow hybrid varieties to be propagated. Their offspring will simply not have the same hybrid qualities. However, for species varieties, this method is quite effective and can be used.
Before planting seeds for seedlings, they must be disinfected and protected from all kinds of viruses and bacteria.For this, you can use coconut substrate. You can also use ordinary seedling soil instead. The seeds need to be pressed into it a little and all this “pie” should be put in the refrigerator for a month and a half.
Caring for seedlings obtained from such seeds is no different from caring for any other.
Conclusion
Clematis is an incredibly unpretentious king, and even a beginner in gardening can easily cope with him. All those procedures that we described above are, in fact, incredibly simple compared to many other plants that require almost daily attention. And how to plant clematis: planting with cuttings or seeds will be chosen by you - it is not so important.
Nevertheless, it is still incredibly important to properly care for clematis: watering it, feeding it and weeding it on time. We hope we have clarified the question of how to do this, and you will never again have questions about how, where and when to plant clematis. And, having answered all these questions, you can easily transform your garden beyond recognition. Good luck with that.

