How to make beds
Content:
Productivity is perhaps one of the most important indicators for summer residents and gardeners. Therefore, everyone, of course, wants it to be as high as possible. However, the yield depends on a huge number of all kinds of parameters, which include not only the correct agricultural technology and the quality of the seeds, but also the quality of the beds on which your crop is grown. Therefore, in this article we will try to enlighten those who, for some reason, have not yet taken up the issue of beds on their site. We hope everyone will find something useful in it or learn from scratch how to make beds on their site.
Choosing a place for the garden
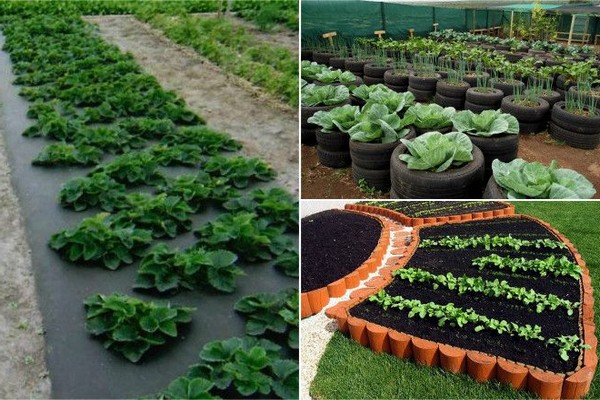
Building beds is an extremely multifaceted process, which, in order to be performed correctly, requires adherence to many small nuances, such as, for example, choosing the right place for planting. After all, for example, not all plants like the direct rays of the hot sun. Peas or sorrel are crops that grow remarkably well without them. Such little things are what first of all need to be considered when building beds.
However, leaving peas and sorrel aside, keep in mind that most existing crops prefer to stay under the sun for as long as possible. Therefore, try to place the beds in such a way that they will be bathed in sunlight for at least 6 hours during the day.
However, the illumination of the area you have chosen is not the only thing that should be taken into account when choosing a place for building beds. The process is also complex, and therefore requires compliance with some rules. Namely:
The most suitable place to plant your plants is in flat terrain, and there is a simple and understandable reason for that. In the event that you decide to plant crops in a deepening or on a hill, the earth will heat up much less actively, just as it will give off heat, because there is much less soil around which you can transfer energy. Therefore, plants planted on such landscape irregularities will suffer much more from both overheating and hypothermia.
The previous statement is also true for water, which, both in depressions and on elevations, will stagnate for too long, which can lead to negative consequences for the roots.
However, any imperfections in the landscape can result in problems for your plantings. For example, a too steep slope right next to the crop can make the irrigation process extremely difficult: water will simply flow down it.
The space around the garden bed should be as spacious and free as possible: all kinds of buildings, as well as trees, can shade future plants too much and thereby significantly reduce their yield.
The best direction in which we advise you to position your plantings is from north to south. It is in this position that they will be best illuminated by the sun's rays.
If you want to calculate approximately how much land you will need to grow vegetables in order to feed the whole family, then you can proceed from the fact that only one hundred square meters are usually planted for three to four people. The rest of the site is usually given to flowers and berry crops.
If you are worried about not only the practical, but also the decorative side of building beds, you should carefully monitor their size. The maximum correct size suitable for any garden will be 3.5 * 0.8 meters.
Also, when planning the placement of beds on your site, do not forget that not all plants get along well with each other. Many of them do not "tolerate" others at all, so it is better to play it safe and check if your fit is compatible.
The optimal size of the beds
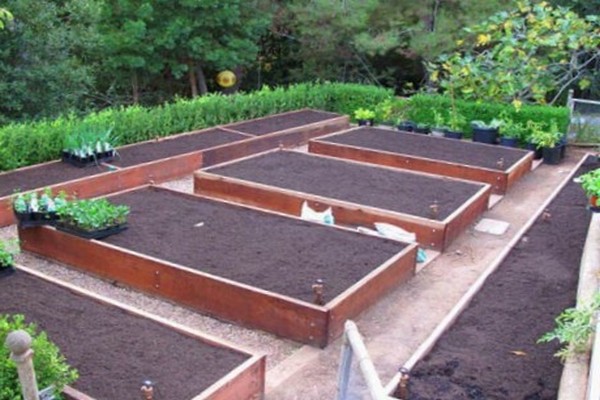
In fact, the size of the beds is almost irrelevant. The only thing that can really suffer if you choose not the most suitable size is your ease of movement around the site. Agree, it is much more difficult to bypass a ten-meter garden bed than a four-meter one. That is why 3.5 meters are taken as the standard for the length of the beds. According to experts, it is easiest to move around the site with just such beds. However, you can make them either a little longer or a little shorter, in the event that this or that circumstance requires it.
The width of the beds is a less optional variable. It is better not to change it and stick to the one that all experienced gardeners in the world have adhered to for hundreds of years. What is this standard width? 0.8 meters. It was to this number that gardeners and summer residents came for a long time. Maybe there is some deep and complex reason for this. No, the answer, again, lies on the surface: weeding wider beds is a real torment, and making narrower ones is simply ineffective. This is where this gold value comes from, and it is highly undesirable to experiment with it.
The only plant that, perhaps, can challenge this golden width is carrots. Much narrower beds are suitable for her, namely those having a width of about 0.4 meters. The fact is that this plant does not like to be crowded at all. In the same way, he does not like the neighborhood with any other plants (especially tall ones). Otherwise, you will be able to observe extremely low yields and growth rates of your plantings.
The most suitable shape of the beds
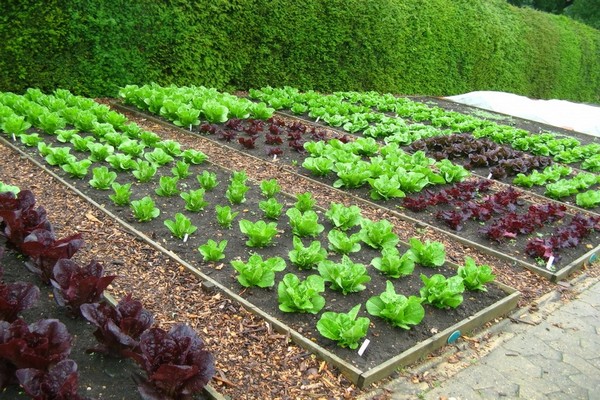
In fact, there are no “most” suitable bed forms. There are only those that you like and those that will be convenient for you to use on your site. You can make ordinary rectangular beds, but you can also dream up by making them triangular, round and even completely irregular in shape. The main thing is to make sure at the planning stage that each of them will be fully accessible for watering, weeding and other procedures.
A completely different question is the height, which can depend on a very large number of factors. The type of site, the plants that will live on it, the type of soil, and so on. However, it is simply impossible to perfectly calculate all this, therefore, the optimal height for almost any garden bed is considered to be half a meter or a little less. The beds above should be done only if your site is too swampy and the soil is incredibly wet. Then a high bed will help you save the roots from decay.
Nevertheless, building such a tall bed is a very difficult task that will require titanic efforts. Moreover, not only from your side, but also from the side of your wallet. Just imagine how much fertile soil you have to bring to the site in order to fill just one bed with soil.
Another reason a gardener might want to raise a garden is to keep some plants in a special temperature regime. For example, cucumbers are a heat-loving crop, and the only way to achieve early ripening by growing them is to keep them in areas with high temperatures. This is where high beds will help us, whose properties help them heat up faster.
It is also quite possible that tall beds seem much more comfortable to you.In the end, keeping a huge vegetable garden and bending over in front of each bed is not the most pleasant entertainment. However, when raising plantings, do not forget that at high altitudes the ground dries up much faster, which means that watering will be needed much more often.
And finally, it is worth mentioning that the beds can be raised if the plants are in the shade.
How to equip a high bed?
Obviously, before you arrange the garden, you need to find it somewhere. Or do it yourself. For this, completely different materials can be suitable, such as wood, stone, plastic or steel.
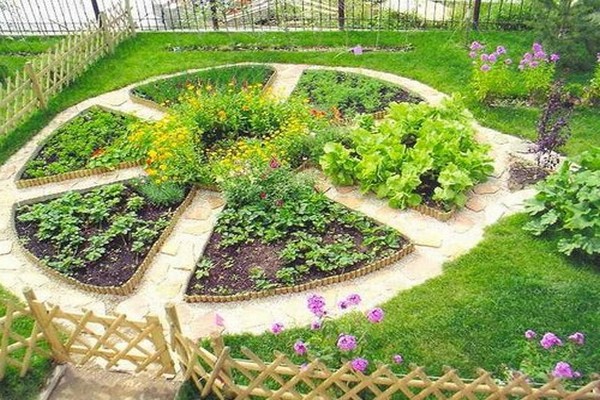
First of all, the installed bed must be protected from rodents. To do this, we cover its bottom with a special metal mesh, which will prevent any living creatures from getting into the ground.
Before filling the bed with fertile soil, it is necessary to fill the drainage into it. Crushed stone or, in extreme cases, broken bricks are most often used as it. This drainage layer should be at least 15 centimeters deep.
You probably want the plants in your garden to “feel” safe. To do this, before pouring the soil into the box, it is necessary to disinfect it with antifungal and insecticidal agents.
In the event that you do not welcome the use of chemicals in your household, you can use a slightly less effective method of disinfection. To do this, you will need to mix earth with wood ash. It is a great natural cleanser that will ward off pests.
A distance of at least 5 centimeters must be maintained from the edge of the box to the ground level.
Which drain to use?
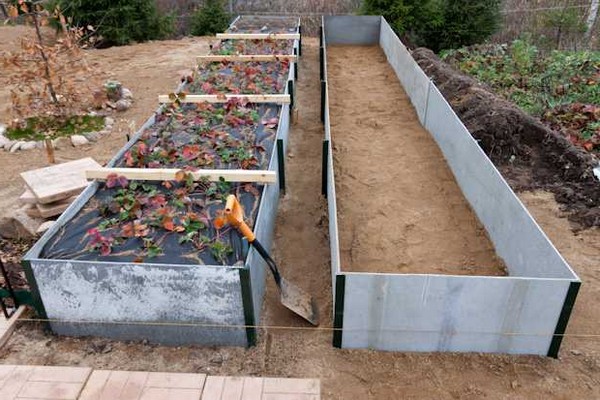
In the last section, a few words were said about drainage, but this topic is worthy of a separate discussion. In a particularly swampy area, you cannot do without it, since many plants are simply not able to survive in such harsh conditions. Even vegetables and berries that survive well in almost any soil are not capable of producing good enough fruits.
For example, their taste is noticeably deteriorated. Much less sugar is deposited in fruits due to the swampy area, which, of course, negatively affects their taste. In general, drainage is essential if you want to keep your plants healthy. After all, this is the only way they can provide you with a good harvest.
However, it is also important to note that this does not apply to all cultures. For example, cabbage, zucchini and cucumbers cannot live without a lot of moisture, and they do not need so much drainage. These, contrary to the common misconception, also include garlic, which, along with cabbage, is unable to get enough nutrients in dry soil.
Nevertheless, many, almost all other plants need drainage at the same level as the water itself, and the area in which they grow is desirable to drain. The above cultures do not need this, as already mentioned.
In order to properly lay the drainage, you will need:
- Dig ditches around the perimeter of the beds. Their depth should be approximately half a meter. Slightly deeper ditches can also be dug.
- The bottom of a freshly dug ditch is filled with a mixture of sand and gravel. Instead of the latter, it is quite possible to use broken brick. The thickness of the scattered layer should be about 25 centimeters.
- On top of this layer, you must also pour sawdust or prepared humus in advance.
- And finally, on top of everything else, you need to pour ordinary soil.
Multi-tiered beds
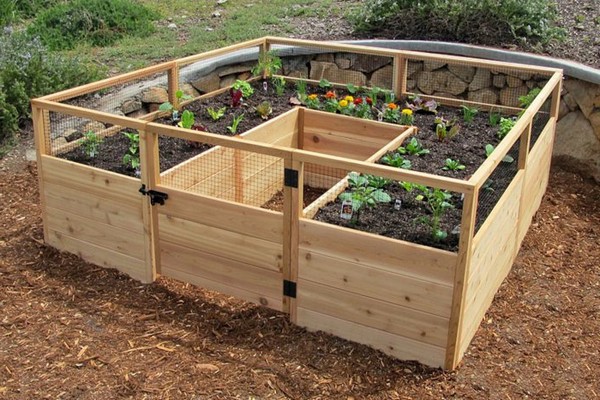
Such beds can seem like a very beautiful and interesting find. In addition, it would seem that they remarkably save space on the site. However, it is much more difficult to care for plants planted in this way than for standard beds.And, to be honest, they are most often used exclusively for planting ornamental plants, since planting potatoes or carrots in them would be a real test for your gardening skills.
Obviously, multi-tiered beds, purely physically, cannot be large enough to grow vegetables or, for example, watermelons on them. However, plants with a not too developed root system take root well in such "high-rise buildings". For example, absolutely any greenery will feel great in them. In addition to it, strawberries, all kinds of flowers and even miniature tomatoes can be planted in multi-level structures.
If you want to build a multi-tiered structure with your own hands, you can use materials at hand. However, it is highly undesirable to use any metal for this purpose: they heat up too much in direct sunlight, which, given the small volume, can have a very negative effect on plants. However, if you still cannot do without metal boxes, you will have to paint them in reflective white.
Also, to create such a multi-tiered structure, you can use boxes specially sold for this, whose shape, volume and material from which they are made are already ideally verified.
Lazy beds
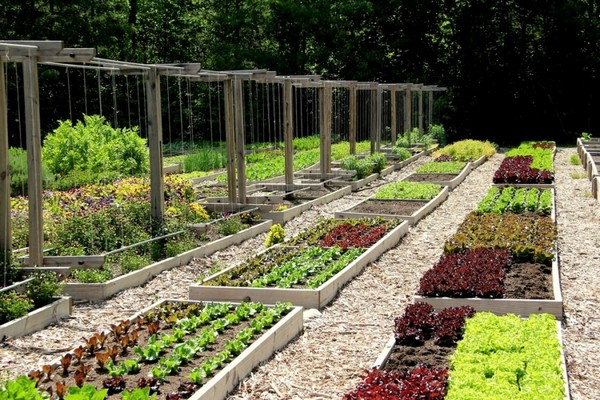
Surely, such mounds can be found in everyone in the country or in the garden. They are often used when a large number of plants need to be planted. Such beds have both obvious advantages and noticeable disadvantages. They do not protrude too much above the ground and outwardly look like volumetric trapezoids, in which they made holes and planted seeds in them.
Perhaps the biggest problem with these beds is that they have to be rebuilt every season, because they do not survive the winter weather very well.
To form a lazy bed, you first need to dig a shallow ditch in the ground. Fold the earth dug out of it to the edges of the newly formed depression. It remains only to level the ground, and "voila": your garden is ready!
It would seem that everything is so simple, but even here you need to follow certain rules. For example, depending on how dry the land is on your site, the height of the embankment should change. The drier, the lower. Accordingly, in swampy areas, everything is done the other way around: the trench is dug deeper, and the embankment is made higher. If the garden bed is done on sandy soil, you don’t need to do anything. Just dig up the ground as usual and mark the paths with footprints. That's why this bed is lazy.
Boxes for beds
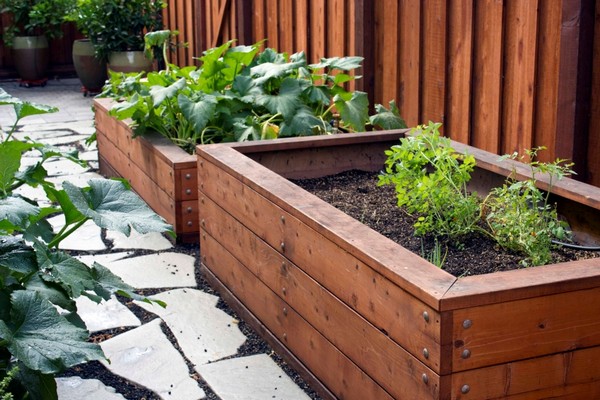
As you probably know, most gardeners are people who love beauty and art. Perhaps you yourself are one of those, and for you the beauty of the site is not in the last place. Therefore, your choice will most likely fall on decorative boxes for the beds. In fact, such boxes are a favorite requisite of any gardener, gardener and summer resident. Who does not want to have not only beautiful beds, but also clean, neat paths in addition.
When using boxes, paths are often also ennobled: for this, you can use either wood or tiles, or more solid concrete.
Naturally, the boxes are also not installed thoughtlessly and the earth needs to be prepared for them. For this, the land in the desired area is completely dug up, and all weeds are removed. Even watering is also very important, so after weeding, level the area to be prepared.
If you are going to install a box on an already planted area, then know: this is not the best idea. Perennial plants can take root under the walls of the box, after which they will emerge to the surface. Therefore, before installing the box on any site, you should thoroughly dig it up.
Unfortunately, getting rid of the roots of perennial plants in just one go is simply an impossible task, so this is done in two passes: in spring and autumn.In order to somehow facilitate your work, you should try to dig up as many roots as possible, pull them to the surface and wait for them to dry so that it is easier to pull them out.
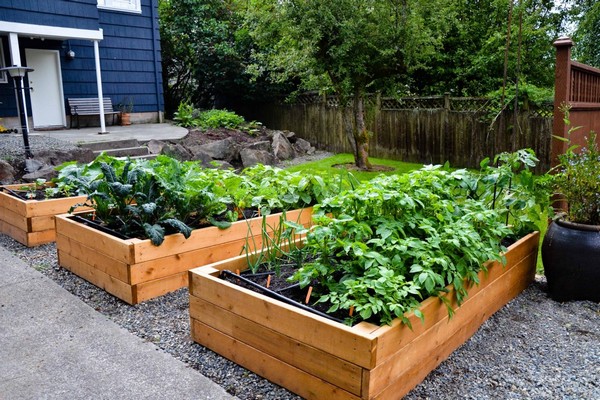
Wooden box
The most ordinary box that you can make yourself at home consists of four long and eight short boards. This is exactly how much you need to build the desired structure. You will also need bars with which all these boards are connected in pairs. In order to secure all this firmly, you can use nails, screws and even metal corners.
In addition, on the outside of the bed, you will need to install four metal pegs, which will strengthen the structure, preventing it from falling apart. In addition to strength, you should also take care of the aesthetics of the resulting box. To make it even, check all the walls with a building level.
Box made of stone or concrete
If you want your fences to be stronger, more durable and reliable, we advise you to use stone or concrete. However, it's worth knowing that using these materials for a large number of boxes can hit your budget hard.
In addition, the very procedure for creating these boxes is a very long and painstaking task, not to mention the fact that such a bed cannot be moved in any way. However, if you are willing to sacrifice these factors, stone fences are at your service.
Metal boxes
Metal is also the worst material for making bed boxes. Despite the fact that this material is rather heavy, the construction of the box allows it to be easily transferred to another place. In addition, the metal is easy and practical to paint, which allows the gardener to personalize his property as much as possible.
The only drawback is that making such a box with your own hands is not possible without special equipment and welding skills. However, if you are not afraid of biting prices, metal boxes can be bought at any large garden store.
Garden beds fenced with slate
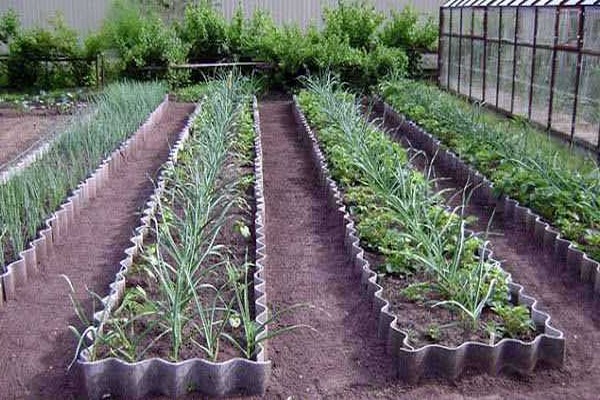
Slate is one of those materials that they love to use as they like, but not for its intended purpose. And its use to create fences is no exception. However, it would be unfair not to note that he copes with his task extremely well: he practically does not rot and is able to serve for many years.
Nevertheless, it, like any other material, has its disadvantages. In this case, it is the fragility of the slate. In order to carefully, without making unnecessary cuts and chips, cut it and, moreover, firmly insert it into the ground, you need skill.
Plastic boxes
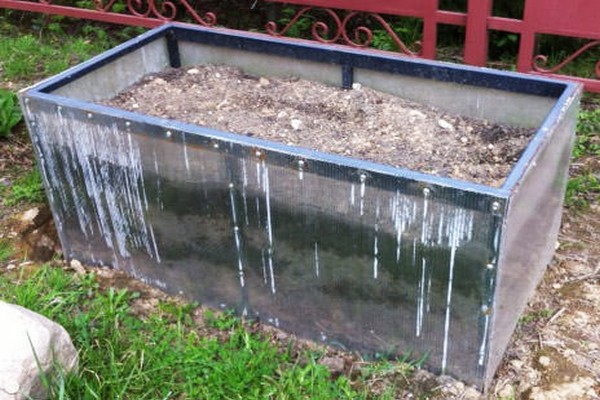
Plastic is also a pretty good material for fencing. He is not at all afraid of what is scary to other boxes: neither being in the ground, nor direct exposure to moisture will harm him.
Plus, plastic is very bright, and with proper use and a good sense of style, it can be a great way to decorate your garden. Its only drawback is that the plastic fades rather quickly in the sun. This, of course, also depends on its quality, but over time, any plastic loses its decorative qualities.
Mulching
Weeding is probably the most hated procedure by all gardeners. Not only does it not bring any joy in itself, but on large areas it becomes a torment at all. You have to spend tens of hours in the garden.
In order to significantly shorten this horribly long procedure, it is necessary to prepare well. Smart beds will help you to weed quickly and easily. Of course, there is no high technology here. It is enough only after planting to cover the open spaces with sawdust or dry grass. Scraps and even foliage are also suitable.
You can also resort to a more cunning method: before planting the plants, the bed is covered with a black film.After that, when planting, holes are made in it where the seed or sprout should be planted. This will give you full coverage of the garden without interfering with the planting itself. However, you should know that a transparent film is completely unsuitable for these purposes: sunlight will penetrate through it, which is only needed by the weeds.
And if you think that it is better to weed the beds once again than to pervert this way, then this opinion is completely wrong, because even authoritative scientists have proven that mulching significantly increases productivity.
After all, mulching is not only a protection against weeds. This procedure has many more beneficial factors than you might think. For example, the soil under the "living" layer does not dry out so much and does not crack. In addition, all kinds of microorganisms and nutrients develop much faster during mulching.
Even completely wild and overgrown areas that you have not visited for a long time can be saved with mulching. Even if this takes a significant amount of time: from one and a half to two years, the effect will be amazing: you will not recognize your old overgrown area at all.
However, as Paracelsus said, everything is poison and everything is medicine. Mulching is, unfortunately, no exception. With this procedure, it will not be possible to protect the wetlands at all. On the contrary, the effect will be more disastrous than positive. The water in such beds begins to stagnate under the mulch, which often leads to the death of the roots.
However, even in such areas, mulching can be useful. If you approach this matter with caution and choose the right shelter time, even a swampy hail can be protected. You just need to avoid the beginning of the spring and the end of the fall seasons. They are the least favorable for mulching watery soils.
Plus, mulch can significantly damage your plants during the rainy seasons. But if the sun does not stop baking, mulch can become a real universal salvation not only from weeds, but also from overconsumption of water for irrigation. Moisture under the mulch evaporates more slowly and the earth does not crack. If you really want to cover a wet area, prepare an escape route for water. For example, a good drainage layer should greatly alleviate the negative effects.
Warm beds
Our climate is not very conducive to the maturation of an early harvest. Especially sudden frosts that return at the most inopportune moment can seriously damage the crop. Plants that were planted in bare ground may well die, and those that do survive will be so stunted that they are unlikely to be able to bear fruit with dignity.
In order to completely avoid this problem, you can use warm beds: they accumulate heat much more readily and part with it more slowly.
They can be used to insulate almost any culture: cucumbers, pumpkins, tomatoes and other plants, especially those who love heat, will definitely "appreciate" such beds at their true worth.
However, you still need to know how to make warm beds, and in order to make it easier for you to figure everything out, we have prepared an instruction for you with detailed rules and tips:
- These beds can be located in completely different ways: not only rise above the ground level, but also go deep into it.
- If you decide that burying a bed under the ground is more suitable for you than raising it above the ground level, you should know that half a meter is the most optimal depth. At a greater depth, the walls of the "bunker" will block the plant's rays from the sun most of the time. At a shallower depth, no insulating effect can be expected at all.
- If lifting the bed is your choice, then it costs no more than a meter to raise it.Unlike the previous case, it is quite possible to make them higher: this will even simplify the care of them, but the cost of creating such beds will also significantly increase.
- The first in the prepared bed, as you probably guessed, is the drainage layer. Crushed stone with sand is suitable as it. Broken brick is also suitable for the first time, but keep in mind that it decomposes quickly under the influence of moisture.
- A layer of fertilizer should be poured over the drainage layer. Most often it is plant waste. This is our first heating layer. As long as this waste decays, it will generate a large amount of heat, which is enough to survive the severe spring frosts. It is best to apply this layer in the fall after harvest. Mowed grass can serve as an insulating layer. The only thing that needs to be closely monitored is that in no case should she give seeds.
- For thermophilic plants such as cucumbers and pumpkins, it is better to use manure as an insulating layer. While it is overheating, manure generates much more heat than ordinary grass. However, there are also plants such as tomatoes. They do not tolerate such high temperatures, and manure is categorically contraindicated for them. They do not tolerate them because all the energy they receive from the heat goes into the growth of leaves, leaving the fruits small and tasteless.
- It remains only to fill in the usual fertile land. In one bed you will need to pour a layer not thinner than 30 centimeters.
- The layer of soil, by the way, is much more important than vegetable fertilizer and even manure. In the end, inexperienced gardeners often complain that professionals have a rich crop grown in insulated beds, while their crops grown on all the same beds do not give even half of that wonderful yield. However, there is a reason for everything, and most often it lies precisely in the fact that the layer of fertile soil is too thin. Remember: the soil layer of fertilizer is not onsprinkle like bread with salt, and perpour, and thoroughly. Otherwise, you will not see such successes as the professionals.
- The last step is the construction of a protective structure over the bed of support arcs and a special film. However, the usual agrofibre is not suitable for these purposes. This is done so that the precious heat does not leave the borders of the garden. In especially severe frosts, you can even completely cover the soil with polyethylene.
This is a very reliable way to save plants from our severe frosts. Moreover, it is very durable. One such bed is capable of maintaining sufficiently high temperatures for as long as four years. After the bed has completely depleted its insulating layer, it is renewed. In no case should you throw out the fertilizer that quails in it: it can still be useful to you when digging up other beds. The first two years of "work" of such a bed are its most productive years, therefore it is at this time that the most heat-loving crops should be planted.
In the remaining two years, such a bed can accept any crop: carrots, beets, and even potatoes.
An important nuance: you should not keep the polyethylene film put on the garden bed during the summer heat, since you need to make sure that the plant blows at least a little with fresh air. Otherwise, the heat will simply kill him. However, the film must be put back on at night.
Paths between beds
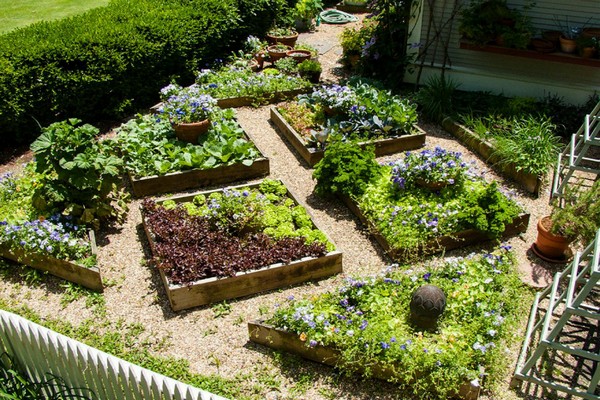
Moving around the site is a really sore subject for many gardeners. Few people want to lay tiles over the entire area of the site, but at the same time, few people want to walk on weeds and paths washed out by rain. Not to mention the fact that weeding the trampled paths is another task that not everyone can do.
Therefore, many resort to various budgetary ways to make tracks. However, most experienced gardeners find it much better to make normal walkways out of tiles and even concrete.
How to do it and what are the nuances:
- Paving slabs are one of the most budget-friendly and effective ways to make your site a pleasant place to be in, not to mention walking or running. In addition, there are so many varieties of tiles that everyone will definitely find something to their liking.
- Concrete paths are a very reliable way to improve the site. During the time that they will faithfully serve you, you will have time to think a thousand times that you have not regretted such a wonderful choice. Particularly good masonry can even last up to twenty years. There are few disadvantages to such tracks, however, they can definitely be attributed to low decorativeness, as well as the fact that they are too susceptible to the destructive effects of moisture. In addition, from time to time, cracks will appear on such paths that will need to be poured. Yes, and transferring the concrete masonry will not work anywhere.
- Rubble paths are not the most convenient way to make paths on your site, but this is definitely better than their absence. The only serious disadvantage is the fact that the soil penetrates into the rubble and gradually such a path collapses. However, it can be solved by delimiting the path with metal or stone fences.
- Wooden paths are the most common way to move around the site. However, at the same time, wood is also the most short-lived of all the materials presented. It rots very quickly and such tracks will have to be changed too often. In addition, the boards are quite elastic, and so that they do not sag when walking on them, it is necessary to choose sufficiently thick specimens.
- Decking paths are a more reliable option than ordinary wood, however, as you would expect, more expensive. Nevertheless, these boards look incredibly solid and will last longer than anything on this list. Their service life is not less than 25 years.
Naturally, these are not all the materials that are available for building paths for the site. You can also use the most ordinary stones or tree cuts, but such paths will be more complex, because they will have to be covered with sand. Otherwise, grass will sprout through the cracks in the near future and spoil the fruit of your labor.
A little about the layout of the tracks. The center pivots should be wide enough so that you do not feel any discomfort while walking on them. The optimal width is 60 centimeters, but the “branches” extending from the main path can be made even narrower, up to 30 centimeters, but you should also take into account your own parameters, because the main thing is that it is convenient for you to walk.
By the way, ordinary linoleum, which, for sure, almost everyone has, can serve as additional protection against weeds. However, with constant work in the garden, you will most likely have damp feet, and the linoleum itself will most likely get wet, which increases the chances of accidents. Therefore, linoleum is never laid with the glossy side up: it is too dangerous.
But the worst material that is in no way suitable for creating paths is brick. It is too susceptible to moisture destruction, which will ultimately lead to the complete destruction of the track and the appearance of a huge pile of weeds.
Strawberry beds
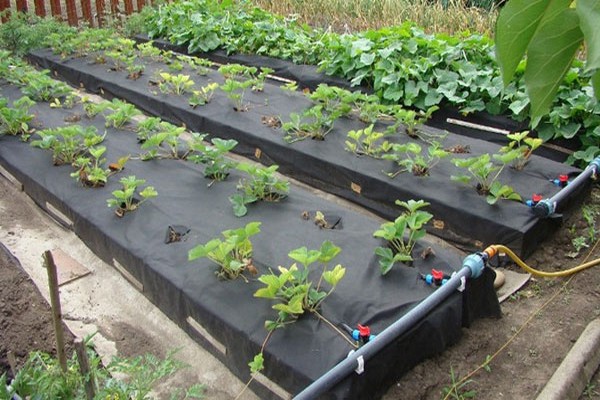
Who doesn't love strawberries. I dare to assume that everyone loves her, but this wonderful red berry is an extremely picky person and requires special treatment.
About what kind of care it needs, and what nuances may arise when growing strawberries:
- Strawberries are a plant that is extremely picky about the moisture content of the soil in which it grows. If there is too much moisture on the site, the strawberry simply will not survive: its roots will rot and die. In addition, berries harvested from a bush growing in such conditions will lose all their taste.
- Best bed for growing strawberries - insulated garden bed.In addition, they need at least 5 cm of sawdust or straw for drainage. This is also done in order to protect the berry from excess moisture. It will not be superfluous to lay a waterproofing film.
- At the bottom of the box in which the strawberries are grown, it is necessary to drill several holes through which excess moisture will come out.
- It is worth making sure that the strawberry bed is high enough, because this is the only way to warm up the soil in which the strawberries grow and get berries of excellent quality.
- The best feeding for strawberries is ordinary humus. She adores him. A couple of handfuls per hole will definitely not hurt, and you will definitely get a better harvest and tastier berries.
- A lot of trouble, however, is delivered by its ubiquitous antennae, which spread throughout the site. Unfortunately, there is no way to get rid of them quickly; timely circumcision is the most common way to overcome them.
- However, instead of fighting the antennae, it is better to prevent their appearance, and mulching with a dark cloth that does not allow light to cope with this is excellent: the antennae will simply have nowhere to grow and nowhere to take energy. In addition, sawdust can be used to keep the berries clean.
And yes, try to forget about the advertising that endlessly advises you to plant strawberries in vertical beds: this is not the best idea, and the crop will most likely freeze in the first winter.
Decorating the beds
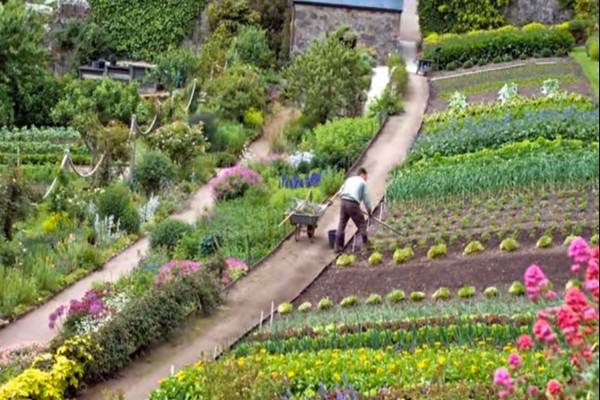
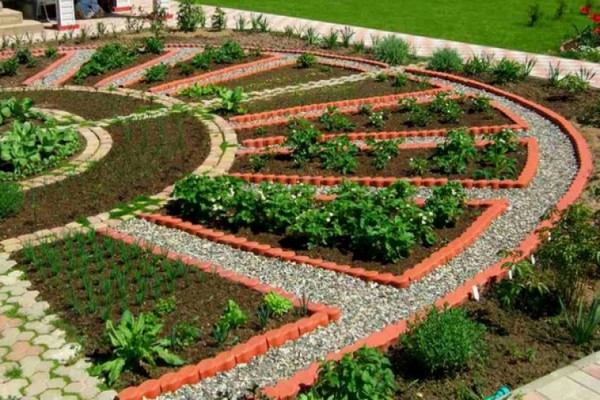
Sometimes even ordinary rectangular boxes look quite aesthetically pleasing. However, many gardeners and gardeners are always hungry for more and want to make their site not only practical and convenient, but also turn it into a work of art.
There are countless ways to do this: you can plant low-growing flowers around the beds, you can place statues and small lanterns everywhere. However, all this is limited only by your imagination, and the most important thing is that you like your site yourself, and that the time spent at work does not lay a heavy burden on you.
The difference between French and English beds
French beds are distinguished by strictly symmetrical shapes, which are practically not found in other styles of planting crops. However, shapes other than rectangular are not taboo. Rhombuses, circles, ovals and triangles are also welcome, but nothing should break the symmetry.
In addition, French beds are most often located at a fixed height, equal to all plants. Although this is not a mandatory rule, it can often be observed.
English beds, unlike French ones, do not require the gardener to observe the strictest symmetry. Their main decoration is lawns. Against the background of green everyday life, absolutely any planting, even if it is a carrot, will look decorative.
Even a house at an English estate looks like an additional vertical bed on which flowers are grown that are beyond count.
Conclusion:
The beds are what keeps the whole site. Without them, the garden would simply not exist, which means that you need to take good care of them and try to make them not just another functional element, but decorate your possessions. We hope that our detailed instructions have helped you figure out how to achieve this, and your site will soon be transformed beyond recognition.

