How to tie peas in the garden
Content:
Peas are highly respected by gardeners. It is tasty and healthy, unpretentious and easy to grow, frost-resistant and suitable for many Russian regions. For a significant increase in the yield of peas, you should know how to correctly garter peas. This is what this article is about.
What is a pea garter for?
There are several main reasons for outdoor garter peas:
- Thanks to the correct tying, the flow of air masses between the branches of the peas improves, as well as the possibility of penetration of sunlight and warm air along the entire length of the plant. Accordingly, the stems will develop better, and the peas will be poured and become ripe.
- With the help of a reliable supports for pea culture, rotting, the risk of infection with bacterial, fungal infections in wet weather is reduced.
- From the vertical planting of pea bushes, the space of the garden is saved, and if the peas are planted in the form of a fence, then this is also a beautiful design for your garden.
- When the peas are tied, it is easier to carry out preventive and curative measures.
- It is easier to harvest and harvest overripe fruits on time when the pods are clearly visible. Indeed, because of one overripe fruit, the entire bush can dry out.
- Peas not tied up can take a fancy to the most dangerous harmful insect for legumes, Burhus. Boerhus can completely destroy the pea crop. In addition, if the fruits are affected by this beetle, then they cannot be eaten and used for planting (the fruits become infected with the toxic substance cantharidin).
- Pea bushes are a lodging plant. The plant can be up to 2.5 meters long. For it to fully develop, there must be enough sunlight. The plant begins to adhere to the ground, reaching only about 25 cm. And already in this state, the plant must be tied up in order to provide it with the sunlight that is so necessary for growth and development.
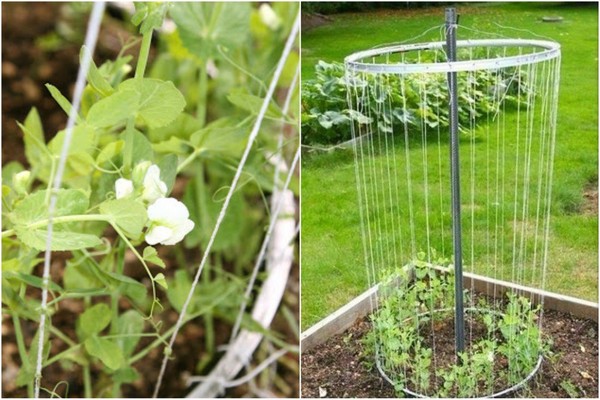
What time should the peas be tied up?
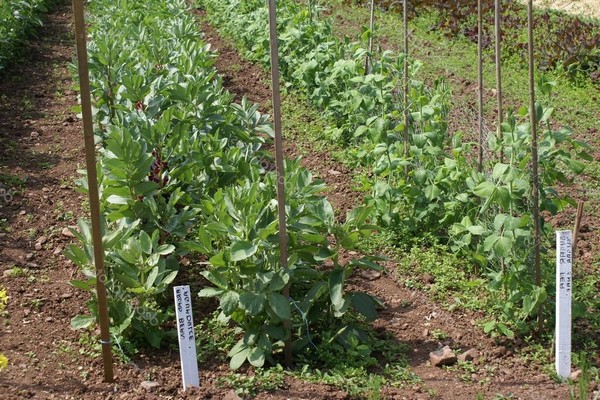
When the sprouts reach 15-20 centimeters in height and the first antennae appear, it is time to tie them to a special support. The twigs, grabbing the support, will stretch in height. The main thing is that they do not get confused with each other.
When the plant has not grown, a simple support is enough to support it. If the plant turns into a large heavy bush, it is necessary to tie the main stems to the trellis. Tied up with soft rags, thick threads or store fasteners.
It is worth emphasizing that coarse materials such as wire or twine should not be used, so as not to harm the branches.
If you are serious about designing your site, then you first need to pick up the props for the pea culture, and then do the rest of the decor.
Alternatively, sunflowers (or corn) are planted near the pea pods to support the pea sprigs.
For low varieties of pea culture, special supports are not built: it is enough to plant the seeds in pairs (the plants will help one another). Usually, when buying seeds, the packages contain information about lodging resistance.
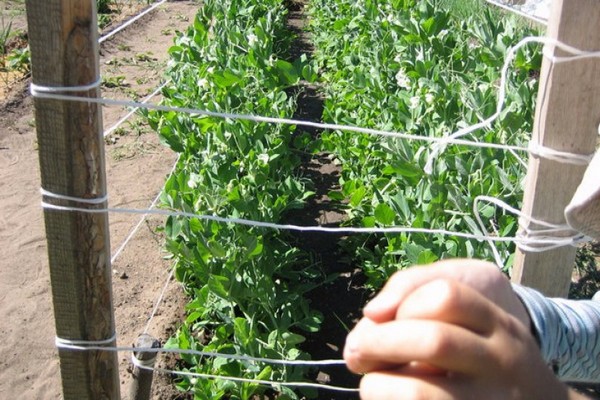
Pea garter: process photo
About the types of support structures for pea culture
Support structures for peas are chosen depending on the characteristics of the garden area, on the location of the beds and decor.The choice depends on the owner of the site. Let's take a look at some of them.
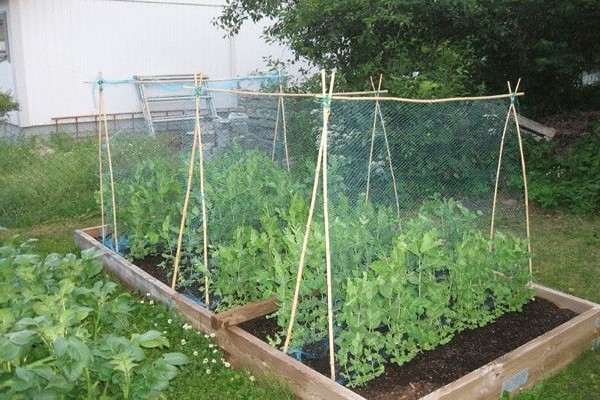
Peg... Some of the simplest support structures are stakes, which can be easily installed without much preparation. A peg can be a rod made of reinforcement, wooden sticks, bamboo devices, or any branch up to two meters long.
It is best to choose wooden stakes, as metal stakes can glow in the sun and harm the plant.
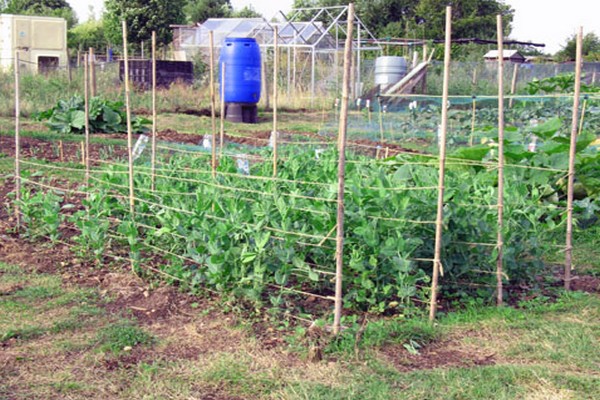
Stakes are placed in two ways. Not far from the stem (about 13 cm), it is recommended to drive stakes along the entire length of the ridge at a distance of half a meter. With the help of these sticks, the rope is pulled (a net can be installed. In the process of growth, the threads are added, adding the height by 20-30 cm. The surface of the pea wall is gradually formed.
It should be borne in mind that no support is made of willow branches, since, once in the ground, the willow takes root easily.
If the stakes are stuck into the ground not vertically, but at an angle to the central part of the ridge, then a kind of hut is obtained. This method is very favorable for the growth and development of the peas.
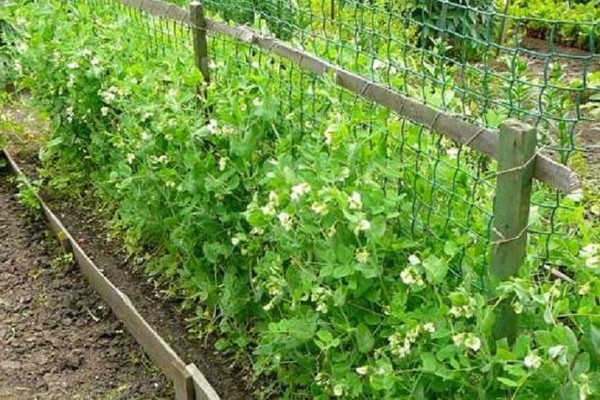
Pea garter net
Tapestries for garters of peas come in metal or plastic and are easy to find in hardware stores or gardening stores. It is better to choose plastic trellises, as metal ones can harm the culture.
To install the trellis, take stakes (3-4 pcs.) 2-2.5 m each and fix them in the ground evenly along the ridge. Stretching the roll with the net, fix it on the pegs with wire (you can also use clamps).
Pea seeds are sown in a staggered manner from different sides of the net. When the plant pulls up, hook the pea whiskers to the bottom of the net. Further, the tenacious plant with the help of the net will stretch itself upward. The mesh height can be up to two meters.
In the case of the formation of a bed next to the fence, the mesh is fixed under 60 to it. And if the plant is located in the southern part of the garden, then there will be plenty of illumination for it.
An arched structure is often constructed using industrial mesh. To do this, you will need three or four metal-plastic pipes (length - 4-4.5 m). Arcs are made of these pipes, the ends of the arcs are fixed to the ground. The arc (she is the frame) will connect both ridges with peas. As a result, nets are thrown over it and fixed with a wire. Pea stalks will beautifully wrap around this net and, connecting somewhere from above, form a tunnel.
The service life of the mesh with a galvanized surface is 10 years. Its location is often changed, and in autumn it can be left in the garden.
Plastic nets will also safely last up to 10 years if used correctly and carefully. In winter, they are transferred to the house.
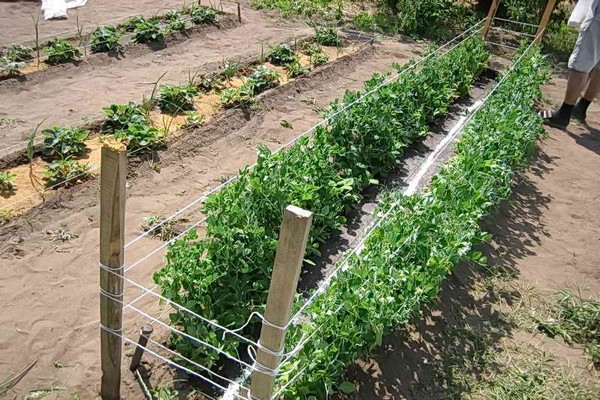
Pea garter net: photo
Tapestry for garter peas
When choosing a trellis for garter peas, you should know that these peas are grown in one place for no more than two seasons. This means that the tapestries must be portable. To install them you will need:
- timber up to 2 meters high (4 pcs.);
- horizontal slats (8 pcs.);
- rope;
- a few screws and a tool.
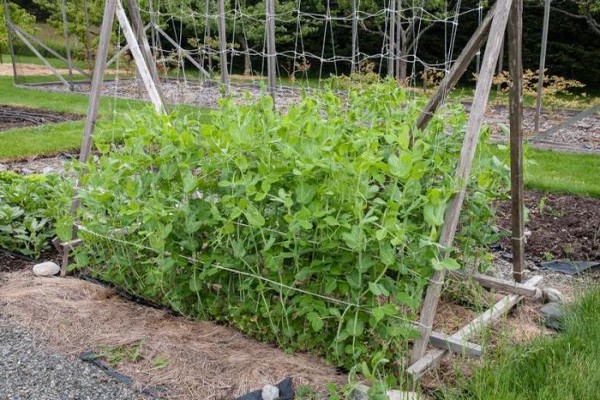
Install the trellis as follows. With the help of screws, they ensure the connection of the vertical posts at an angle. It turns out a pair of triangular shapes. Then they are fastened with the help of transverse bars. Horizontal bars are connected with twine (rope) according to the principle of a ladder. The distance between the bars is 30 cm.
It should be emphasized that the trellis should be installed as soon as possible after sowing.
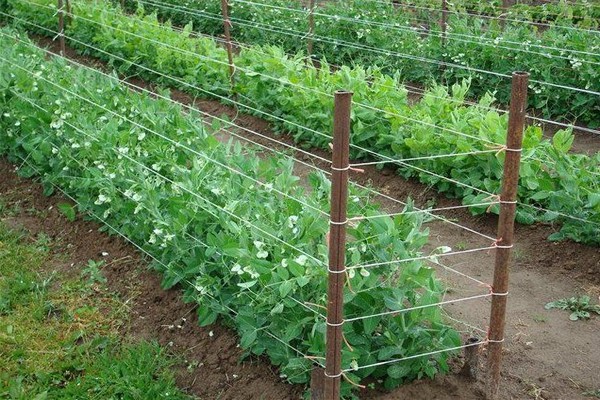
If there are no ready-made store tapestries, it is possible to do it yourself with the help of one and a half meter props and twine. Several props are placed along the edge of the beds. They are connected by parallel strings in the form of a ladder. The first "step" should be built about 15-20 centimeters from the ground. Young pea stalks will actively cling to the ropes and stretch up to the next "step".
Another interesting option is the pyramid design. The shape of the frame is like a roof in a house.The frame is placed on the ground, and twine is attached to the inclined parts of the structure.
Trellis for garter peas in the open field: photo
Shalashiki
The pea support structure is often made in the form of a hut. Such spectacular "houses" will give your site their unique "zest".
So, from stakes about 2 meters long, driven from the outer sides of 2 beds, make the letter "L". The distance between the pegs driven into the ground should be approximately 1 meter. At the top, where the pegs cross, they are secured with twine or rope. In pairs, the stakes are connected using a rail or rope, and thus a frame mount is obtained.
Such designs can be made from branches, stakes, sticks or twigs. In general, huts help to increase yields.
Wigwams
Unlike a wigwam hut, a 2 m long pole is attached in the center. Visualize a circle with a radius of 0.7 meters. Pegs are driven along such a circle, which are collected in the center and connected at the top at the main base. Peas are sown on both sides of the stakes.
Bicycle rim support
The next support option requires a bicycle wheel. With this design, about 25 pea bushes will stick.
The spokes are removed from the 2 rims from the bicycle. Next, they are engaged in frame wooden cross-pieces, which are fixed to each rim with the help of holes from the knitting needle.
In the center of the "wheels" there will be a main pole, the length of which is up to 2 m. It is installed perpendicular to the crosspiece. The 2nd rim is attached to the opposite part of the base.
Threads are pulled into the holes from the knitting needles. For stability and reliability of the structure, it is fixed with construction brackets or pegs from tourist tents.
Peas are sown on both the inside and outside of the wheel.
Fences
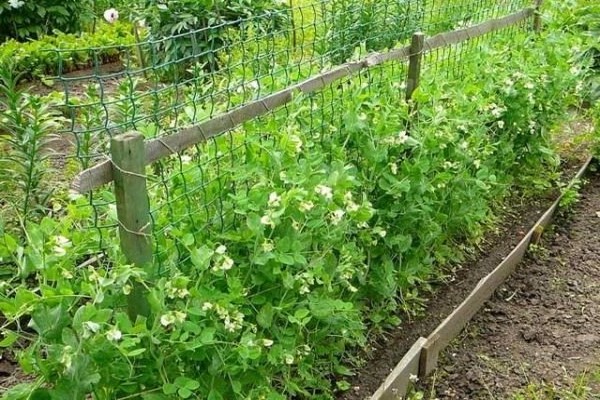
Many garden owners plant peas near fences and fences. The main advantage of this solution is the savings in space and costs in materials for the supporting structure.
Pea bushes are friendly with wooden fences. In the heat, the tree does not heat up from the scorching sun, and in cool weather it will add a little heat.
For pea antennae, a chain-link mesh is convenient. She perfectly supports the stems of the culture, without blocking the sun.
It is not recommended to use metal barriers. It gets very hot in the sun and can burn the plant. Pea bushes can dry out.
A little about how to tie up curly beans
The curly beans are tied to self-made supports. Supporting structures can be made from stakes, metal pipes, rods, branches and other elements. Such structures can serve as trellises, huts, nets and other options, the same as for supporting peas. All of them look original and can become a decoration of your site.
Agrotechnical techniques
Peas are sown from the 20th of April to July. It is recommended to sow peas after ten days. This will allow you to consume a fresh, sweet and healthy product all summer long.
Pea bushes love an open, sunny and calm place. This crop will appreciate planting in light, fertile soil. Just do not overdo it with nutritional value, since an excess of nitrogen will adversely affect the development of the plant.
The soil for planting peas begins to be prepared in the fall. Digging is necessary, adding superphosphate (50g / 1m2), potassium salt (20g / m2). If the soil is acidic, then ash is added (300g / 1m2).
The height of the planting beds must be large enough. The depth of the grooves is at least 8 cm, the distance between the grooves is about half a meter.
Compost, ash and, at the end, earth are added to the holes. Seeds are placed in the ground every 7-10 cm, sprinkling with soil and compacting. At the end, watering is done.
In a couple of weeks from the time the shoots hatched, the soil is loosened and the young shoots are hilled. Regularly, in case of appearance, weeds are removed.
When the supporting structures are installed, it is necessary to pinch the tops of the plants. A little later, the shoots are pinched.
Peas are watered once every 7 days, in dry weather - 2 times a week.
It is important to remember that peas are fed 2 times in 30 days. This will require nitroammophoska at the rate of 2 teaspoons per bucket of water (this amount is enough for 1 square meter of area).
Sowing and garter rules for peas: useful video


