How to transplant a violet
Content:
Without a doubt, the violet or saintpaulia is one of the most popular indoor plants. Blooming violet looks very touching and helps to create coziness. Lovers of these indoor plants collect whole collections of plants with different colors of inflorescences and leaves, exchange rare specimens and create the most comfortable conditions for violets. Beginning flower growers, purchasing a violet, should be prepared for the fact that the plant will require attention and care, but in return, it will delight you with its flowering almost all year. One of the important factors affecting the appearance, flowering and general comfort of the plant is just the timely transplantation of violets and the rejuvenation of the bushes. In this article, we will talk about when to replant a violet, how to do it correctly so as not to put a lot of stress on the plant.
How to know when a violet transplant is needed

Violets are usually grown in fairly small pots and the soil depletes rather quickly. Top dressing will not help in this case, because with the help of fertilizers it is impossible to replenish the required amount of nutrients if the plant continues to remain in depleted soil.
Therefore, it is recommended to replant plants annually, regardless of age. But sometimes circumstances develop in such a way that the plant may require an unscheduled transplant, which is carried out for the following reasons:
- after purchasing and quarantining a new plant;
- when white bloom appears on the top layer of the soil;
- when the root system grows so much that the plant becomes cramped in the pot;
- in case the violet withers and withers, despite regular fertilization;
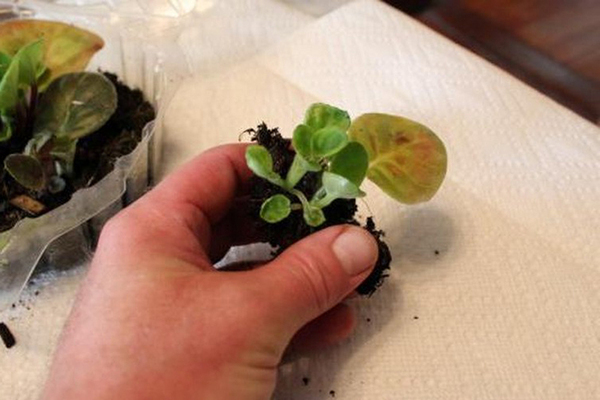
- when several outlets appeared from a recently rooted leaf that should be planted.
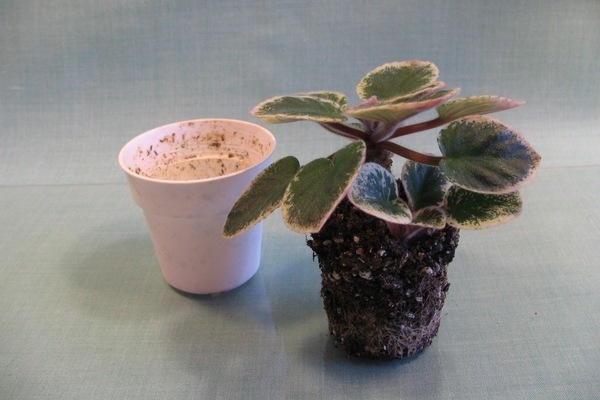
In each of the above cases, the plant should be transplanted immediately. The easiest way to do this is to use the transshipment method: without violating the integrity of the earthen coma and without injuring the root system, the plant is carefully and quickly moved from one pot to another and the empty space is filled with fresh soil.
If a complete replacement of the land is required, then you will have to act differently. Such a transplant will take more time, since you will have to examine the roots of the plant, partially free them from the old soil and at the same time try not to damage them.
The transplant is recommended to be carried out at a time when the violet is not blooming, so it adapts faster. In winter, the adaptation process may slow down due to lack of light, and in summer due to increased air temperature, so the best time for transplanting will be spring or autumn.
If there is an urgent need to transplant a blooming violet, then experienced florists recommend removing all peduncles first, so that the plant directs all its forces to rooting, and not to flowering.
Transplanting violets at home: picking up a flower pot

Preparation for transplanting violets begins with the selection of a new flower pot. Very young plants can be planted in plastic cups, as the violet grows, the size of the container gradually increases. The diameter of the pot for an adult plant should not exceed 13-15 cm (while the height is about 10-12 cm).
The pot can be either plastic or clay, there are no clear recommendations, and this issue is decided at your discretion.Keep in mind, however, that clay is a breathable, eco-friendly material that can absorb excess moisture.
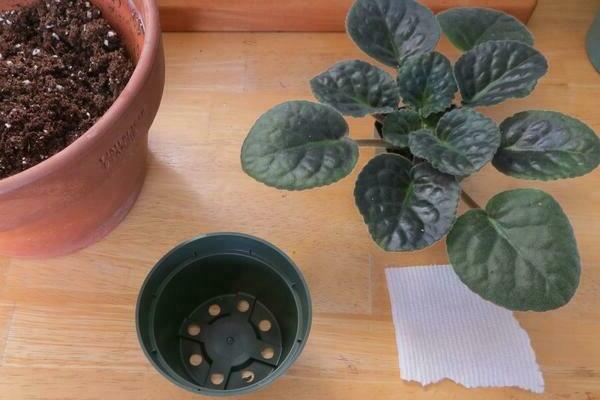
If you practice "wick" watering, then before transplanting, insert soft cords or strips of tissue into the drainage hole, which will act as a wick and deliver moisture to the roots of the plant. You can fix the wick with expanded clay or small pebbles, which will be a drainage layer.
Preparing soil for violets
You can buy ready-made soil for violets (or Saintpaulias) in almost any flower shop or garden center. If you are used to preparing the soil mixture yourself, then you will need to mix peat soil, coarse sand and black soil in a ratio of 3: 1: 5. Also, a baking powder must be added to the mixture, which will improve the moisture permeability of the soil (crushed expanded clay, sphagnum or vermiculite). The volume of such an additive should correspond to the volume of sand.
Regardless of whether you bought the soil or prepared it yourself, the soil must be disinfected before replanting the plant. To do this, spill the earth with a weak solution of potassium permanganate, steam it or bake it in the oven. Considering that such processing can destroy not only harmful, but also beneficial microorganisms, vermicompost can be added to the ground before planting (a small amount).
When planting, the soil should not be dry or waterlogged, it should be moderately moist, light and free-flowing.
Transplanting indoor violets. Preparing for the process

If you plan to transplant in the afternoon, then water the plant in the morning - this will make it easier to slip out of the pot, pre-watering reduces the risk of mechanical damage.
Examine the root system carefully, cleaning it off the ground as gently as possible.
If you find damaged roots with traces of rot, then they should be removed and the cuts should be sprinkled with crushed charcoal or activated carbon.
If all the roots are healthy, but have grown very much, then at least half can be cut off without damage to the plant (the cuts can also be treated with charcoal). In either case, it is important to use very sharp and pre-disinfected scissors.
If rot has affected the entire root system, then after removing the affected part, the flower can be rooted in water by dissolving a tablet of activated carbon in it, and after the roots appear, plant it in the soil according to all the rules.
Step by step transplant of violets

So, you have prepared a flower pot, warm settled water, soil and are ready to transplant violets. Steps to take:
- Pass the wick through the hole in the bottom of the flowerpot and place a drainage layer on the bottom.
- Pour the soil, place the plant in the pot and spread the roots, gradually adding the soil. Using a small spatula or stick, the soil should be slightly compacted.
- The soil should be filled up until you reach the level of the root collar, then gently water the plant with a syringe, the soil will settle a little during watering, it should be filled up to the previous level (without deepening the root collar).
- Very gently so as not to damage the leaves, wiggle the violet from side to side to make sure it sits firmly in the ground. Vermiculite can be poured onto the surface of the soil, which will function as mulch.
- In order for the violet to adapt as quickly as possible, you can build a shelter from a bag, which will help maintain the desired air temperature and prevent moisture evaporation. It is only important to provide ventilation, since the violet does not tolerate high humidity very well.
Violet transplant for the purpose of rejuvenation
The older the violet becomes, the more it grows and the less it blooms. You can rejuvenate the plant to restore its former lush bloom. This procedure consists in removing part of the root system and some leaves and replanting the plant in a smaller flower pot.Or, you can completely remove the roots along with the lower bare part of the trunk, root the plant in water and plant it in a new pot.
We plant young violets

In the process of rejuvenating an adult bush, you can root some of the cut leaves. Approximately 2.5 months after rooting, they should be planted in separate cups, in which they will remain until their first flowering.
Once the young violets have bloomed, they can be planted in plastic or ceramic flower pots of the appropriate size. Regardless of the size and age of the violet, she needs to provide the necessary lighting, proper watering and a suitable temperature regime.
If you prepare well for the transplant process, then it will not cause you any difficulties. Over time, you will adapt, and you will do it quickly and accurately, since violets need to be transplanted quite often, and given the beauty of these plants, their number in your home will constantly grow.

