How to store tulip bulbs
Content:
The article describes in detail how to store tulip bulbs: preparing the bulbs, choosing a place, storage secrets, the best time to plant.
Gardeners will never come to a common decision: should tulips be dug out every year? Most are inclined to believe that there is no need to dig up the plant bulbs annually, but every few years it still has to be done, since the tulips get cramped, the soil is depleted, which means there is a high probability that your plants will not bloom next year. Therefore, every two to three years after the end of the growing season (when the leaves finally wilt and dry out, about a month after the end of flowering), the bulbs must be carefully dug up, inspected for diseases and mechanical damage and prepared for storage.
How to store tulip bulbs: properly preparing the bulbs for storage

How to store tulip bulbs: properly preparing the bulbs for storage
But still, if you approach the cultivation of tulips seriously, acquiring a variety of varietal bulbs, then you need to know that some species still require annual digging.
All tulips can be conditionally divided into three groups:
1. Species belonging to the first group must be removed from the ground every year. This includes terry and fringed varieties, green and parrot varieties, as well as "Rembrandt tulips".
2. The second group includes species that can grow for two years in the same flower bed: "triumph tulips", Darwin's hybrids and common species.
3. The third group is the least capricious, flowers feel good in a "home" place for up to five years. These are tulips FOSTER, KAUFMAN, GREIGA.
The bulbs are dug out not only to transplant them to a new place, but mainly to carry out mandatory work: to dry, to carry out preventive treatment for diseases, to separate the newly formed "children" so that the plants are not cramped and there is enough nutrition. This is also necessary to preserve varietal characteristics, as well as so that the bulbs do not go deep and do not disappear without a trace. Although sometimes even very careful care does not help to maintain varietal characteristics, and in the second year you can see branches of a completely different color and shape.
Well, then, replanting tulips annually, each time you prepare a new flowerbed with nutritious soil especially for them, and therefore the plant will be comfortable and it will delight you with flowering.
In order for the bulbs to be well preserved until the next planting, they must be removed from the ground in a timely manner and carefully. After the end of flowering, cut off the stem, leaving at least a couple of leaves necessary for the photosynthesis process. After about a month, these leaves will completely wither, which means that the bulb has accumulated a sufficient supply of nutrients and is ready to go into a dormant state.
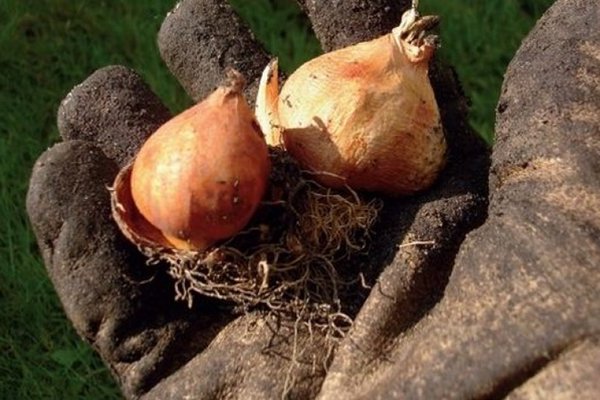
It is necessary to dig up the bulbs in dry weather, for work it is preferable to use a pitchfork rather than a shovel. Gently pry the soil and pick out the bulbs by shaking off or scraping off any remaining soil. When you dig up all the bulbs, rinse and carefully inspect the material - only healthy bulbs should be stored without traces of rot, insect penetration or scratches. If you find damage, then try to carefully cut them off with a very sharp and disinfected knife, and sprinkle the cut with activated carbon.And even after this operation, it is better to store such bulbs separately from those whose health is beyond doubt.
After sorting, prepare a light pink solution of potassium permanganate and soak the bulbs in it for half an hour (separate healthy from suspicious ones), and then dry them until completely dry. Any fungicide can be used instead of potassium permanganate.
If you have different varieties of tulips growing on your site, then even before digging out, you need to prepare separate containers with the name of the variety or color and at each stage lay out the bulbs in their boxes, otherwise, during the preparation and storage process, everything will get confused, and you will not be able to determine where what sort of.
How to store tulip bulbs before planting: where to store them

How to store tulip bulbs before planting: where to store them
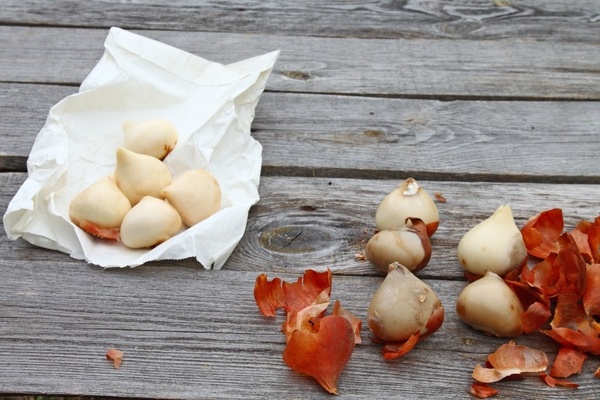
After all treatments, dry the tulip bulbs for several days in a dry and well-ventilated room; a country attic is ideal for this. Most importantly, the bulbs should not be exposed to direct sunlight. Then remove the remnants of the roots and remove the old scales, if the bulbs are well dried, then the scales will separate without problems. Separate the "babies" from the mother's bulb, if they did not fall off on their own. Healthy, almost round bulbs with a diameter of four centimeters or more are ideal planting material, smaller bulbs most likely will not bloom next year, they have yet to grow. You have to decide whether to plant them together with the rest of the bulbs of this variety, or plant all the "kids" separately so that they grow and gain strength.
In the first month of storage, the air temperature should be 24 degrees, and for some varieties + 27 ... + 30 degrees. You also need to maintain a humidity level of 60-70%. It is in the first month that the formation of flower buds begins, so maintaining temperature and humidity is very important. In the second month, the temperature is lowered to + 19 ... + 22 degrees, and with the onset of the third month to +14 degrees (this is exactly the temperature regime that Dutch specialists adhere to, who, as you know, know a lot about tulips).
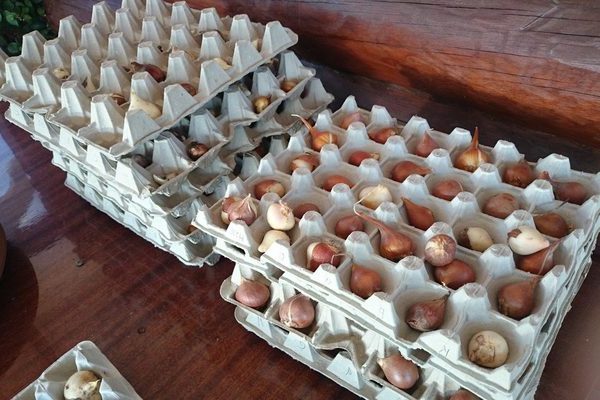
It is recommended to store flowers in cardboard boxes, in wooden or plastic boxes, spreading the planting material in one layer. The drawers themselves can be placed under the bed, on the mezzanine or on the shelves in the pantry - the main thing is to provide good ventilation. Remember, how you save the bulbs directly depends on whether they will bloom next year.
You can make a waterproof box, equip it with a thermometer and place all the bulbs there, then this structure can be stored on the balcony, where there will be the best ventilation. Of course, there are specialized heat chambers, but if you do not grow tulips on an industrial scale, then this is a rather expensive device. Although domestic craftsmen are able to build such a device from improvised means, having gained all the necessary knowledge on the Internet. The most important thing in storage conditions is the absence of direct sunlight, constant and good ventilation, a certain air humidity, as well as maintaining a temperature schedule that is most comfortable for tulip bulbs.
How to store tulip bulbs at home: secrets

How to store tulip bulbs at home: secrets

This paragraph contains not theoretical information and not the recommendations of Dutch specialists, but real advice from experienced summer residents who have been engaged in flowers on their plots for years and have accumulated considerable practical experience. Listening or not is your business, but it's definitely worth getting to know it, what if it comes in handy?
1. It is very important to carefully dig up the bulbs. A cut with a shovel or a pitchfork, or just the slightest scratch, can open a loophole for infection to enter.
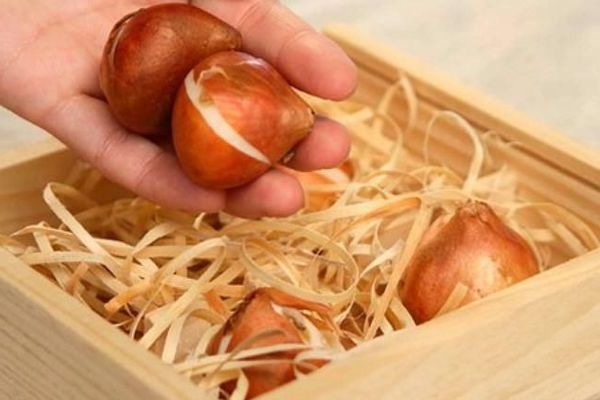
2. If the bulbs are stored in a room with very high humidity, then sprinkle them with sawdust, as this material absorbs excess moisture.
3. It should always be dark where the bulbs are stored. Otherwise, the sprouts may appear before you plant the tulips.
4. To plastic bags - a categorical "no"! During storage, ventilation is very important, but when using polyethylene, this is not possible.
5. If you wrap each bulb individually in a newspaper, this will increase the chances of material preservation - the bulbs are better protected from moisture loss and will not suffer from unexpected temperature changes.
6. If you did not have time to plant tulips in the fall and you need to save them until spring, then wrap each bulb in a newspaper sheet and put them in a paper bag or a linen or cotton bag. These bulbs will be stored in the refrigerator in the vegetable compartment.
7. Continuation of point 6 - every couple of weeks, the bulbs from the refrigerator must be examined. If signs of disease are found, for example, mold, then it is carefully scraped off, the onion is disinfected with a light pink solution of potassium permanganate, dried for three days and returned to storage.
8. If you have a basement and it is dry enough there, then the planting material can be laid out right on the shelf of the rack.
The main thing is not to forget to carry out inspections. In winter, the temperature in the basement must be kept in the region of + 2 ... + 4 degrees.
Autumn is considered the ideal time to plant tulips. The bulbs should have time to take root before frost, but should not begin to grow (and this sometimes happens if the autumn is very warm). This is roughly mid-October, but of course, first of all, you need to build on the current weather conditions.
Choosing the best time to plant
Choosing the right time for planting is just as important as ensuring the correct storage of the planting material. If you stay too late and plant too late, then the bulbs may not have time to take root and then there is a possibility that they will die in winter. If you plant it too early, then the tulip will begin to grow, the sprout will appear on the surface of the earth, and at this moment the frost is most likely to hit. Even if the sprouted bulb does not die, then most likely it will not be able to bloom next year, having released only one foliage.
At the time of planting, the soil temperature should be + 7 ... + 10 degrees, and the air temperature + 3 ... + 6 degrees, it will take about three weeks for the tulip bulbs to fully root.
Our country is large and planting dates may vary depending on the climate. In the Middle Lane, tulips are planted in the first half of October, in Siberia this can be done already at the end of August (if the weather is warm, then it can be done in September). In the Urals, planting should be carried out in the second half of September (you can capture the first days of October). And in the southern regions, tulips are planned to be planted in late October or even early November.
Prepare the soil thoroughly before planting. Remember that all bulbous plants do not tolerate liquid stagnation, so you need to take care that the soil is not too dense and provide the necessary drainage (if necessary, remove the soil layer and cover with expanded clay). If your site is dominated by clay, then add sand or peat, this will make the soil more breathable and nutritious. If the soil, on the contrary, is sandy, then compost should be added to it, and also enriched with mineral fertilizers.
After the soil for the tulips is prepared, mark the furrows or holes for the bulbs and spill them with a potassium permanganate solution (for disinfection). The tulip planting depth is usually equal to the triple height of the bulb, the distance between the bulbs should be at least 12 cm In the loose soil, the bulbs can be buried a little more, but in the dense and heavy, on the contrary, smaller. Small onions, from which we do not expect flowering yet, can be planted closer to each other.
Before planting, it is recommended to dust the bulbs with ash, this will provide both additional fertilization and protection from fungal infections. While lowering the bulb into the ground, apply a little pressure to eliminate the formation of an "air pocket". Then cover the holes or furrows with soil, level the surface. If there is no rain in the next week, then be sure to water the flower bed with tulips so that the root system can fully develop.
There is no unequivocal opinion whether it is necessary to cover tulips during frosts or whether the snow cover will be enough for them. But since this will require very little effort and will increase your plants' chances of a favorable overwintering, I highly recommend that you mulch the soil around the bulbs. You can use straw, dry leaves, spruce branches or fallen needles for this. But do not forget to remove the mulch in time in the spring so that the tulips have access to sunlight.
Please note that agricultural shops and garden centers sell special baskets and containers for growing bulbous flowers (not only tulips, but also daffodils, crocuses, hyacinths). This is very convenient, in this case the bulbs are placed in a basket with fertile soil (there are holes in the bottom of the basket or container), and only then the basket is placed in a recess in the flower bed. This method allows you not to lose the bulbs, ensures their safety when removed from the ground, and also protects against damage by mice.
Conclusion
Perhaps you are perplexed, since when purchasing tulip bulbs, you planned to plant them once and then admire the flowering every year. But not only garden plants require care, flowers, both annual and perennial, also need your attention. Only with proper care will plants be healthy and bloom lush, colorful and annual. Sometimes it happens that the plant loses its attractiveness and even dies for reasons beyond our control. But still, in most cases, we can provide our flowers with a comfortable environment. In the case of tulips, all the secrets lie in the timely processing of planting material, compliance with all storage conditions and competent planting. And then it is these flowers that every year will delight you one of the first, confirming the arrival of spring.
How to store tulip bulbs

