Meatlider beds
Content:
The most important task and problem of absolutely any farmer or gardener is undoubtedly the quality and quantity of the grown crop. After all, it is not always possible to grow a large, healthy and tasty harvest, despite all the efforts and expenditures of time, effort, and means of the gardener. That is why more farmers are now trying to move away from their principles and their own knowledge, and to act as science dictates. Now there are a huge number of ways to maintain a home garden, but perhaps the most effective and well-known is the Meatlider beds. Let's consider this method in detail.
Meathlider beds: method description
Mitlider beds: photo
If you are arranging your garden, then you have probably already heard rumors and talk that the vegetables currently growing in the beds have not changed for the better. They seem to be very beautiful and large in appearance, but the taste suffers. And the healing substances have significantly decreased, or there are no more.
Dr. D. Meatlider also faced this trouble when he started growing agricultural crops and noticed that every year he spends much more effort and money, and the result is only getting worse. The yield remained at a high level, but the taste was noticeably affected.
Thanks to this, the scientist began to actively study biology and botany in order to find the cause of this trouble and ways to solve it. As a result, he managed to bring out a new method of growing crops, which got its name in honor of the scientist. Moreover, it quickly gained recognition in more than thirty countries, and in different climatic zones and different soil.
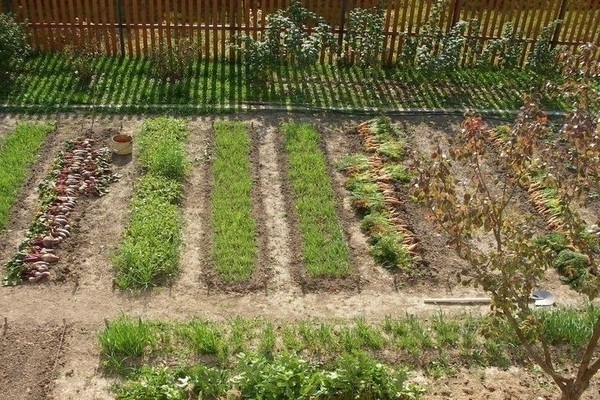
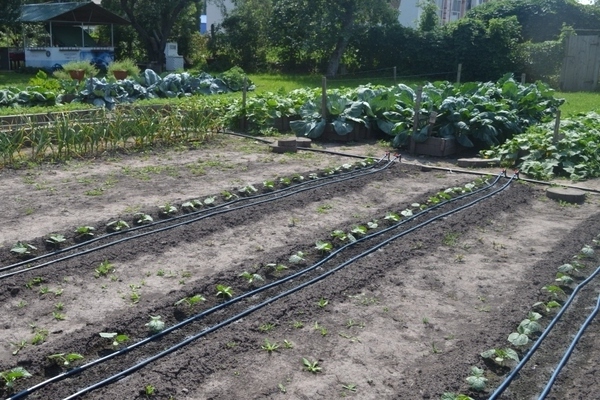
The main idea of this method was a balanced nutrition of various crops and the creation of the best conditions for their growth and ripening, and with a small amount of costs. The essence of the beds according to the Meatlider method is that the crops are planted on extremely flat and not wide beds. But the distance between them is made wide on the contrary.
Ultimately, the plants are unable to shade each other and start getting pretty decent sunlight. These ridges constantly need to be watered, approximately every 1-2 days. Due to their evenness, they can absorb moisture equally throughout their entire length. In this case, the fact is excluded when some plants are overdried, while others receive too much moisture and rot.
In addition, the ridge receives stable fertilizers, always according to a strictly consistent scheme. In this case, cultures begin to receive all the substances they need in the required abundance, without surplus and deficiency. The result is very pleasing - tasty, healthy and high-quality vegetables with very little nitrates. The main advantage of using this method is that the vegetables grow more chemically purer than those grown on conventional beds.
Advantages of beds according to the Meatlider method
Do-it-yourself Meatlider beds: photo
Before you use the Meatlider beds on your personal plot, you should carefully familiarize yourself with it. Let's consider all its advantages:
- Increased productivity. At first it may seem to you that on such rather narrow ridges, you will not be able to sow much, and, accordingly, you will not be able to collect much.But this is a big mistake, since following the rules for fertilizing, watering and caring for the crop as a whole, gardeners begin to harvest many times more crops than those who use ordinary beds.
- Less nitrates. In the application of this method, there is the inclusion of fertilizing, containing magnesium and molybdenum, often so lacking in the soil on which the plants are grown. These substances are assistants in the conversion of nitrates into amino acids, proteins and other substances that the plant needs in order to have good growth, development and maturation.
- Quite fewer other harmful substances. On narrow ridges of vegetable crops, roots of a rather compact size are formed, which cover a very small part of the area. Therefore, it is natural that the culture simply cannot absorb many harmful substances. Plus, getting all the necessary trace elements in abundance gives a stimulating mood in the self-purification of the plant.
- Application in completely different climates and land composition. As noted earlier, this method of building a vegetable garden is quite successfully used in many countries, including Asia and Africa. And nowhere he showed negative results. Thanks to the use of soil mixtures and fertilizing, crops receive all the necessary trace elements. And even in the most unfavorable climate and depleted, poor land.
- Efficiency of fertilizers and water. Their number will be much smaller due to the rather narrow ridges. But the result will exceed all expectations.
- The wonderful quality and taste of the vegetables grown on these ridges.
- Simplicity in the care of the garden and savings in effort, time and costs.
It is very important to follow all the rules and requirements for the formation of beds according to the Meatlider method, all your prejudices about the presence of chemicals. The composition of the dressings should be taken quite seriously, because they should be exactly the same as described in this method. The result will delight you noticeably and will not keep you waiting: regular, high-level, tasty and healthy harvest of vegetables. It is advised to grow vegetables in these beds in this order:
- Cabbage, broccoli and head lettuce, as well as other crops of similar size, should be placed in two rows, and in a checkerboard pattern.
- Crops that require ample space, such as melons, tomatoes, should be planted in one row, along one side of the ridge.
It would be best to make a passage between the ridges approximately 100-110 centimeters wide. But if the presence of free space does not allow you to do this, then this width can be slightly reduced, but the main thing is that it should not be less than 65 centimeters, otherwise the cultures will not receive the necessary amount of light and space for growth and development.
Choosing a place for narrow Meatlider beds
Do-it-yourself narrow beds in the Meatlider: photo
Arrangement of a vegetable garden according to this method begins with the fact that it is necessary to choose the right plot for the beds. This process also has some requirements.
- First of all, the Meathlider beds require a sufficient amount of moisture. Therefore, it is imperative that a pond, a well, a water supply system, or another body of water be located next to such ridges. If water problems are regularly present on your site, and besides, they are also practically insoluble, then this method will not work for you, unfortunately.
- Secondly, the beds along the Meatlider should in no case be in lowlands and in places where there is a high chance of flooding. Since the roots of vegetable crops are almost on the surface of the soil, and stagnant water can begin to rot. This will naturally lead to the death of the plant.
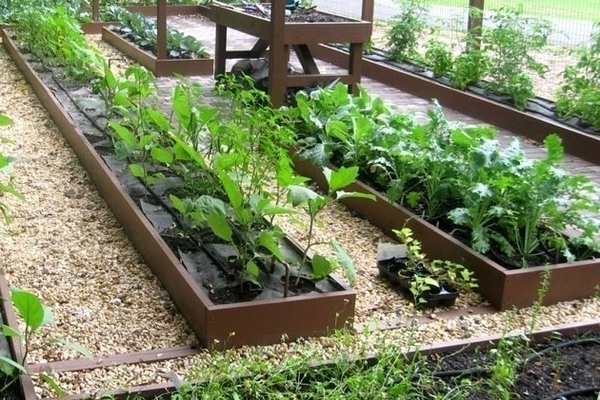
- Thirdly, the beds along the Meatlider are made perfectly even, since even the smallest slope can irregularly moisturize crops.In one place, plants will suffer from drought, while in another from an excess of moisture. If it is impossible to level the site, or the ridges, then for this they knock together special boxes from the boards, or as an option for slate, and then arrange such boxes with a ladder. Fill them with fertile soil and you will end up with a wonderful vegetable garden using this method.
- Fourthly, the place for making the beds should not have shading from various structures and trees. This is because plants using this method require sufficient light to grow and mature.
DIY instructions for building a Meatlider garden bed
Do-it-yourself beds according to the Meatlider method: photo
After choosing a place for a bed along the Meatlider, you should already start to arrange these beds. To start doing this, you will need: a shovel, a rake, a pitchfork, a tape measure, pegs, a rope, as well as a building level.
You should orient yourself from south to north. This is done so that when the sun rises, in the east, it can evenly give light to all crops along the entire length of the beds. The Meathlider beds should be located like this:
- The surface of the area for the beds should be perfectly flat.
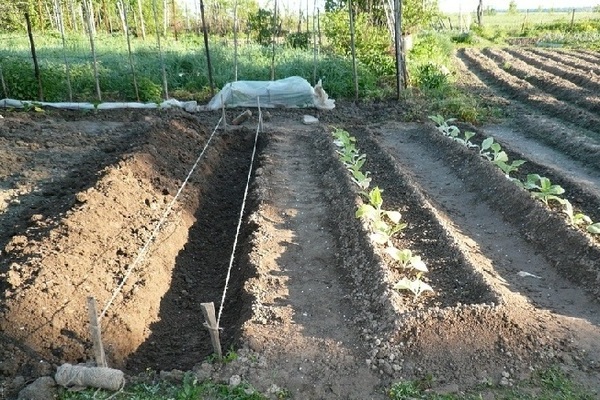
- The width of the ridge is approximately 45 centimeters, so that the landing site, taking into account the minus of the sides, remains approximately 35 centimeters.
- The earthen sides of the beds themselves should have a height of 7-10 centimeters. Leave the distance between the rows 95-105 centimeters.
It is worth noting that the beds themselves along the Meatlider should be on the same level with the row spacing, they are separated only by earthen bumpers. It is worth watering the plants on such ridges only at the root, and only the bed needs to be loosened, we do not touch the aisle.
Here are detailed instructions for setting up beds using the Meatlider method:
- Completely and well clear the area for the beds of various weeds. It is necessary to dig up the whole garden, over the entire area, and with the use of a pitchfork. Remove all roots of plants growing up to this point in this place.
- Using a shovel and a rake, level the surface so that you end up with a fairly level surface with minimal inclines and elevation differences.
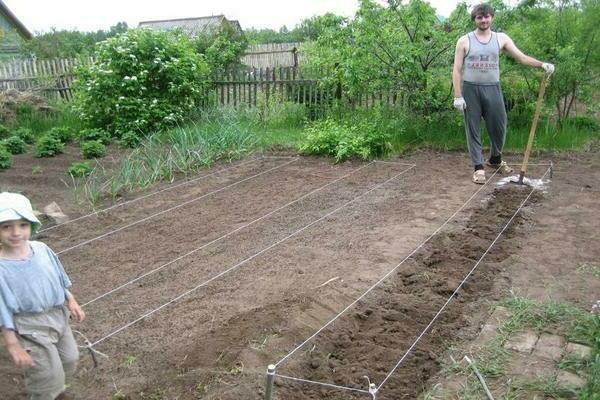
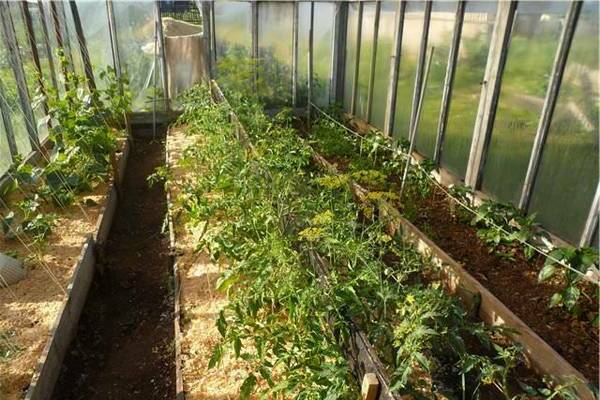
- Mark out future beds. The dimensions were shown above. For the marking process, you will be helped by a tape measure and pegs driven into the corners of future beds. Often, when arranging a garden with such a technique, gardeners have a strong desire to reduce the width of the row spacing. They are fully convinced that a distance of 100 centimeters is long enough for walking, and a shorter distance will be enough for caring and growing vegetables. And that would be a big mistake for these farmers. After all, such a distance is not just indicated, but calculated specifically so that higher crops do not give shade for the lowest ones, thereby all plants to receive the necessary level of illumination. Adopt one piece of advice: Install a small arch made of plastic pipes. It will be possible to stretch a film on them and in a short time make a greenhouse to protect the culture from rather unfavorable weather conditions.
- Pull the rope between the pegs, at a height of about 10 centimeters. This will help you to control the location and height of the earthen boards.
- Thanks to such pegs with stretched ropes, it will be possible to navigate and use a rake to make the outer side of the sides of these beds. If you want, you can use pieces of slate or boards instead of earthen sides.
- Make the sides of these ridges from the inside according to the same principle. Level the rest of the soil between the sides.
- Using the building level, check the evenness of the surface of the beds. This is a very important condition, it should not tilt either along or across.
- If all is well, you can prepare seeds and seedlings for planting. Choosing the most favorable weather day for this process.Also, be sure to prepare the necessary fertilizer mixtures for planting. Their composition and application features are described in this article below.
Features of fertilizing with fertilizers for Mitlider beds
Garden beds according to the Meatlider method: photo
In addition to the special arrangement and design of the beds according to the Mitlider method, another main component is high-quality and timely feeding of vegetable crops. When using the minimum amount of fertilizers, plants receive the maximum amount of micronutrients and substances that are so necessary for growth and development.
For such a garden, two types of mixtures were specially formed.
First mixture it is applied before the start of digging the site and planting seeds and seedlings. Pour 100 grams of the mixture per linear meter along the central part of the garden. The composition of this mixture is completely dependent on the acidity of the soil and may differ from its various types.
The composition for alkaline soils contains about 10 kilograms of gypsum (alabaster) and 80 grams of boric acid.
For acidic soils, use: 80 grams of boric acid and 10 kilograms of chalk. Or as a variant of limestone or dolomite flour, which is made from the rock of the same name. Thanks to it, too acidic soils are normalized, enriching it with useful microelements.
Remember that, filling the ridge before planting the crops with the first mixture, add also top dressing with the second mixture.
Part second the mixture includes the following components: one part of phosphorus oxide, 1.8 parts of nitrogen, the same part of potassium oxide, about 0.2-0.4 parts of magnesium oxide, as well as trace elements. The first 4 components can be extracted from the large amount of fertilizers that exist today. Just before you buy them, study the composition very carefully and compare it. This is necessary in order for the mixture to come out as accurate as possible to the original one, and with a minimum amount of other impurities.
You should not purchase ready-made dressings for tomatoes and others that do not have an exact list of ingredients on the package. As for trace elements, they are added to this top dressing from other sources. Be aware that when working with micronutrients, be sure to use a scale that can measure grams.
If these are not available, then you can make them yourself. To do this, use plastic containers or ordinary glass jars as cups, and instead of sinkers, there can be coins. Basic information about micronutrients is presented below.
For 10 kilograms of the mixture, the second contains such trace elements: boric acid about 56.8 grams, ammonium molybdate 7.3 grams, zinc sulfate 116.9 grams, copper sulfate 14.6 grams and ferrous sulfate in the amount of 197.4 grams, as well as sulfate manganese in the amount of 58.5 grams.
Also, we will apply the variant of the scientist Ugarova to this mixture, we will also consider it. For seedlings: iron sulfate 338.3 grams, copper sulfate 11.3 grams, zinc sulfate 22.6 grams, manganese sulfate 33.8 grams, boric acid 28.2 grams and ammonium molybdate 14.1 grams. And for vegetables according to Ugarova, you only need to add 21.1 grams of boric acid and the same amount of ammonium molybdenum.
This composition is presented to you as an example. It should be borne in mind that during the use of other fertilizers, the composition of the second mixture may differ in the main compounds and trace elements. For those new to farming, you should first consult with experienced agronomists, or look through the books of D. Meatlider and T. Ugarova himself.
Some rather experienced farmers who have already used this method reasonably note that it is quite difficult to get trace elements for the second mixture, since they appear quite rarely in ordinary specialized stores.
They advise purchasing these substances from organizations that sell chemical reagents. Such shops are available in almost any big city, or you can order them online as an option.
In short, there are three stages of top dressing according to this method:
- first step - pre-planting fertilizer (first mixture plus second mixture),
- second stage - weekly feeding (second mixture),
- the third step is corrective fertilizers, but this is only if it is really necessary.
Let's focus on the third stage of fertilizing - this stage is not at all necessary, since it can only be applied by real experienced and knowledgeable gardeners who are able to determine which substances and microelements are lacking in plants.
Meatlider beds in boxes
Do-it-yourself Meatlider beds: video
Sometimes it happens that it is not possible to level the plot for the beds along the Meathlider, it is rather difficult and difficult. But this is the main rule of this method. At such a moment, experienced gardeners found a way out of this unpleasant situation.
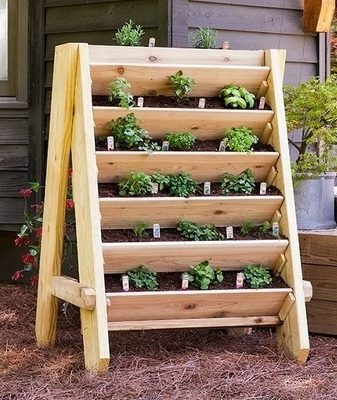
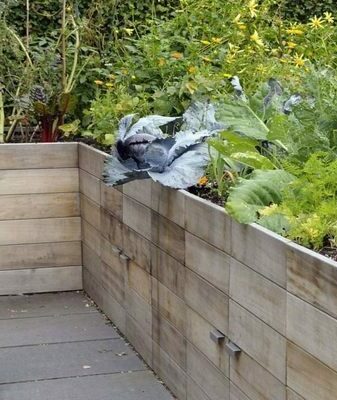
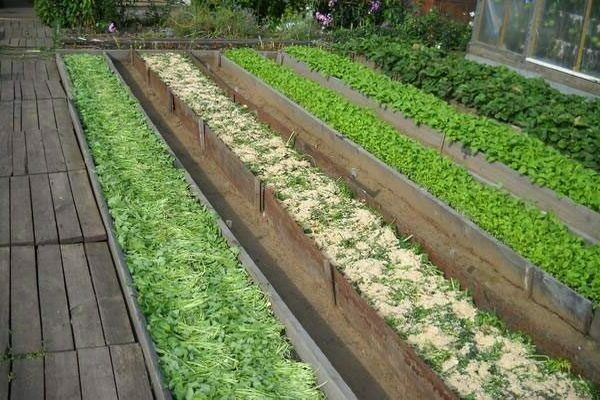
For this, not wide rectangular boxes are hammered out of the boards, installed on the ground and then leveled with the help of supports. After that, soil is poured into them, and ultimately a ridge is formed, exactly the kind that this method requires.
Let's take a closer look at the creation of such boxes.
- Make markings for the beds in the same way as described above. Along the long sides and corners, place the pegs so that the peaks are at the same height, regardless of the slope, and stretch the rope between the pegs.
- Select in advance the boards for the walls of the boxes, screws for fasteners and bars for the supports.
- Chip off half of the box and prepare the timber for the supports.
- Place half of the box on the ground and line up the support bars. Use a building level for control. It must be ensured that there is no longitudinal and lateral tilt.
- If everything works out well, then pound and install the other half of the box. Connect them together into several bars.
- Next, soil is poured into the boxes, or pre-prepared soil. You can put a small layer of sawdust on top of this. It is better not to add manure or compost to the soil, as their use will force you to change the composition of the first and second mixture.
Common mistakes in the application of the Meathlider bed
Do-it-yourself Meatlider beds: photo
In theory, the arrangement of the beds according to Meatlider is not at all a complicated procedure. Although in practice, then gardeners often make various mistakes, which, in principle, can be corrected, or even avoided altogether. It should be noted that most gardeners, who are not experienced enough, stubbornly think that the main thing in this method is the arrangement of the narrow beds themselves. And further procedures for watering and fertilizing with fertilizers can be overlooked or changed.
And this is a big mistake of these gardeners. These changes from technology can lead to the fact that a drop in yield and efficiency will begin, as well as completely unfounded criticism of this method in the future.
We will analyze the most common and important mistakes made by gardeners so that you cannot make them.
- Neglecting the alignment of the site... Often, gardeners believe that the requirement for leveling the site is too high and unnecessary. Therefore, this rule is neglected. As a result, the site is on a slope, when watering, water begins to flow in one direction and during this washing off fertilizers after itself.As a result, some plants do not have enough moisture or fertilizer, and at the same time they suffer and become depleted. And other plants got a surplus of moisture and feeding, which, of course, is also not a favorable condition for growing. There is a way to level the plot using boxes. And there is also another option, much simpler. This is one of the narrow long beds with several small ones. In this way, a smaller bed is leveled, and it is much easier than leveling a large surface.
- Infrequent watering... It is considered one of the most common mistakes made by gardeners. After the gardener makes the correct beds, he will carry out all the dressing as instructed. It is possible that further he will forget about daily watering, or he will decide that such frequent watering will be superfluous. As a result, not only does the crop receive less moisture, but also the fertilizers applied to the ridge cannot dissolve. This means that nutrients will not reach the roots of the culture. After some time, a thin crust of these fertilizers forms on the ridge, and their concentration grows to such values that are already considered quite harmful to plants. That is why, for the most part, regular watering is required. If you do not have the opportunity to carry out this procedure constantly, then you can build an automatic drip irrigation.
- Changed row spacing... This issue was discussed at the beginning of this article. Often, gardeners who do not fully understand this method think that such a distance is too wide and there is no need to leave it that way. Therefore, they lend it to about 60 centimeters, while saving the area of the site. But this, at first glance, a rather advantageous measure leads to the fact that crop yields are significantly reduced. Since the grown plants cover the sunlight with others, shading is obtained, due to which less fruit is obtained.
- Changed composition of the feeding mixture... Stands next for common mistakes after watering. The reason for this error can be both the usual laziness and the difficulty in obtaining the necessary components, especially for the second mixture. Therefore, gardeners often refuse this or that component, considering it not a serious fact. But, as a result, after a while the culture begins to lack this component. As a result, the assimilation of other compounds is impaired from this. There is not only a decrease in the amount of harvest, but also the taste of vegetables does not change for the better.
- Incorrect feeding... It is also considered a very common mistake, especially for beginners, who sprinkle top dressing unevenly along the ridge. And as a result, a deficiency of nutrients is formed in one place, and an overabundance in another place, which is also considered harmful. Therefore, it is very important to apply fertilizers correctly and on time, and to take this process seriously enough.
Conclusion
This article provides only general and introductory information about the construction of beds along the Mitlider and how to make such beds with your own hands. The inventor of this method has written several books detailing this method. Therefore, for more detailed knowledge, we advise you to refer to these sources. And a good harvest.


