Dracaena and its varieties
Content:
Dracaena is beautiful and unpretentious, thanks to these two qualities, it has become a very popular indoor plant, which is kept not only at home, but also actively used for landscaping and decorating public spaces. Thanks to the variety of species, everyone can choose a plant to their liking: small palms look great in apartments, creating coziness, and large specimens decorate offices with their exotic look. Dracaena are versatile, they look spectacular alone, but on the other hand, they fit perfectly into the groats of a variety of indoor plants. In this article, we will talk about the most popular types of dracaena and how to care for them, how to reproduce and how to cope with emerging problems.
Dracaena varieties
Among the dracaena, you can find both tree-like forms and shrubs, as well as semi-shrubs. Dracaena is the most popular among flower growers.
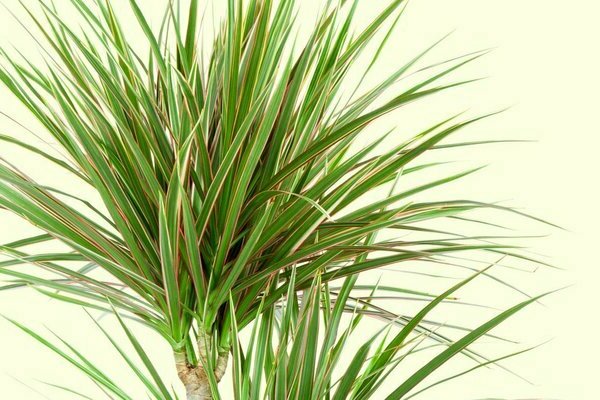
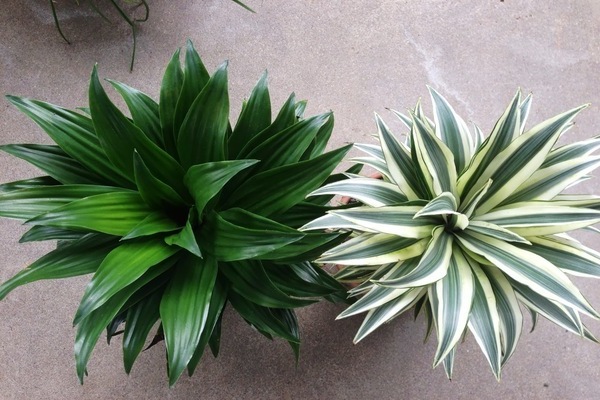
- Bordered. This is the most unpretentious type of dracaena, one of the most decorative, and therefore the most popular. You can buy bordered dracaena in almost every flower shop. In nature, this plant can grow more than three meters, but in indoor conditions its size is much more modest. This dracaena has a central trunk and long, narrow leaves of a dark green color with a dark red border around the edges.
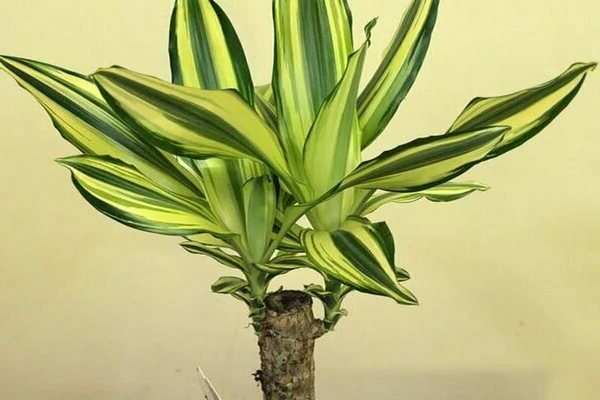
-Spiritual. This is the largest dracaena, in natural conditions it grows up to six meters, even at home, in a fairly spacious room with high ceilings such a plant can grow up to two meters. The leaves of Fragrant Dracaena are wide and long, and it also blooms with white flowers, the aroma of which resembles the smell of freshly cut grass.
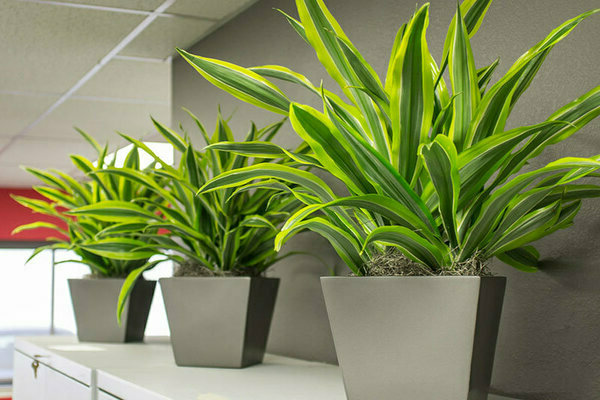
-Dermskaya. This tree with dark green leaves is native to the subtropics. The leaves of the plant, on which dust accumulates very quickly, are a problem, so they must be wiped almost daily.
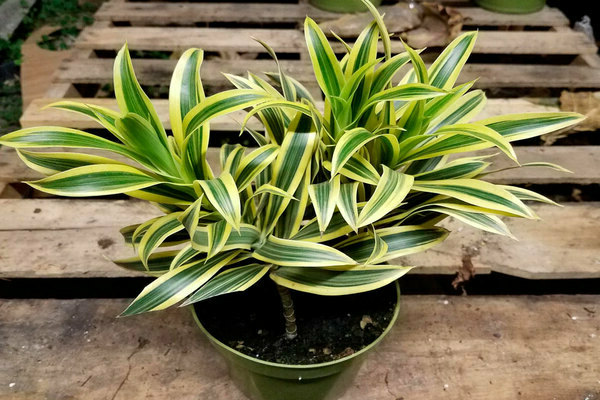
-Bended. A plant with bright green foliage drooping down. It is considered a tree, although outwardly it looks more like a bush. In indoor conditions, you can very rarely see the flowering of the Bent Dracaena.
Another popular species is the Godsef dracaena, a dracaena shrub that is almost impossible to recognize. This species is popular for its dark green leaves with contrasting white spots.
Dracaena care
Despite the fact that warm countries are the homeland of dracaena, it prefers a rather moderate temperature, not exceeding + 25 degrees in summer and not lower than = 15 degrees in winter. In summer, the plant can be taken out onto the balcony, but it is worth protecting it from direct sunlight. When choosing a place for a dracaena in a room, make sure that the plant will be protected from drafts.
Any dracaena needs spraying, regardless of the variety and what time of year it is outside the window. In particularly hot weather, you can spray the plants twice, in the morning and in the evening. In addition, you must regularly wipe the foliage with a damp sponge or cloth to remove dust, sometimes you can arrange a warm shower for the plant. If possible, place your dracaena next to an aquarium, indoor fountain or air humidifier, so it will feel most comfortable, and the leaves will not turn yellow and dry.
If we talk about lighting, then we need to build on the dracaena variety. Plants with dark green foliage will feel comfortable in partial shade, while plants with striped or spotted leaves will lose their decorative color without enough light.Also keep in mind that in partial shade dracaena will grow noticeably slower than with enough light. Well, the undoubted advantage of these plants is that they also feel comfortable under artificial lighting, so they are often purchased for landscaping offices and halls.
Water for watering dracaena must be defended for several days, the plant must be watered after the top 2-3 cm of the soil is completely dry. All types of dracaena are moisture-loving, and in the hot summer period they should be watered almost every day. But it is important to ensure that the water does not stagnate, as this can lead to decay of the roots. In winter, when most of the plants are resting and active growth stops, watering should be reduced, but the plant should not be stopped at the same time.
From spring to the end of summer, dracaena must be fertilized 1-2 times a month, using a complex fertilizer for decorative deciduous plants. With the onset of the dormant period, one feeding every one and a half to two months will be enough.
Diseases and harmful insects
Among the parasites, the main enemies of the dracaena are spider mites, thrips and scale insects. If you find the first signs of pests, use insecticidal preparations that can be used in an apartment. Observe the recommended dosage and all precautions.
In addition to the invasion of pests, changes may occur with the plant, which are evidence of any discomfort.
If the leaves of the dracaena become covered with brown spots and dry out, then this is most likely due to the low level of humidity in the room and insufficient watering. This situation is easy to fix and soon the dracaena will look healthy again.
Sometimes spots on the leaves appear due to sunburn, this happens if the dracaena is standing on the windowsill in the daytime, when the sun's rays are especially aggressive. This problem can also be solved quite simply - move the plant to a more suitable place.
If the lower leaves of the dracaena dry and fall off, then you should not worry, as this is part of a natural process. But if the upper leaves dry up, then the problem is again in insufficient air humidity and you should spray the plant more often.
Dracaena reproduction
Bordered dracaena is beautiful as long as its height is 30-70 cm. With a higher growth, the tree loses its former decorative effect, and in order not to acquire a new plant, you can rejuvenate the existing one by rooting its cuttings. This should be done during the period of active growth, in the first half or mid-spring, then it will be possible to achieve the best results.
Rooting apical cuttings is an easier and more common method. It is necessary to cut off a stalk about fifteen centimeters in size, using a very sharp and pre-disinfected tool. Then you can act in different ways.
The easiest way is to put the cutting in water and wait for it to root. The water should not be cold, at the slightest turbidity it should be changed (this should be done on average every three days). You can add one tablet of activated carbon to the water, which will maintain the freshness of the water, or the preparation "Zircon", which stimulates growth and promotes rooting.
You can also root the cuttings in the soil (a special soil for palms or succulents and cacti is suitable). Lower the cuttings with the growth stimulator ("Zircon", "Epin") and then deepen into the soil a few centimeters. Cover it with a jar or bag on top, thus creating a greenhouse. Be very careful about moistening the soil - do not allow it to dry out or waterlogged, both will lead to the death of the cutting.Raise the shelter daily and spray the cutting leaves, every 6-7 days when spraying, add complex fertilizer for palms to the water, since in the absence of roots, the plant receives nutrition from the foliage.
If, for some reason, the top of your palm tree wilted, then there is a chance to get a new plant by rooting stem cuttings. You will need a healthy section of the trunk that is about two centimeters thick and 5 to 10 centimeters long. The soil for rooting is the same as when rooting the apical cuttings. Then you can act in two ways, rooting the cuttings vertically or horizontally.
With vertical rooting, they act in the same way as when rooting the top, only the surface of the soil is sprinkled with a thick layer of sand so that the emerging roots of the palm tree are first in the sand, and then they have sprouted into the soil.
With horizontal rooting, the cuttings are placed on moist soil and pressed into it a little, a transparent shelter is installed on top, moistened and aired as needed.
When rooting the apical cuttings, only roots appear, and shoots also sprout from the stem cuttings. On average, rooting takes from one to one and a half months, it takes at least two months for the shoots to germinate, so you should be patient and not try to dig out the soil to check for roots. As soon as young leaves appear, we can assume that rooting has taken place. If this did not happen for two months, then you did something wrong and the procedure should be repeated from the very beginning using fresh cuttings.

